How to Enable/Disable the Answerphone on Blackview P10000 Pro
The answerphone allows you to transmit information to a person without your own participation. This is convenient when you are busy at work or driving a car. People are used to voice answerphones, but now they are not available due to security issues. Options for SMS and messengers are available on Blackview P10000 Pro.
How to enable SMS answerphone on Blackview P10000 Pro
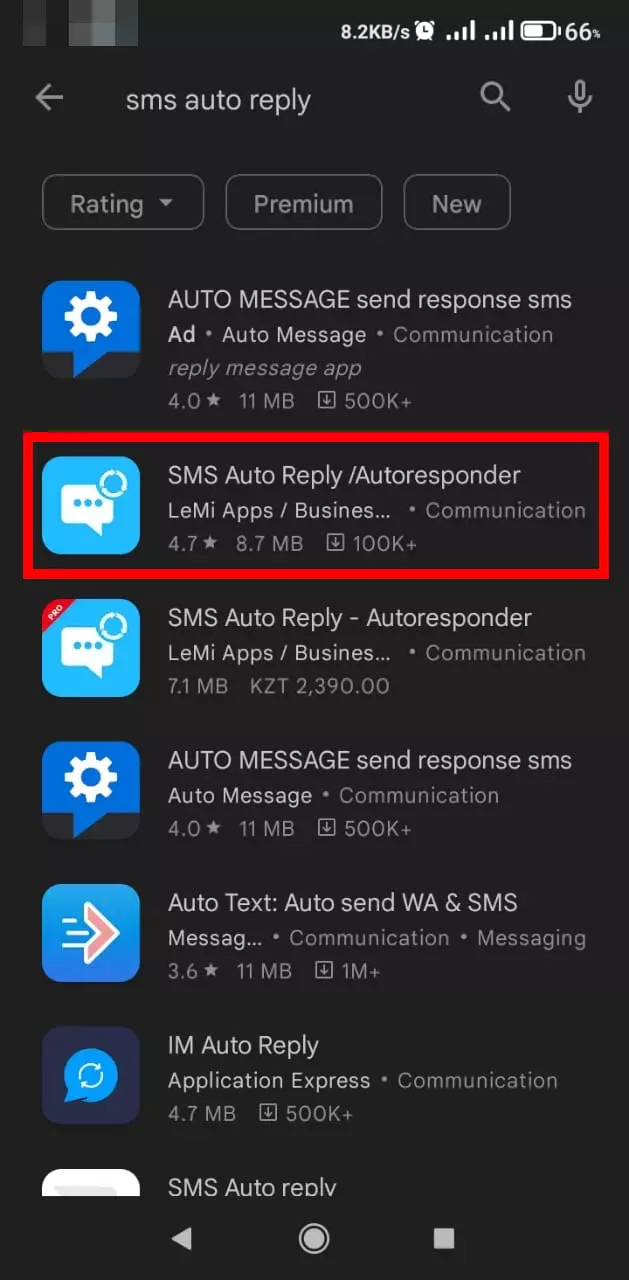
Download the android app of the same name from Google Play, open it.
Actions next:
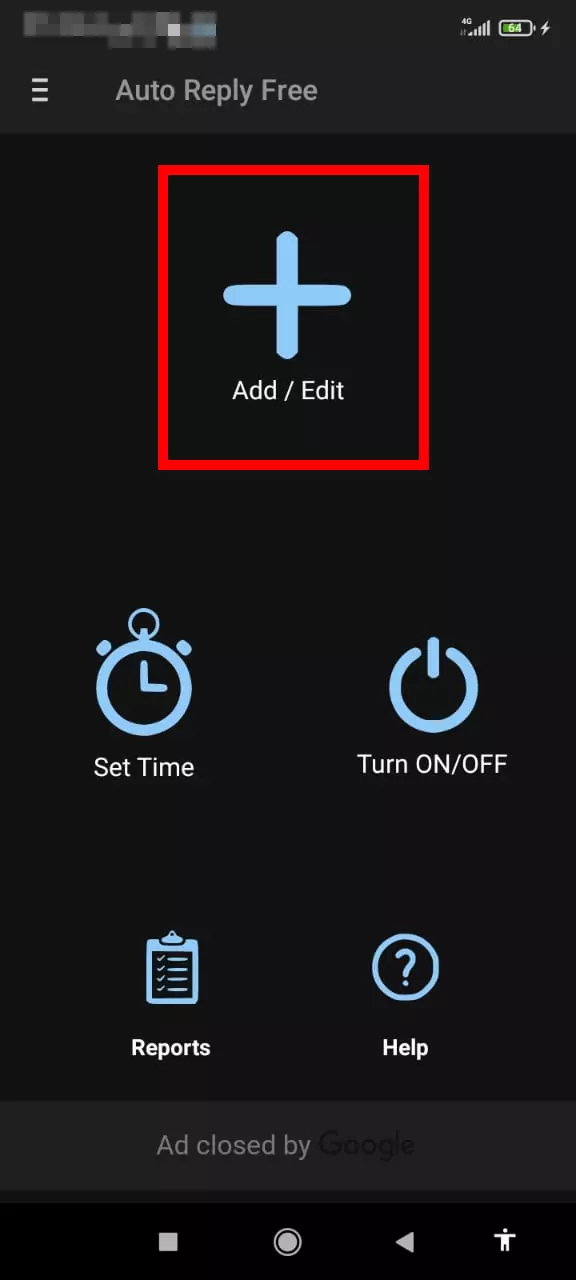
- Click the big plus, signed «Create».
- Give a name to the profile (at will).
- Mark the communication channels that will be used to send the response (the free version only allows SMS).
- Through the personal list, select the contacts to whom you want to send a unique message. To add subscribers, click the pencil next to the list.
- Add to the blacklist those who do not need to answer at all.
- Set the time period, date, days of the week when the answerphone is active.
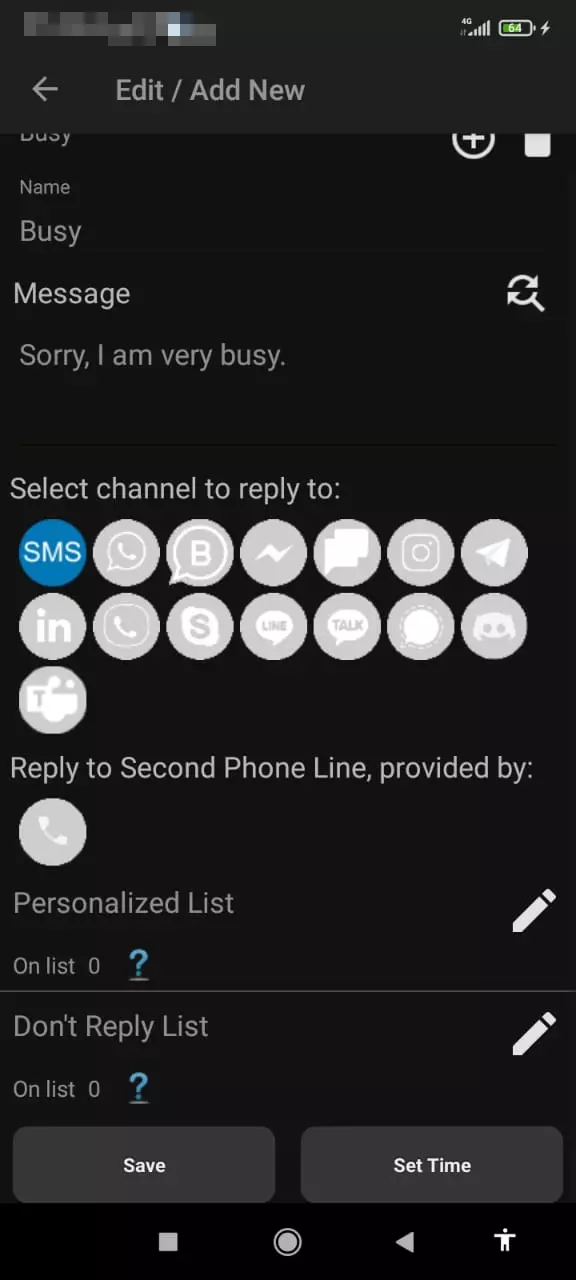
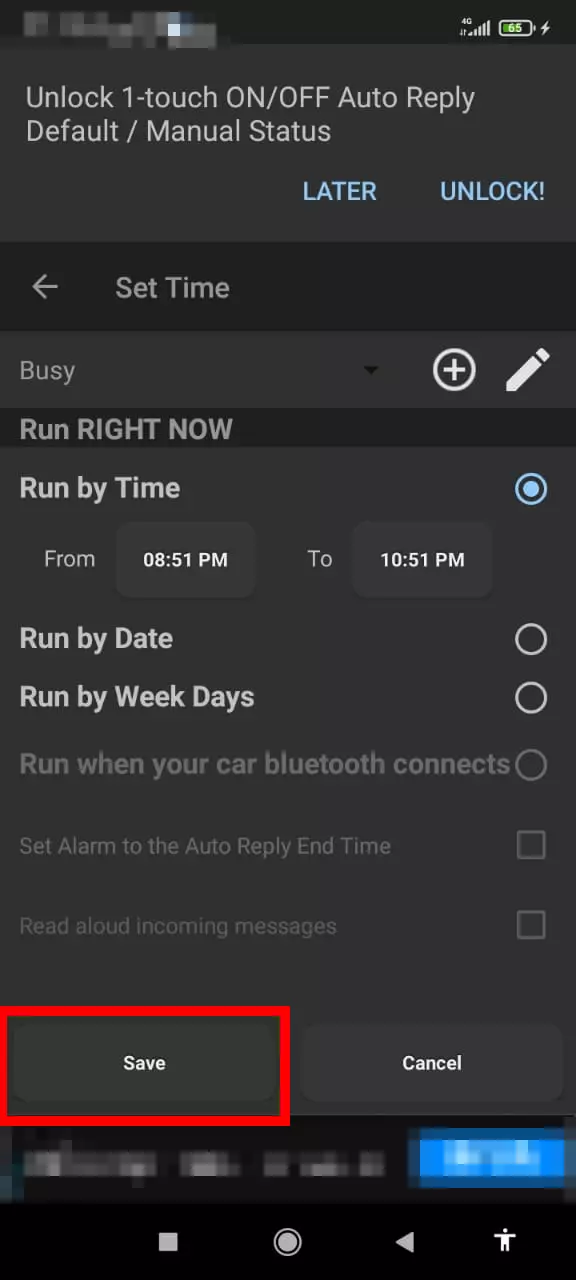
- Click «Save».
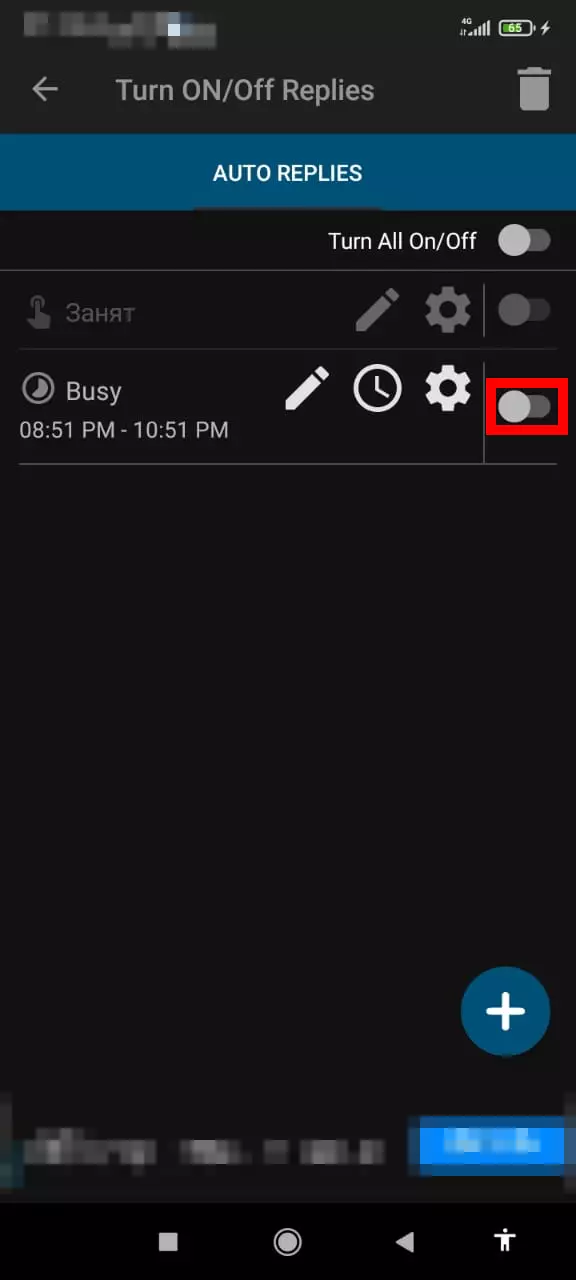
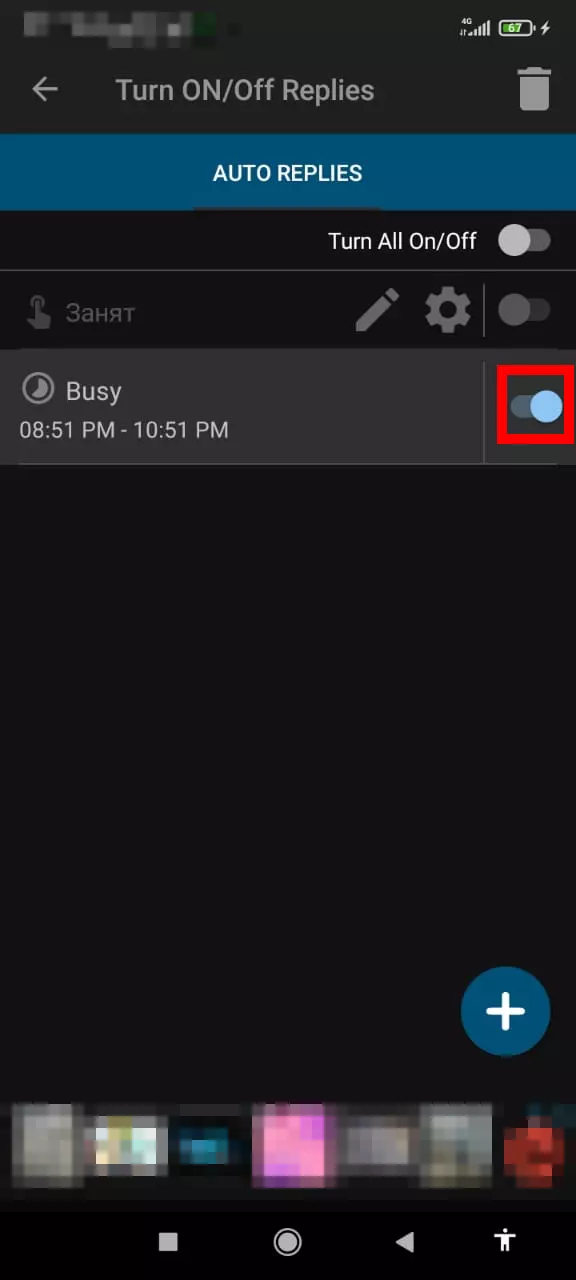
- You will be immediately redirected to the «Profile list», where you need to move the slider to the right position. Just above, you can delete the profile or enable everything.
How to disable SMS answerphone on Blackview P10000 Pro
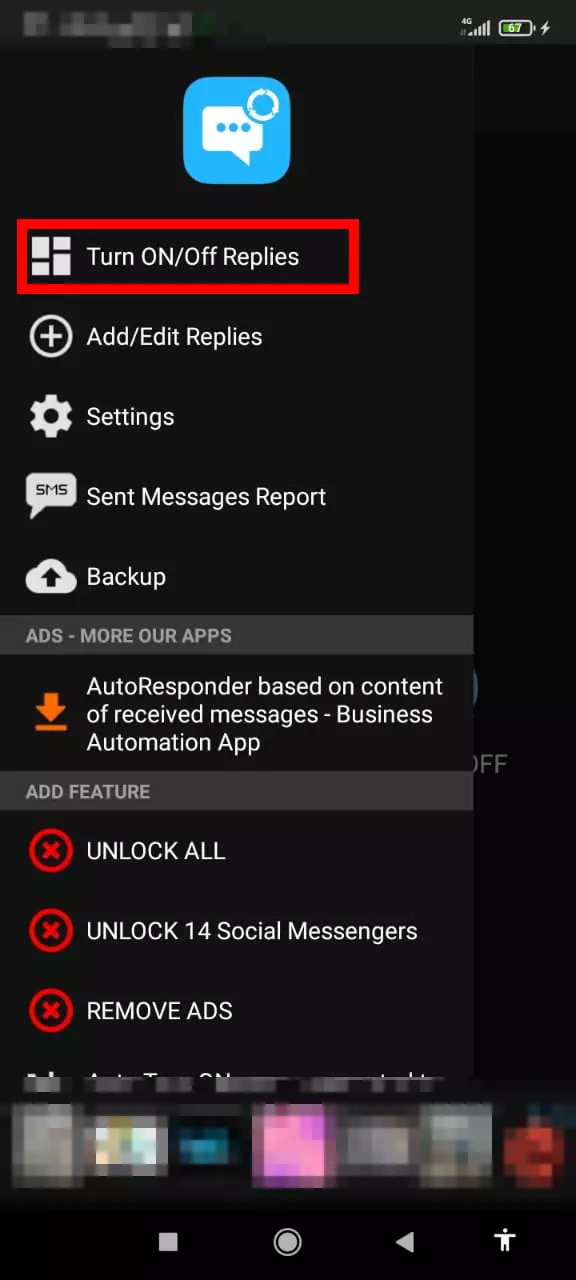
- Open the application, press the three bars.
- Click on «Profile list».
- Deactivate the slider:
- near the profile - disable only his;
- top right - disable all.
How to enable the answerphone for messengers
- Download from Google Play the program «IM Auto Replay».
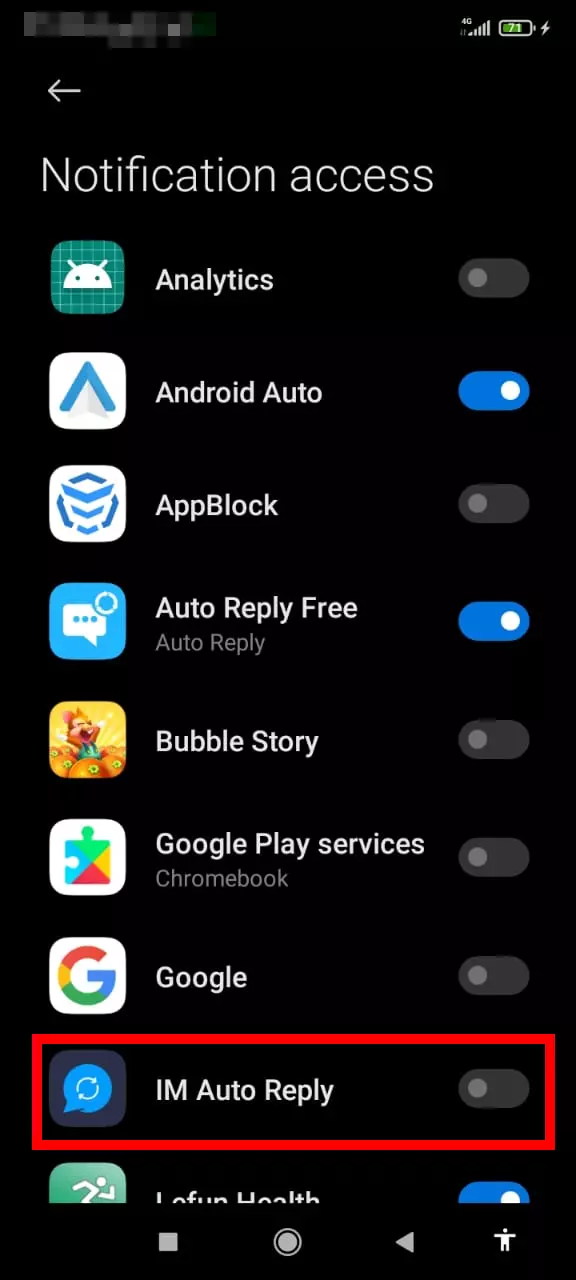
- Opening the program. You will be asked to enable permission to read notifications. Click «ОК». The list will pop up, select the application. A threat message will appear – we wait 10 seconds, confirm.

- We do the same with the permission of «Automatic startup» and «work in the background». The application will redirect itself to where it is needed.
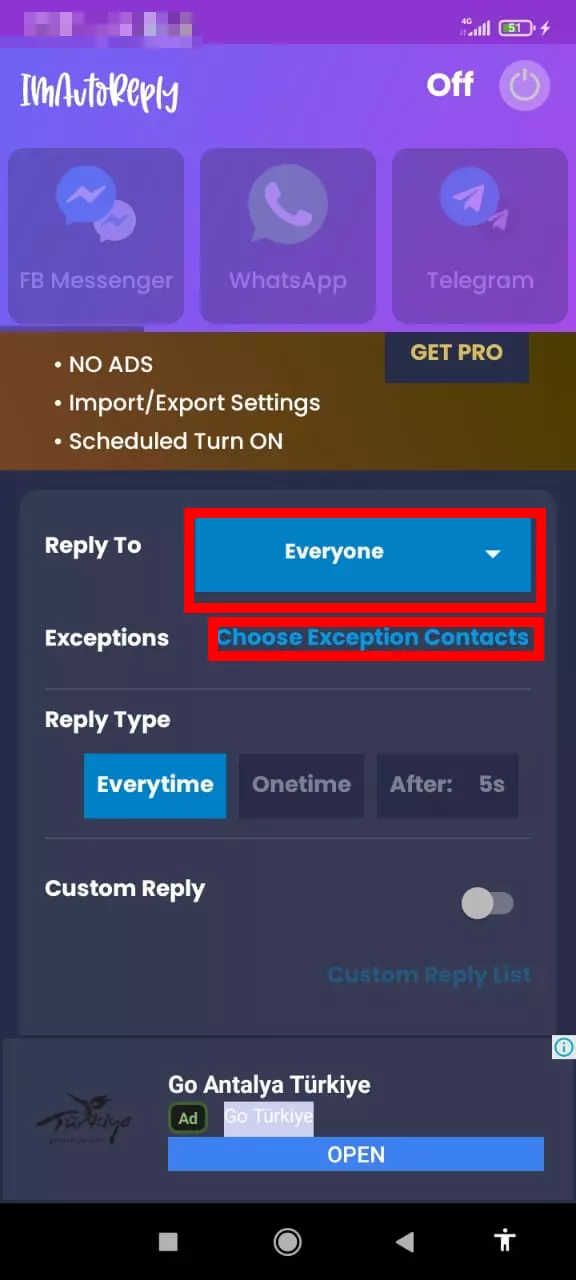
- By clicking the field to the right Reply To, select to whom you want to send the response:
- Everyone – all incoming. You can add exceptions below. Open the «Choose Exceptions List»:
- click plus;

- click the contact icon to the right of the field;

- give access to contacts;
- selecting.
- Specific Contacts – certain contacts. We select them below via «Choose Specific Contacts». The process is similar to adding exceptions from the previous paragraph.
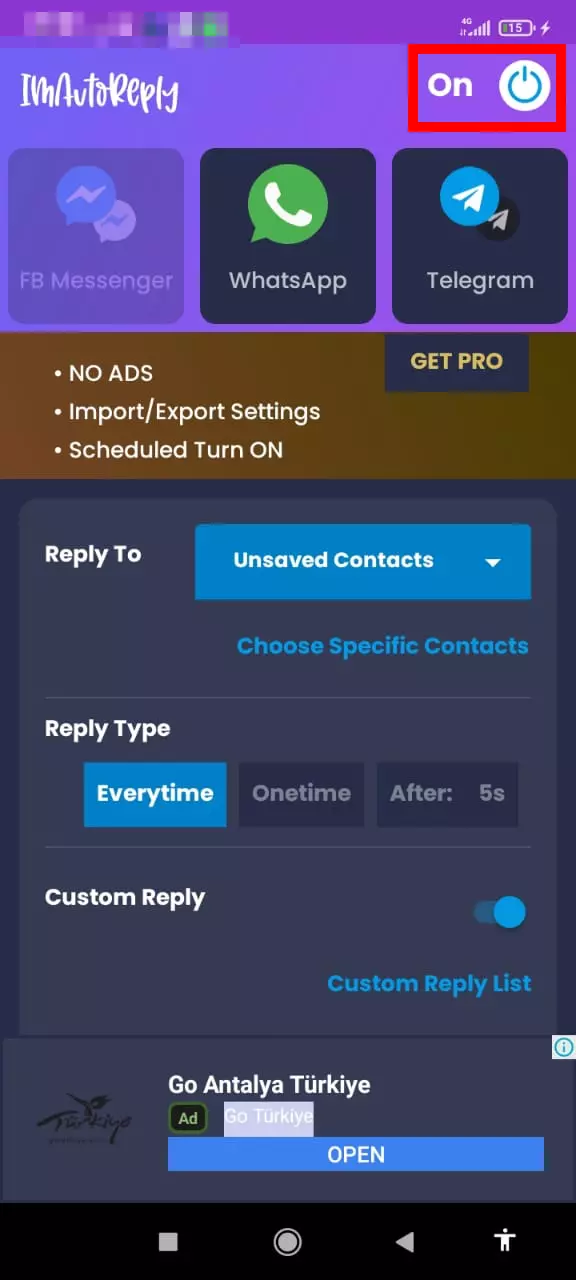
- Unsaved Contacts – to all non-subscribed users.
- Select how you want to send the response by clicking «Reply Type»:
- Everytime – to each message;
- Onetime – only one;
- After: 5s – in five seconds, if you didn't have time to answer yourself. The time is adjustable.

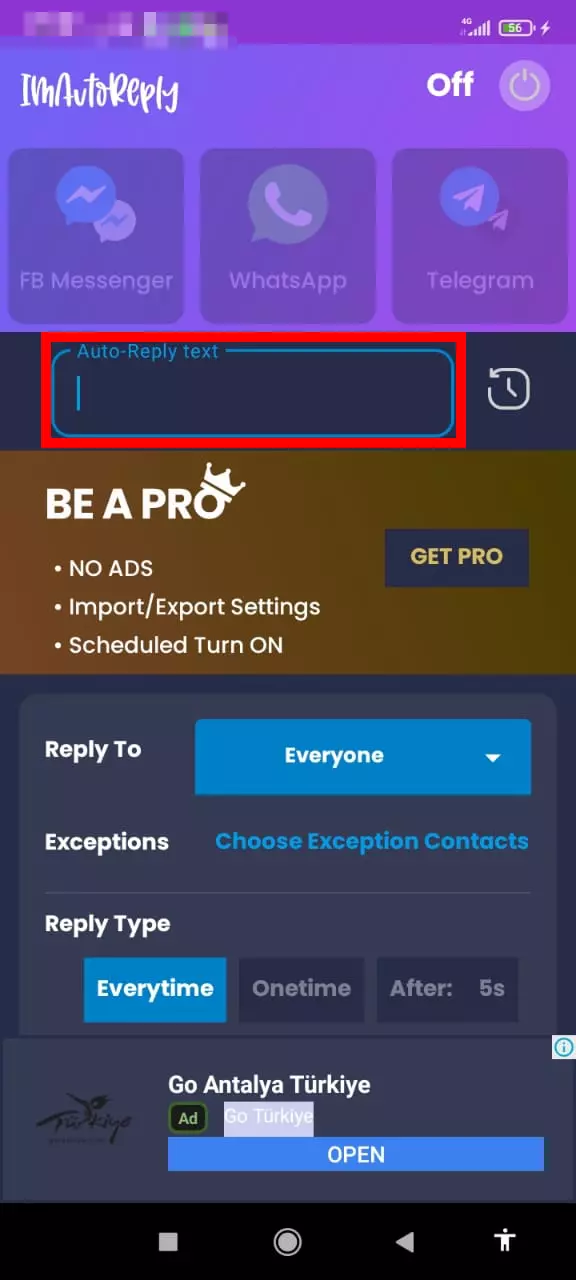
- Enter the response message in the field above.
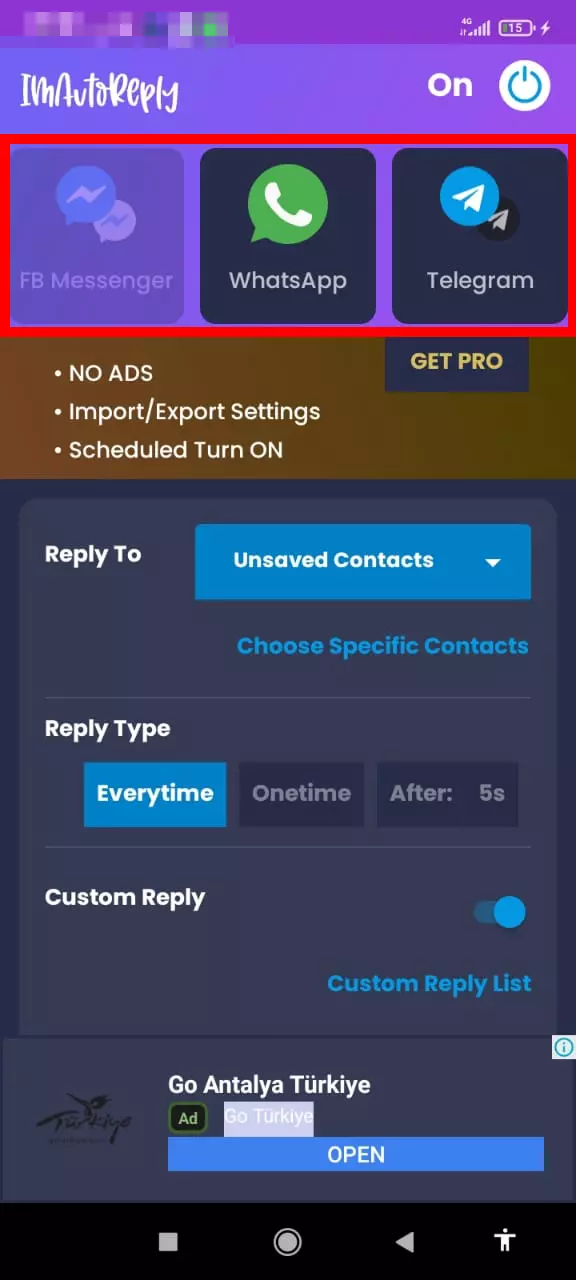
- Select messengers from the top. Now available:
- FB messenger;
- WhatsApp;
- Telegram.
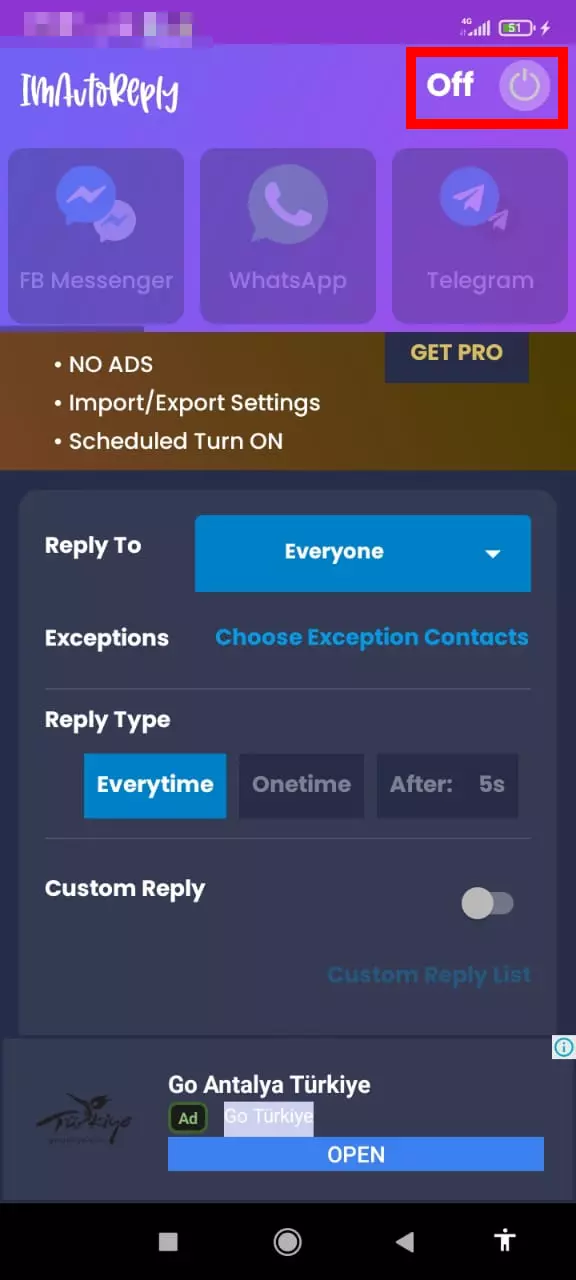
- Press the start button (upper right corner).
How to disable the answerphone for messengers
- Open the app.
- Click the launch button on the top right.
See also:
How to flash Blackview P10000 Pro
How to root Blackview P10000 Pro
Hard reset for Blackview P10000 Pro
How to reboot Blackview P10000 Pro
How to unlock Blackview P10000 Pro
What to do if Blackview P10000 Pro won't turn on
What to do if Blackview P10000 Pro doesn't charge
What to do if Blackview P10000 Pro doesn't connect to PC via USB
How to take a screenshot on Blackview P10000 Pro
How to reset FRP on Blackview P10000 Pro
How to call recording on Blackview P10000 Pro
How to update Blackview P10000 Pro
How to connect Blackview P10000 Pro to TV
How to clear the cache on Blackview P10000 Pro
How to backup Blackview P10000 Pro
How to disable ads on Blackview P10000 Pro
How to clear storage on Blackview P10000 Pro
How to increase font on Blackview P10000 Pro
How to share internet on Blackview P10000 Pro
How to transfer data to Blackview P10000 Pro
How to unlock bootloader on Blackview P10000 Pro
How to recover photos on Blackview P10000 Pro
How to record the screen on Blackview P10000 Pro
How to find blacklist in Blackview P10000 Pro
How to set up fingerprint on Blackview P10000 Pro
How to block number on Blackview P10000 Pro
How to enable auto-rotate on Blackview P10000 Pro
How to set up or turn off an alarm on Blackview P10000 Pro
How to change ringtone on Blackview P10000 Pro
How to enable battery percentage on Blackview P10000 Pro
How to turn off notifications on Blackview P10000 Pro
How to turn off Google assistant on Blackview P10000 Pro
How to turn off the lock screen on Blackview P10000 Pro
How to delete app on Blackview P10000 Pro
How to recover contacts on Blackview P10000 Pro
Where is the recycle bin on Blackview P10000 Pro
How to install WhatsApp on Blackview P10000 Pro
How to set contact photo in Blackview P10000 Pro
How to scan QR code on Blackview P10000 Pro
How to connect Blackview P10000 Pro to computer
How to install SD card in Blackview P10000 Pro
How to update Play Store in Blackview P10000 Pro
How to install Google Camera in Blackview P10000 Pro
How to enable USB debugging on Blackview P10000 Pro
How to turn off Blackview P10000 Pro
How to charge Blackview P10000 Pro
How to use the camera on Blackview P10000 Pro
How to find lost Blackview P10000 Pro
How to set password on Blackview P10000 Pro
How to turn on 5g on Blackview P10000 Pro
How to turn on VPN on Blackview P10000 Pro
How to install apps on Blackview P10000 Pro
How to insert a SIM card in Blackview P10000 Pro
How to enable and configure NFC on Blackview P10000 Pro
How to set time on Blackview P10000 Pro
How to connect headphones to Blackview P10000 Pro
How to clear browser history on Blackview P10000 Pro
How to disassemble Blackview P10000 Pro
How to hide an app on Blackview P10000 Pro
How to download YouTube videos on Blackview P10000 Pro
How to unblock a contact on Blackview P10000 Pro
How to turn on the flashlight on Blackview P10000 Pro
How to split the screen on Blackview P10000 Pro
How to turn off the camera sound on Blackview P10000 Pro
How to trim video on Blackview P10000 Pro
How to bypass the Google account on Blackview P10000 Pro
How to fix black screen on Blackview P10000 Pro
How to change the language on Blackview P10000 Pro
How to open engineering mode in Blackview P10000 Pro
How to open recovery mode in Blackview P10000 Pro
How to find and turn on a voice recorder on Blackview P10000 Pro
How to make video calls on Blackview P10000 Pro
Blackview P10000 Pro sim card not detected
How to transfer contacts to Blackview P10000 Pro
How to enable/disable «Do not disturb» mode on Blackview P10000 Pro
How to set up face recognition on Blackview P10000 Pro
How to set up voicemail on Blackview P10000 Pro
How to listen to voicemail on Blackview P10000 Pro
How to check the IMEI number in Blackview P10000 Pro
How to turn on fast charging on Blackview P10000 Pro
How to replace the battery on Blackview P10000 Pro
How to update the application on Blackview P10000 Pro
Why the Blackview P10000 Pro discharges quickly
How to set a password for apps in the Blackview P10000 Pro
How to format Blackview P10000 Pro
How to install TWRP on Blackview P10000 Pro
How to set up call forwarding on Blackview P10000 Pro
How to empty the recycle bin on Blackview P10000 Pro
Where to find the clipboard on Blackview P10000 Pro
How to Enable/Disable the Answerphone on Another Phones
