How to Set Up Call Forwarding on ZTE Geek 2
Redirecting or forwarding calls — this function can automatically redirect a phone call from one number to another. To make it clear, let's give a simple example. You've registered a new phone number, but you know you can still receive calls to the old one. To ensure that none of these calls are missed, you can configure the redirection of calls to ZTE Geek 2 from your old number to the new one. Now, if someone wants to contact you through a call to the old number, automatic redirection to the new one will occur.
How much does this feature cost
Redirection is not free! Unfortunately, it is not possible to simply enable it in the settings on Android — first, you need to connect it from your operator. We will immediately say that no one will charge you for connecting this service. You will only pay for forwarded calls. The average price tag per minute of such a call is different for each country. We recommend checking this information with the operator since no one wants to receive a large bill at the end of the month.
Enabling redirection
In order to enable call forwarding to ZTE Geek 2, need to do the following:
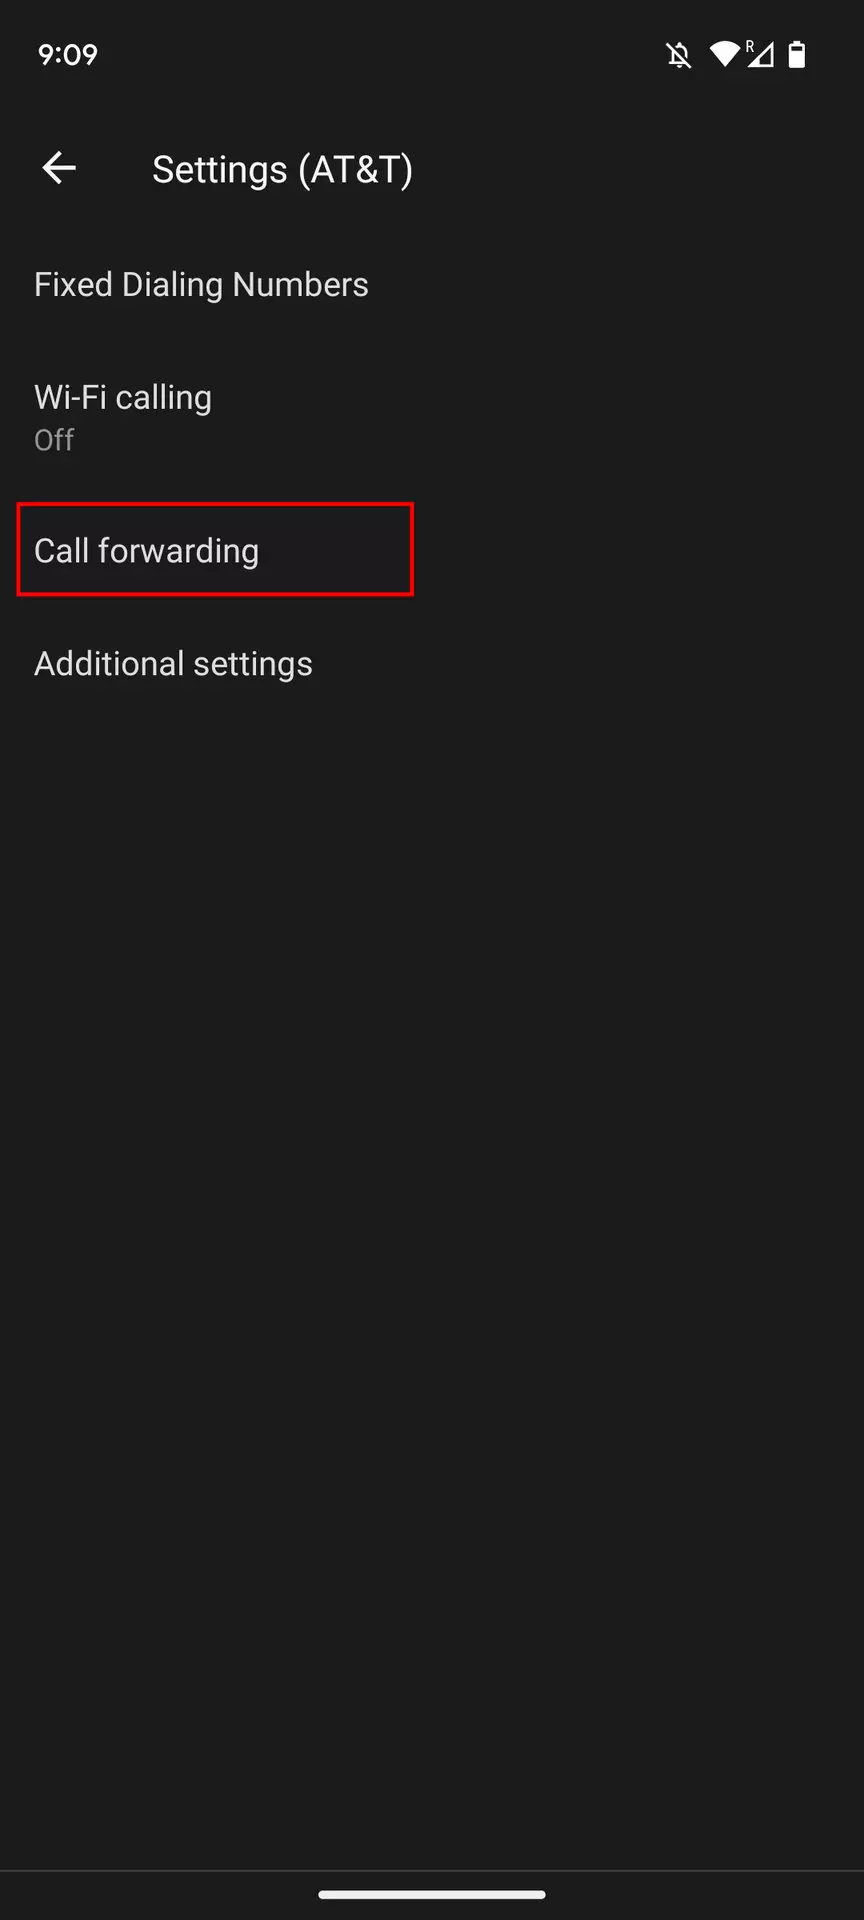
- Go to your smartphone settings.

- Use the search located at the top of the screen to find the submenu «Call forwarding».
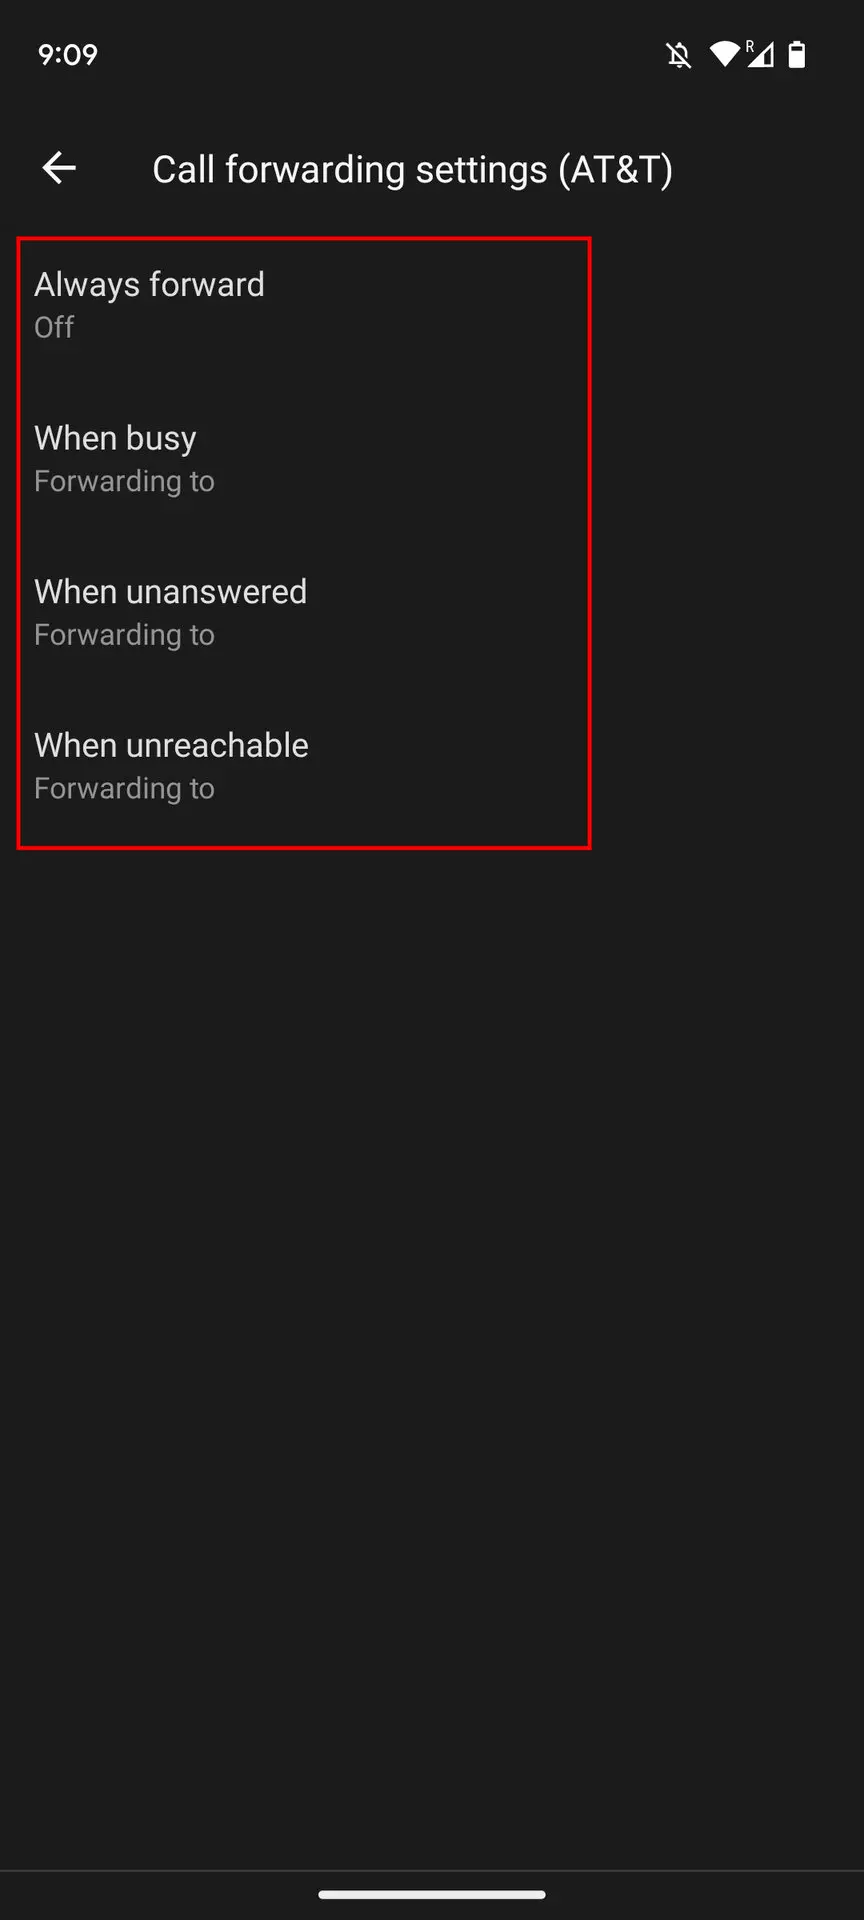
- Here you can see the different forwarding options:
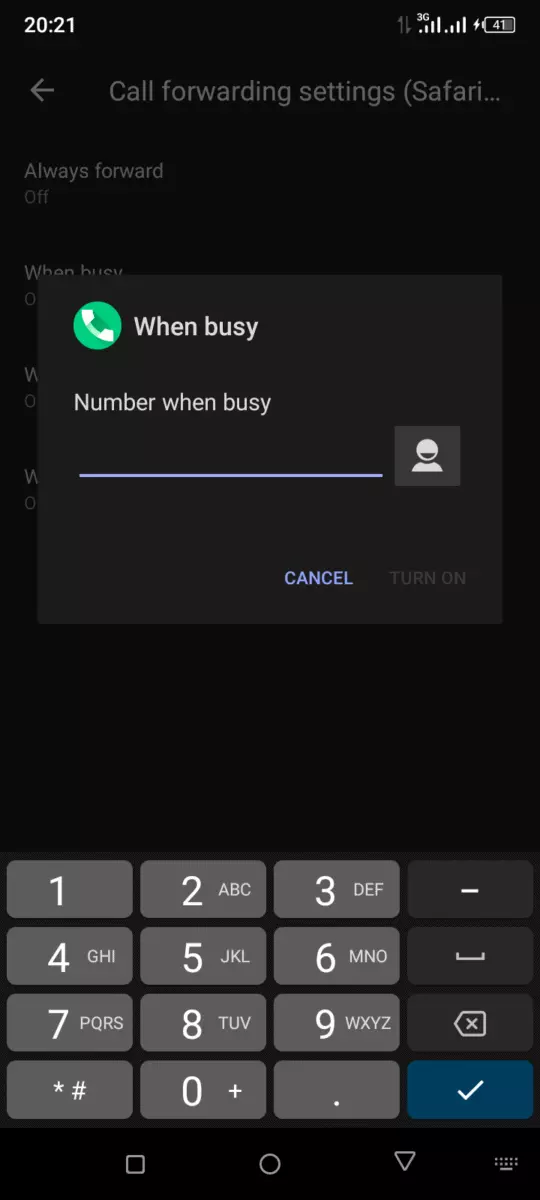
- «Always forward calls» — each call to the SIM card installed in your device will be sent to a different number.
- «If the phone number is busy» — redirection will only work if you are already talking to someone.
- «If there is no answer» — forwarding will only work if you were unable to answer the call.
- «If the number is unavailable» — redirection will only occur if the SIM card is not working (for example, you are out of the area of telephone towers).
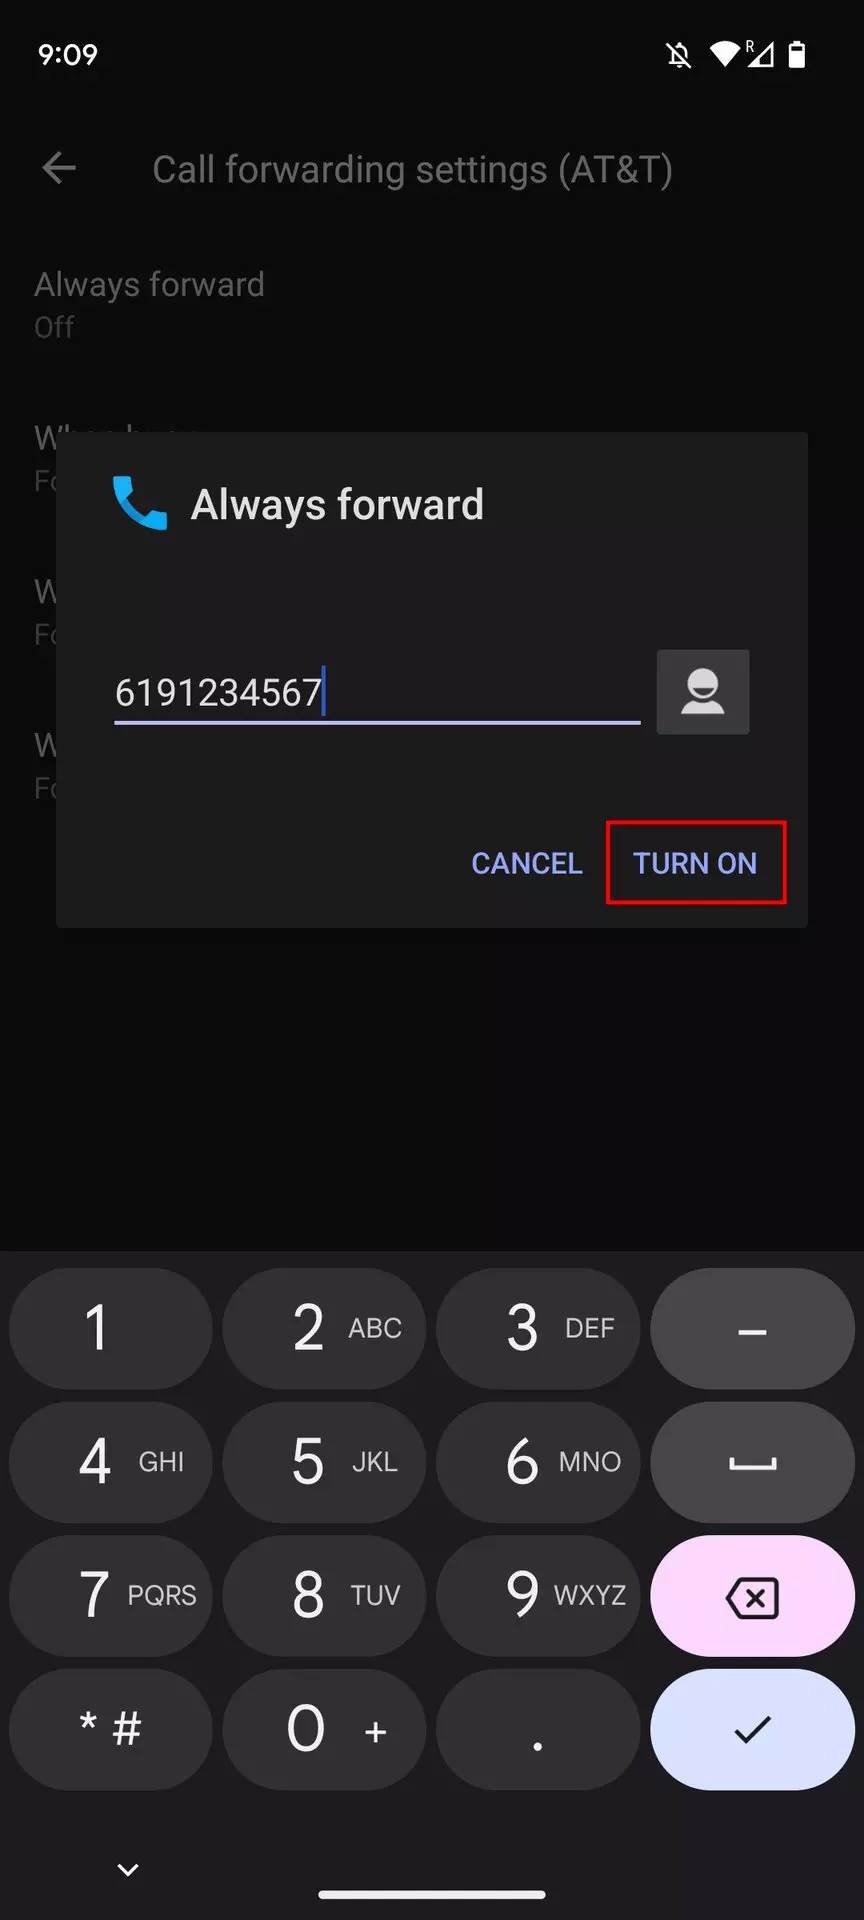
- Select the desired option, enter the phone number to which calls will be forwarded in the window that opens, and click «Switch on».
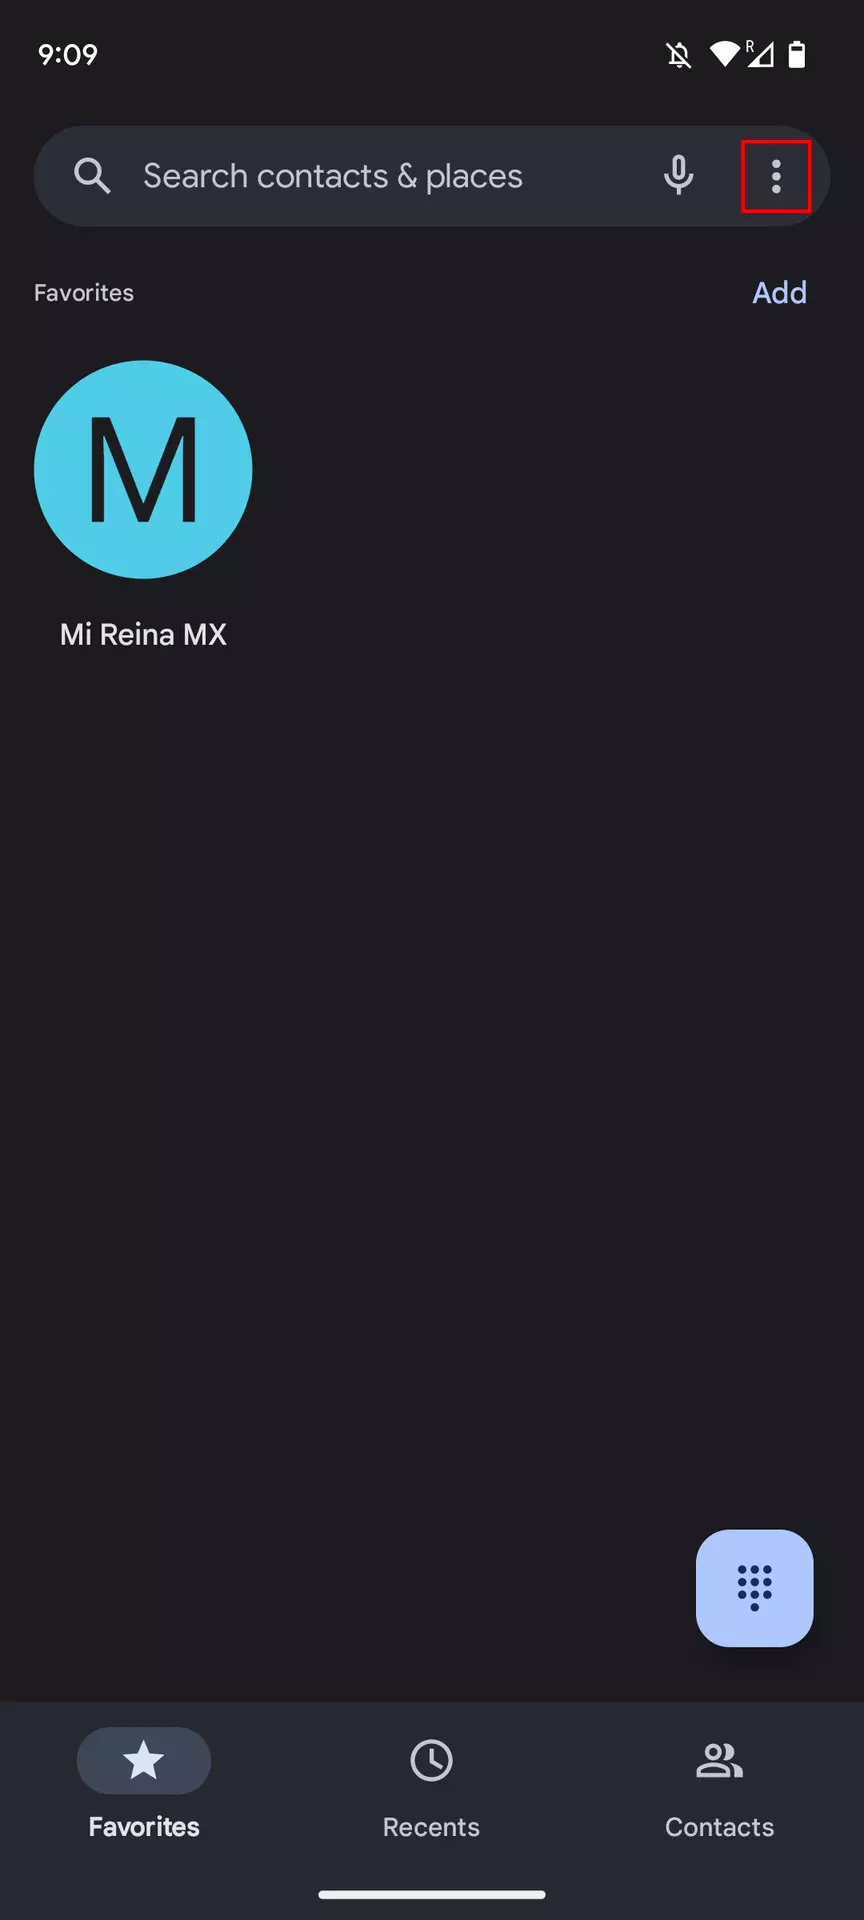
If you use the «Calls» app from Google:
- Go to the application.
- Click on the three dots to enter the settings.
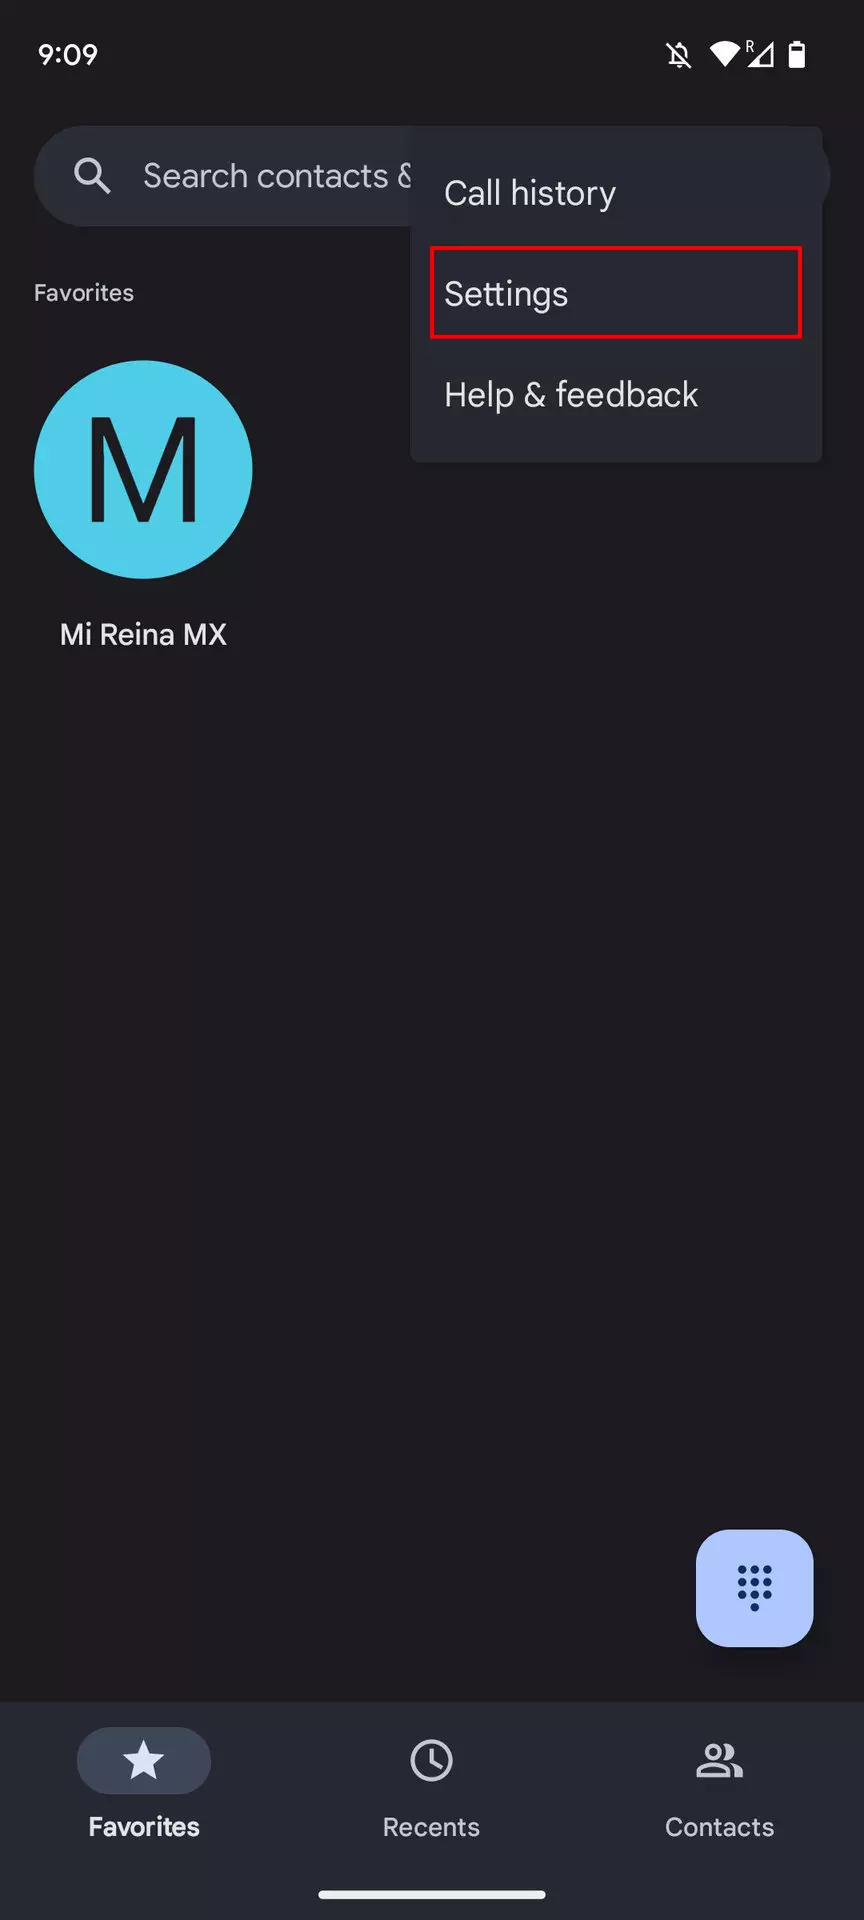
- Go to «Accounts for calls» — «Call forwarding».

- There will also be options described in the previous algorithm. Select the optimal one for you again, enter the phone number, and press «Switch on».
Note that call redirection does not redirect SMS. This is another function, for which, accordingly, you need to pay separately.
Share this page with your friends:See also:
How to flash ZTE Geek 2
How to root ZTE Geek 2
Hard reset for ZTE Geek 2
How to reboot ZTE Geek 2
How to unlock ZTE Geek 2
What to do if ZTE Geek 2 won't turn on
What to do if ZTE Geek 2 doesn't charge
What to do if ZTE Geek 2 doesn't connect to PC via USB
How to take a screenshot on ZTE Geek 2
How to reset FRP on ZTE Geek 2
How to call recording on ZTE Geek 2
How to update ZTE Geek 2
How to connect ZTE Geek 2 to TV
How to clear the cache on ZTE Geek 2
How to backup ZTE Geek 2
How to disable ads on ZTE Geek 2
How to clear storage on ZTE Geek 2
How to increase font on ZTE Geek 2
How to share internet on ZTE Geek 2
How to transfer data to ZTE Geek 2
How to unlock bootloader on ZTE Geek 2
How to recover photos on ZTE Geek 2
How to record the screen on ZTE Geek 2
How to find blacklist in ZTE Geek 2
How to set up fingerprint on ZTE Geek 2
How to block number on ZTE Geek 2
How to enable auto-rotate on ZTE Geek 2
How to set up or turn off an alarm on ZTE Geek 2
How to change ringtone on ZTE Geek 2
How to enable battery percentage on ZTE Geek 2
How to turn off notifications on ZTE Geek 2
How to turn off Google assistant on ZTE Geek 2
How to turn off the lock screen on ZTE Geek 2
How to delete app on ZTE Geek 2
How to recover contacts on ZTE Geek 2
Where is the recycle bin on ZTE Geek 2
How to install WhatsApp on ZTE Geek 2
How to set contact photo in ZTE Geek 2
How to scan QR code on ZTE Geek 2
How to connect ZTE Geek 2 to computer
How to install SD card in ZTE Geek 2
How to update Play Store in ZTE Geek 2
How to install Google Camera in ZTE Geek 2
How to enable USB debugging on ZTE Geek 2
How to turn off ZTE Geek 2
How to charge ZTE Geek 2
How to use the camera on ZTE Geek 2
How to find lost ZTE Geek 2
How to set password on ZTE Geek 2
How to turn on 5g on ZTE Geek 2
How to turn on VPN on ZTE Geek 2
How to install apps on ZTE Geek 2
How to insert a SIM card in ZTE Geek 2
How to enable and configure NFC on ZTE Geek 2
How to set time on ZTE Geek 2
How to connect headphones to ZTE Geek 2
How to clear browser history on ZTE Geek 2
How to disassemble ZTE Geek 2
How to hide an app on ZTE Geek 2
How to download YouTube videos on ZTE Geek 2
How to unblock a contact on ZTE Geek 2
How to turn on the flashlight on ZTE Geek 2
How to split the screen on ZTE Geek 2
How to turn off the camera sound on ZTE Geek 2
How to trim video on ZTE Geek 2
How to bypass the Google account on ZTE Geek 2
How to fix black screen on ZTE Geek 2
How to change the language on ZTE Geek 2
How to open engineering mode in ZTE Geek 2
How to open recovery mode in ZTE Geek 2
How to find and turn on a voice recorder on ZTE Geek 2
How to make video calls on ZTE Geek 2
ZTE Geek 2 sim card not detected
How to transfer contacts to ZTE Geek 2
How to enable/disable «Do not disturb» mode on ZTE Geek 2
How to enable/disable answerphone on ZTE Geek 2
How to set up face recognition on ZTE Geek 2
How to set up voicemail on ZTE Geek 2
How to listen to voicemail on ZTE Geek 2
How to check the IMEI number in ZTE Geek 2
How to turn on fast charging on ZTE Geek 2
How to replace the battery on ZTE Geek 2
How to update the application on ZTE Geek 2
Why the ZTE Geek 2 discharges quickly
How to set a password for apps in the ZTE Geek 2
How to format ZTE Geek 2
How to install TWRP on ZTE Geek 2
How to empty the recycle bin on ZTE Geek 2
Where to find the clipboard on ZTE Geek 2
How to Set Up Call Forwarding on Another Phones
