How to Set Contact Photo in BQ BQ-5302G Velvet 2
The settings on smartphones, including BQ BQ-5302G Velvet 2, allow you to visualise many components. And this goes far beyond just changing the desktop background or overall theme. The user can set contact photo in BQ BQ-5302G Velvet 2 so that the caller's face can be seen during an incoming call. There are two ways to implement this feature. You just need to choose the one that seems most convenient.
Through the "Contacts" section
As anyone who owns a BQ BQ-5302G Velvet 2 probably knows, you can manage your call settings, and more specifically your phonebook settings, through the built-in Contacts app. There are a lot of editable options located here. So, if you want the phone to show the caller's face during an incoming call, do the following:
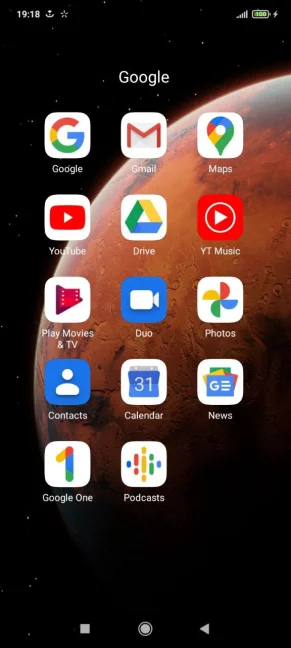
- Start the Contacts application. It is normally located on the home screen. You can also find the utility via the general list of programmes.
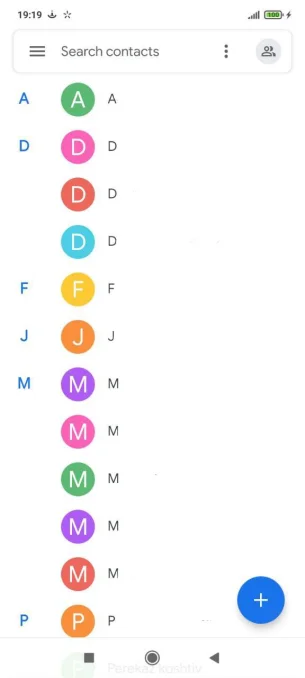
- When you open the app, you will see a list of numbers in your phonebook in front of you. Tap on the caller to whom you want to assign a picture.
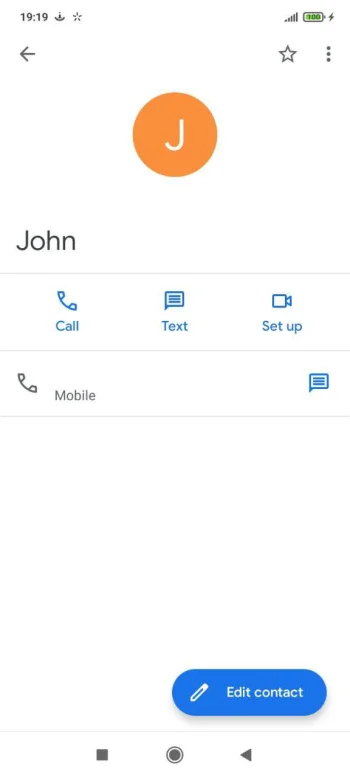
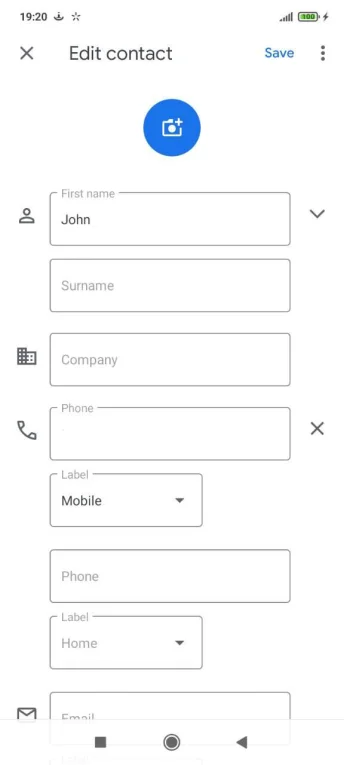
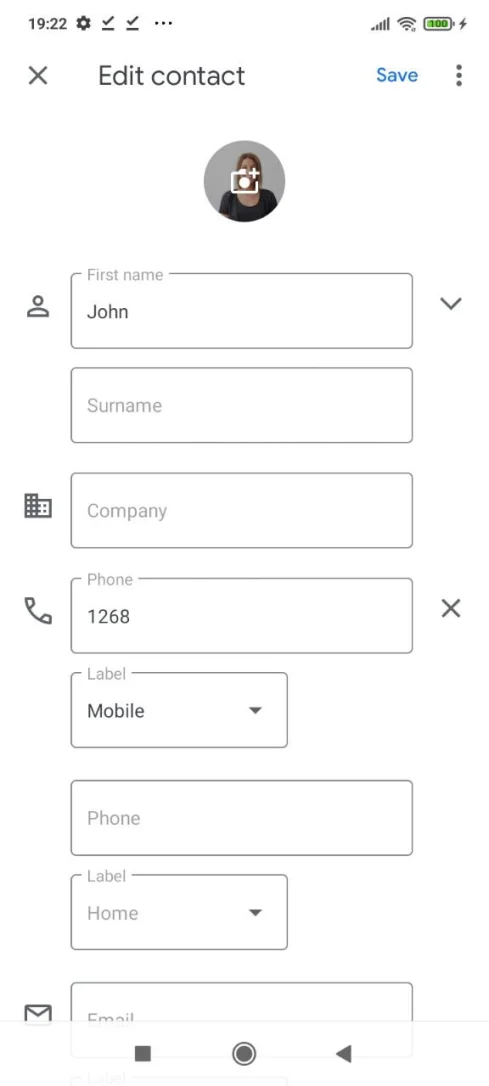
- So you have the caller ID in front of you. If a photo is already installed, it will appear at the top of the screen. If there is no photo, you will see a random Android icon in its place. To modify or add a photo, press the pencil button, which is responsible for editing.
- Below you will see items allowing you to edit the name and other settings of the caller. But we are interested in the picture, so click on the camera icon.
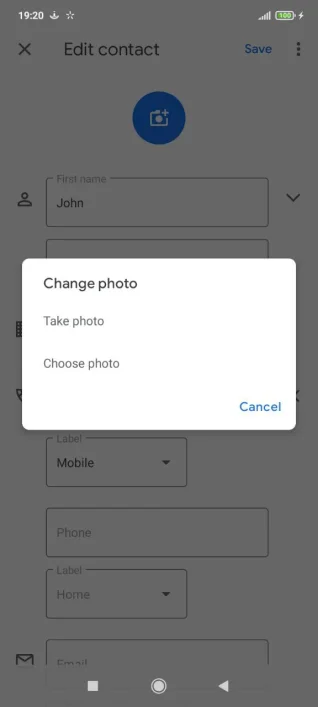
- If there is no photo, BQ BQ-5302G Velvet 2 will prompt you to either take a photo of the person or select a photo from an album. More often than not, phone owners use the second option, so select "Choose photo".
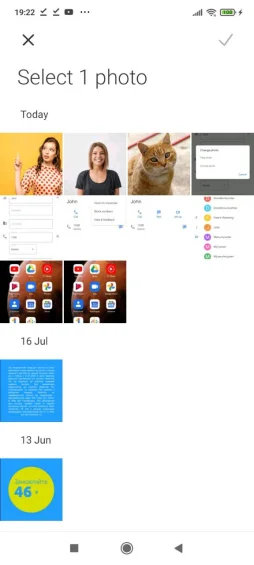
- The "Gallery" will open and you will be prompted to select a suitable picture.
- BQ BQ-5302G Velvet 2 can also offer to edit the picture. If necessary, take advantage of this option and tap on the tick box.
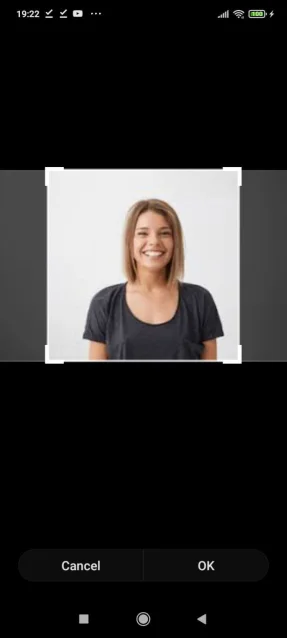
- Back at the page for changing the Caller ID settings, confirm that the new settings have been saved.
So, the photo is selected, and now you will see the face of the conversationalist during the incoming call. Remember that you can install any other image available on your smartphone as a photo.
Installing Contact Photo in BQ BQ-5302G Velvet 2 through the "Gallery" section
The photos on BQ BQ-5302G Velvet 2 are viewed via the standard Gallery app, which is available on most Android smartphones. It is therefore logical to use it to select a contact's photo:
- Launch the "Gallery" in any way you like.
- Find a suitable photo and tap on it.
- On the view page, open the pop-up menu by pressing the three dot button.
- Click on the "Set picture as" button.
- Select "Contact picture" from among the available options.
- Specify to which contact in the list the image should be assigned.
The settings are automatically saved, and from the next call you will see the new caller's photo.
Share this page with your friends:See also:
How to flash BQ BQ-5302G Velvet 2
How to root BQ BQ-5302G Velvet 2
Hard reset for BQ BQ-5302G Velvet 2
How to reboot BQ BQ-5302G Velvet 2
How to unlock BQ BQ-5302G Velvet 2
What to do if BQ BQ-5302G Velvet 2 won't turn on
What to do if BQ BQ-5302G Velvet 2 doesn't charge
What to do if BQ BQ-5302G Velvet 2 doesn't connect to PC via USB
How to take a screenshot on BQ BQ-5302G Velvet 2
How to reset FRP on BQ BQ-5302G Velvet 2
How to call recording on BQ BQ-5302G Velvet 2
How to update BQ BQ-5302G Velvet 2
How to connect BQ BQ-5302G Velvet 2 to TV
How to clear the cache on BQ BQ-5302G Velvet 2
How to backup BQ BQ-5302G Velvet 2
How to disable ads on BQ BQ-5302G Velvet 2
How to clear storage on BQ BQ-5302G Velvet 2
How to increase font on BQ BQ-5302G Velvet 2
How to share internet on BQ BQ-5302G Velvet 2
How to transfer data to BQ BQ-5302G Velvet 2
How to unlock bootloader on BQ BQ-5302G Velvet 2
How to recover photos on BQ BQ-5302G Velvet 2
How to record the screen on BQ BQ-5302G Velvet 2
How to find blacklist in BQ BQ-5302G Velvet 2
How to set up fingerprint on BQ BQ-5302G Velvet 2
How to block number on BQ BQ-5302G Velvet 2
How to enable auto-rotate on BQ BQ-5302G Velvet 2
How to set up or turn off an alarm on BQ BQ-5302G Velvet 2
How to change ringtone on BQ BQ-5302G Velvet 2
How to enable battery percentage on BQ BQ-5302G Velvet 2
How to turn off notifications on BQ BQ-5302G Velvet 2
How to turn off Google assistant on BQ BQ-5302G Velvet 2
How to turn off the lock screen on BQ BQ-5302G Velvet 2
How to delete app on BQ BQ-5302G Velvet 2
How to recover contacts on BQ BQ-5302G Velvet 2
Where is the recycle bin on BQ BQ-5302G Velvet 2
How to install WhatsApp on BQ BQ-5302G Velvet 2
How to scan QR code on BQ BQ-5302G Velvet 2
How to connect BQ BQ-5302G Velvet 2 to computer
How to install SD card in BQ BQ-5302G Velvet 2
How to update Play Store in BQ BQ-5302G Velvet 2
How to install Google Camera in BQ BQ-5302G Velvet 2
How to enable USB debugging on BQ BQ-5302G Velvet 2
How to turn off BQ BQ-5302G Velvet 2
How to charge BQ BQ-5302G Velvet 2
How to use the camera on BQ BQ-5302G Velvet 2
How to find lost BQ BQ-5302G Velvet 2
How to set password on BQ BQ-5302G Velvet 2
How to turn on 5g on BQ BQ-5302G Velvet 2
How to turn on VPN on BQ BQ-5302G Velvet 2
How to install apps on BQ BQ-5302G Velvet 2
How to insert a SIM card in BQ BQ-5302G Velvet 2
How to enable and configure NFC on BQ BQ-5302G Velvet 2
How to set time on BQ BQ-5302G Velvet 2
How to connect headphones to BQ BQ-5302G Velvet 2
How to clear browser history on BQ BQ-5302G Velvet 2
How to disassemble BQ BQ-5302G Velvet 2
How to hide an app on BQ BQ-5302G Velvet 2
How to download YouTube videos on BQ BQ-5302G Velvet 2
How to unblock a contact on BQ BQ-5302G Velvet 2
How to turn on the flashlight on BQ BQ-5302G Velvet 2
How to split the screen on BQ BQ-5302G Velvet 2
How to turn off the camera sound on BQ BQ-5302G Velvet 2
How to trim video on BQ BQ-5302G Velvet 2
How to check RAM in BQ BQ-5302G Velvet 2
How to bypass the Google account on BQ BQ-5302G Velvet 2
How to fix black screen on BQ BQ-5302G Velvet 2
How to change the language on BQ BQ-5302G Velvet 2
How to open engineering mode in BQ BQ-5302G Velvet 2
How to open recovery mode in BQ BQ-5302G Velvet 2
How to find and turn on a voice recorder on BQ BQ-5302G Velvet 2
How to make video calls on BQ BQ-5302G Velvet 2
BQ BQ-5302G Velvet 2 sim card not detected
How to transfer contacts to BQ BQ-5302G Velvet 2
How to enable/disable «Do not disturb» mode on BQ BQ-5302G Velvet 2
How to enable/disable answerphone on BQ BQ-5302G Velvet 2
How to set up face recognition on BQ BQ-5302G Velvet 2
How to set up voicemail on BQ BQ-5302G Velvet 2
How to listen to voicemail on BQ BQ-5302G Velvet 2
How to check the IMEI number in BQ BQ-5302G Velvet 2
How to turn on fast charging on BQ BQ-5302G Velvet 2
How to replace the battery on BQ BQ-5302G Velvet 2
How to update the application on BQ BQ-5302G Velvet 2
Why the BQ BQ-5302G Velvet 2 discharges quickly
How to set a password for apps in the BQ BQ-5302G Velvet 2
How to format BQ BQ-5302G Velvet 2
How to install TWRP on BQ BQ-5302G Velvet 2
How to set up call forwarding on BQ BQ-5302G Velvet 2
How to empty the recycle bin on BQ BQ-5302G Velvet 2
Where to find the clipboard on BQ BQ-5302G Velvet 2
How to Set Contact Photo in Another Phones
