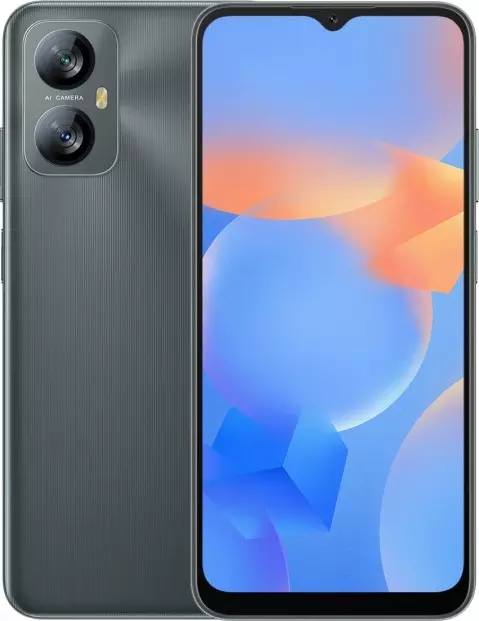
Reset FRP lock on Blackview A52 Pro
Users of Android-based devices may encounter problems during the activation of their Google account. If a user can’t pass authorization, they have probably encountered the so-called Factory Reset Protection function. To activate the device and continue using it, you must reset FRP. How to accomplish this without damaging your smartphone?
What is FRP Used For
The abbreviation stands for Factory Reset Protection. This feature first appeared in Android 5.1.
As most people know, the developers of the operating system are trying to protect the smartphones of their users. To this extent, FRP doesn’t allow a person that stole a mobile device to activate it for further use. That is, when trying to reactivate the device, the attacker will see a message on screen stating that the smartphone only supports the owner's Google account.
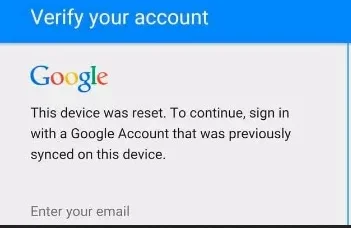
Of course, Factory Reset Protection is a useful feature. However, problems with activating a new account can also occur with a person that bought a used smartphone. In this situation, there is no theft involved. Still, the buyer doesn’t have the option to activate their account.
How to Bypass FRP on Blackview A52 Pro
Unfortunately, the problem with activating a new Google account occurs quite often when the smartphone is purchased used. There are 2 ways to resolve the issue:
- the official way;
- the unofficial way;
These names are rather arbitrary. Still, they adequately explain what operations the user will have to perform. In the first case, the user must contact the previous owner of the smartphone to reset their Google account. In the second option, FRP bypass occurs by its own means without using the data of the previously established account.
The Official Way
This method is used under the assumption that the current owner of the Blackview A52 Pro smartphone has the means to contact its previous owner. To officially reset FRP, you will need the previous Google account data: the linked email address and password.
- In the Greetings window or phone settings enter the details of the previous account.
- Log in on the PC in the same way.
- On the computer, unlink the smartphone among the listed devices.
- On the phone, go to the Google account settings and delete the account.
- In the developer settings, enable the Unlock OEM option.
If everything is done correctly, FRP will be reset and the corresponding device will be unlocked. After rebooting the smartphone, you can enter your Google account data.
The Unofficial Way
There are several ways to bypass the Google Account on Blackview A52 Pro without having email and password information.
The 1st Option:
- Insert a SIM card into the phone, turn it on.
- Skip the starting menu for device activation.
- Call the smartphone.
- Accept the call and save the new contact.
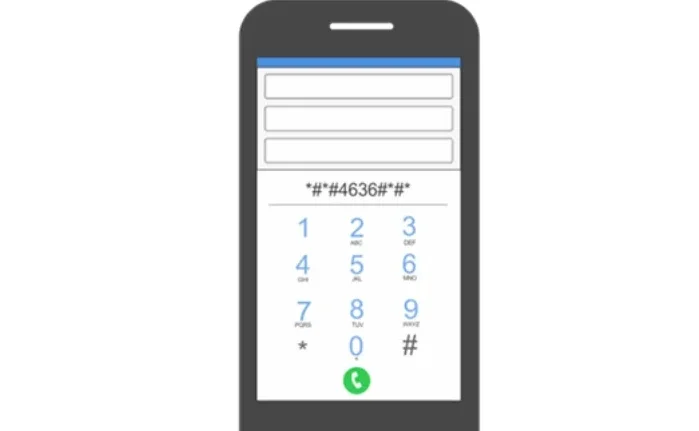
- In the dialer, enter the following command: *#*#4636#*#*.
- Press the Back button in the opened menu to go to phone settings.
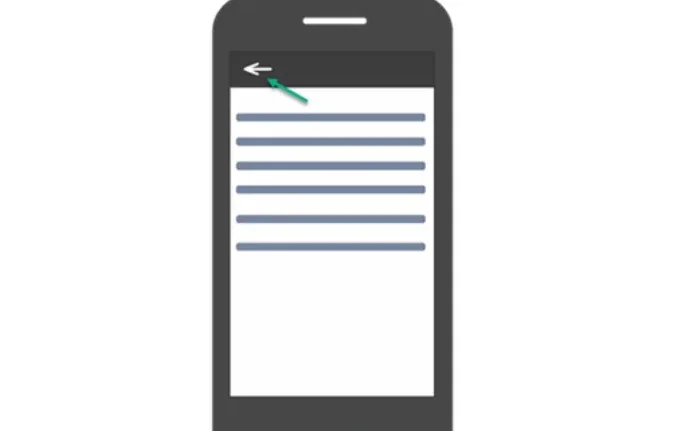
- Go to Recovery and Reset, then Backup and Restore.
- Disable data backup and perform a factory reset.
The 2nd Option:
- Turn on the phone with the installed SIM card.
- Connect to Wi-Fi at the primary boot-up.
- Enter some letters and highlight the text.
- Select the Share option to send this text via SMS.
- Put 112 as the receiving number.
- A notification will appear that the message has not been delivered after you attempt to send the text. This is just what we need.
- Open the texting menu with the 112 number and press the Call button.
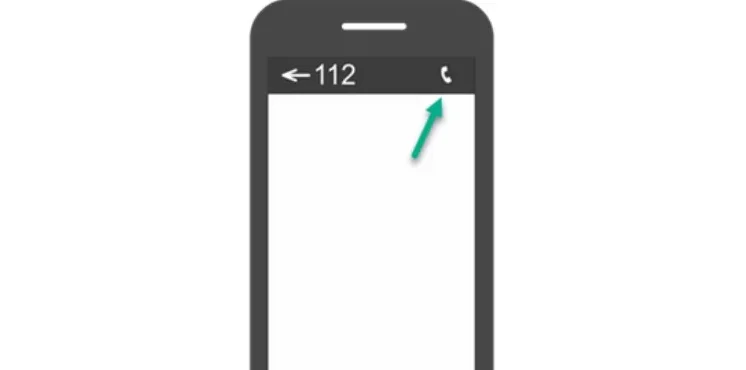
- Delete 112 and enter the following command: *#*#4636#*#*.
- Similarly to the previous method, go to the Recovery and Reset menu, reset your smartphone back to factory settings and restart.
Whichever reset method the user chooses, it will be possible to enter the details of a new Google account after restarting the device. The FRP function should be disabled.
What to Do if Nothing of the Above Worked
All people buying smartphones used are advised to ask the previous owner for documentation. This will help you bypass FRP without having to tamper with your mobile device.
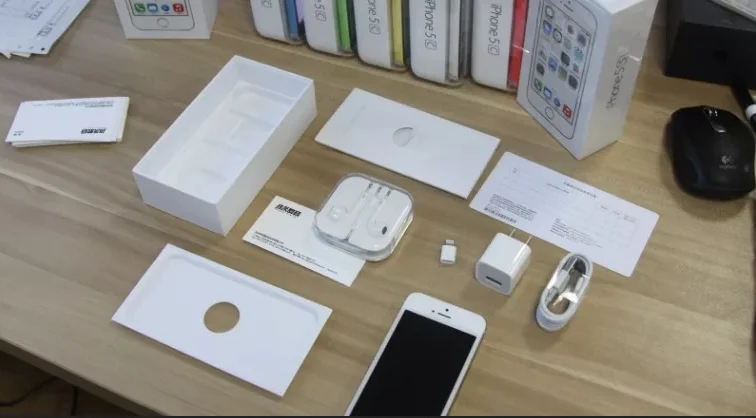
If it’s not possible to find the data of the old account to disable it, you visit the store where the device was first purchased. The info is indicated on the receipt or warranty certificate. If you visit the store, you will need to take all the documents that come with the smartphone. The telecom store employee will help you with Factory Reset Protection. If the previous owner sold the phone without its packaging, your only option is to use the unofficial reset methods.
Share this page with your friends:See also:
How to flash Blackview A52 Pro
How to root Blackview A52 Pro
Hard reset for Blackview A52 Pro
How to reboot Blackview A52 Pro
How to unlock Blackview A52 Pro
What to do if Blackview A52 Pro won't turn on
What to do if Blackview A52 Pro doesn't charge
What to do if Blackview A52 Pro doesn't connect to PC via USB
How to take a screenshot on Blackview A52 Pro
How to update Blackview A52 Pro
How to call recording on Blackview A52 Pro
How to connect Blackview A52 Pro to TV
How to clear the cache on Blackview A52 Pro
How to backup Blackview A52 Pro
How to disable ads on Blackview A52 Pro
How to clear storage on Blackview A52 Pro
How to increase font on Blackview A52 Pro
How to share internet on Blackview A52 Pro
How to transfer data to Blackview A52 Pro
How to unlock bootloader on Blackview A52 Pro
How to recover photos on Blackview A52 Pro
How to record the screen on Blackview A52 Pro
How to find blacklist in Blackview A52 Pro
How to set up fingerprint on Blackview A52 Pro
How to block number on Blackview A52 Pro
How to enable auto-rotate on Blackview A52 Pro
How to set up or turn off an alarm on Blackview A52 Pro
How to change ringtone on Blackview A52 Pro
How to enable battery percentage on Blackview A52 Pro
How to turn off notifications on Blackview A52 Pro
How to turn off Google assistant on Blackview A52 Pro
How to turn off the lock screen on Blackview A52 Pro
How to delete app on Blackview A52 Pro
How to recover contacts on Blackview A52 Pro
Where is the recycle bin on Blackview A52 Pro
How to install WhatsApp on Blackview A52 Pro
How to set contact photo in Blackview A52 Pro
How to scan QR code on Blackview A52 Pro
How to connect Blackview A52 Pro to computer
How to install SD card in Blackview A52 Pro
How to update Play Store in Blackview A52 Pro
How to install Google Camera in Blackview A52 Pro
How to enable USB debugging on Blackview A52 Pro
How to turn off Blackview A52 Pro
How to charge Blackview A52 Pro
How to use the camera on Blackview A52 Pro
How to find lost Blackview A52 Pro
How to set password on Blackview A52 Pro
How to turn on 5g on Blackview A52 Pro
How to turn on VPN on Blackview A52 Pro
How to install apps on Blackview A52 Pro
How to insert a SIM card in Blackview A52 Pro
How to enable and configure NFC on Blackview A52 Pro
How to set time on Blackview A52 Pro
How to connect headphones to Blackview A52 Pro
How to clear browser history on Blackview A52 Pro
How to disassemble Blackview A52 Pro
How to hide an app on Blackview A52 Pro
How to download YouTube videos on Blackview A52 Pro
How to unblock a contact on Blackview A52 Pro
How to turn on the flashlight on Blackview A52 Pro
How to split the screen on Blackview A52 Pro
How to turn off the camera sound on Blackview A52 Pro
How to trim video on Blackview A52 Pro
How to check RAM in Blackview A52 Pro
How to bypass the Google account on Blackview A52 Pro
How to fix black screen on Blackview A52 Pro
How to change the language on Blackview A52 Pro
How to open engineering mode in Blackview A52 Pro
How to open recovery mode in Blackview A52 Pro
How to find and turn on a voice recorder on Blackview A52 Pro
How to make video calls on Blackview A52 Pro
Blackview A52 Pro sim card not detected
How to transfer contacts to Blackview A52 Pro
How to enable/disable «Do not disturb» mode on Blackview A52 Pro
How to enable/disable answerphone on Blackview A52 Pro
How to set up face recognition on Blackview A52 Pro
How to set up voicemail on Blackview A52 Pro
How to listen to voicemail on Blackview A52 Pro
How to check the IMEI number in Blackview A52 Pro
How to turn on fast charging on Blackview A52 Pro
How to replace the battery on Blackview A52 Pro
How to update the application on Blackview A52 Pro
Why the Blackview A52 Pro discharges quickly
How to set a password for apps in the Blackview A52 Pro
How to format Blackview A52 Pro
How to install TWRP on Blackview A52 Pro
How to set up call forwarding on Blackview A52 Pro
How to empty the recycle bin on Blackview A52 Pro
Where to find the clipboard on Blackview A52 Pro
How to Reset FRP lock on Another Phones
