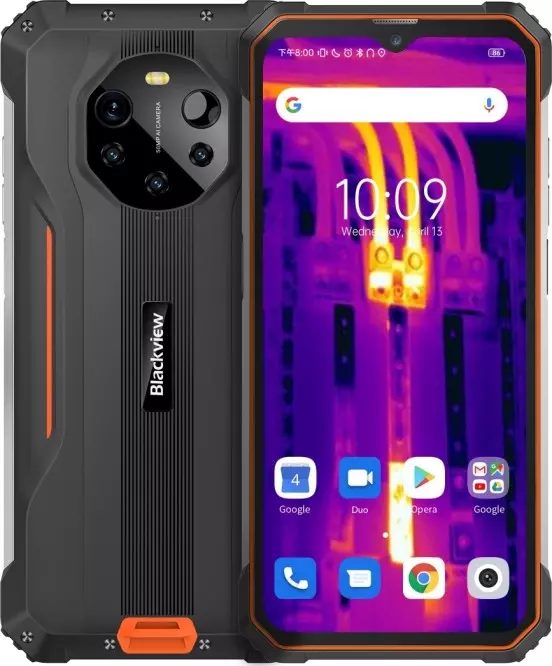
How to Hard Reset Blackview BL8800 Pro 5G
There can be many reasons for choosing to perform a hard reset of the Blackview BL8800 Pro 5G (the process is also called “factory reset”). Typically, this is done to restore the system’s functioning that was disturbed by viruses, deleted system files, "clumsy" firmware updates, and other mishaps. It’s very easy to perform a hard reset on any device, but you should be aware of the consequences of this action and be able to back up your system and files. All of this will be tackled in detail below.
How to Make a Backup
Important! The reset will wipe all information on your Blackview BL8800 Pro 5G. If you have not made a backup copy of your contacts, images, videos, documents, and everything else you’d want to be saved, do so, otherwise you will lose all your personal information stored on the device.
Follow these steps to save your data.
- Export your photos, documents, and videos to your PC via USB. You can also use Google Photos to backup images and the Google Drive cloud storage for documents and folders (you can also upload several files to your Google Drive). You’ll have to pay to expand the available storage.
- Enable “Cloud Sync” in your device settings to save your contacts and apps. Go to “System” - “Other” - “Backup”. Enable sync with your Google account.
As you’ve done all this, you may proceed to perform a hard reset of your Blackview BL8800 Pro 5G.
How to Perform a Full Data Wipe on Your Blackview BL8800 Pro 5G
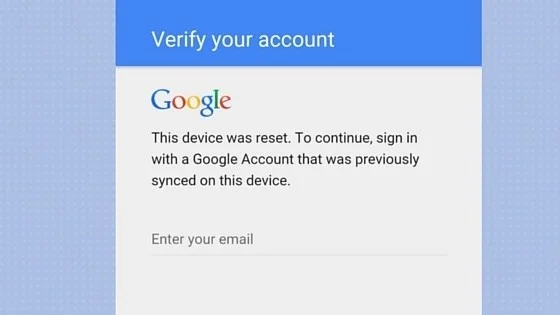
Important! Due to FRP (Factory Reset Protection), Android will ask you to enter the username and password of the account that was connected to the device before proceeding with the hard reset. This is why you must log out of your Google account ("Settings" - "Accounts" - "Google" - "Delete Account") before resetting if you plan to sell your smartphone down the line so that the person who receives your phone can activate their Google account on the device
Given the wide array of Android phones and the complexity of reset processes for each specific model, we will provide a guide based on three fundamentally different devices and firmware:
- Mi A1 on basic Android, which is also used in Nokia, Motorola, and OnePlus (it has a slightly touched up system) phones and in other devices released as part of the Android One program;
- Galaxy S7, which is running Samsung Experience. Keep in mind that this Korean company is the biggest phone producer on the planet, so it makes sense to include this shell in the list;
- Redmi Note 5 running MIUI. The products of this company are in great demand, so it would be weird to ignore this one.
The easiest way to perform a full wipe is through a special menu in the system settings. Once again, note that the location and name of the settings in question may vary slightly depending on the phone used. The main thing is to find the basic category for recovery and reset.
Xiaomi Mi A1 (Basic Android 8.1 Oreo)
- Click the “Settings” icon in the applications menu or open the settings using the icon in the notification center.
- Scroll down and go to "System".
- Press “Reset”.
- Press “Wipe All Data” (“Factory Reset”).
- Confirm your action.
- Enter your device’s PIN and press “Continue”.
- Select “Wipe All”.
The device will reboot and you will need to do the initial setup again, as if it were a completely new device.
Samsung Galaxy S7 (Samsung Experience)
- Go to “Settings” in any way you choose to.
- Select the “General Settings” tab.
- Select “Reset” (“Reset & Archive”).
- Press “Data Reset”.
- Press the blue button.
- Enter your device’s PIN and press “Continue”.
- Select “Wipe All” (“Device Reset”).
Your phone will then reboot and you’ll have to do the initial setup.
Redmi Note 5 (MIUI)
- Open up “Settings”.
- Go to “Additional Settings”.
- Select “Backup & Reset”.
- Select “Settings Reset”.
- Tick the “Wipe Internal Storage” option to delete all your apps and files.
- Finally, press “Settings Reset” and enter the password if needed.
Important! s you can see, the main thing is to find the "Reset" settings section. In order not to “wander around” all settings in the search for the right menu, it’s easier to simply enter “Reset” into the search bar on the main page. Select the needed menu from the drop-down list and you will immediately open up the necessary settings. Then just follow the instructions.
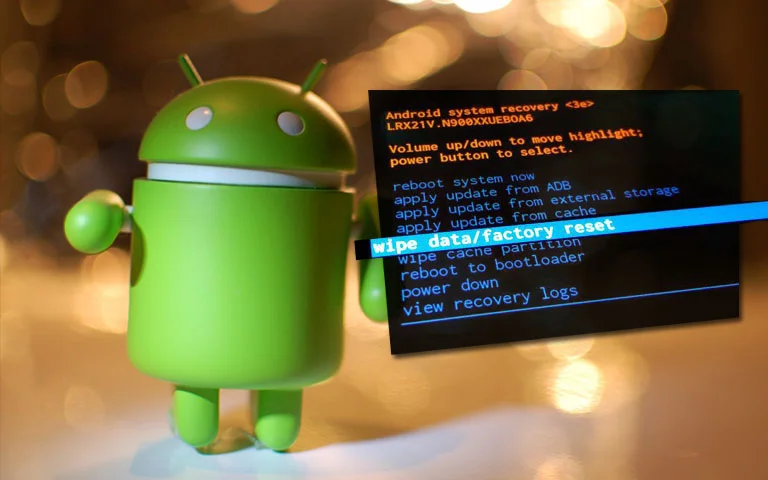
How to Perform a Hard Reset on Blackview BL8800 Pro 5G via Recovery Without Password
This is an applicable method if there is a malfunction that prevents the phone from booting up. The recovery mode is used in such cases to perform a hard reset without a password.
- If your phone is turned on, turn it off.
- Hold down the Power button and the Volume Down key (if nothing happens, try this article on how to enter Recovery mode).
- Instead of a regular loading screen you’ll see a menu where navigation is performed using the volume keys (to move the cursor) and the Power button (to select).
- Select “Wipe data/factory reset” via the Power button.
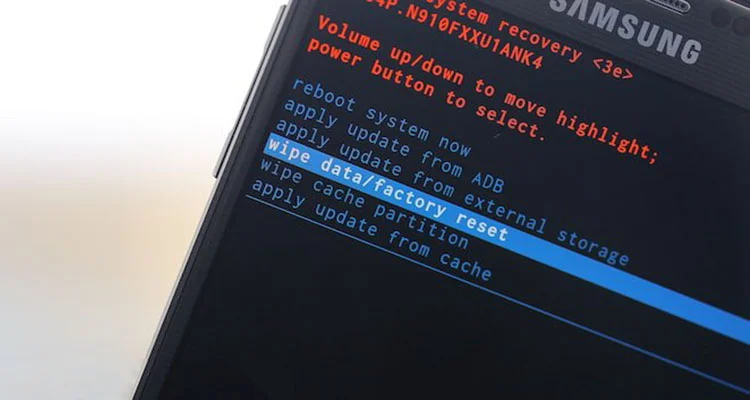
- Choose “Yes” to confirm the reset.
After the reset is finished, the device will reboot and show a standard greeting and settings window. Once again, the menu names may vary somewhat depending on your device.
Share this page with your friends:See also:
How to flash Blackview BL8800 Pro 5G
How to root Blackview BL8800 Pro 5G
How to unlock Blackview BL8800 Pro 5G
How to reboot Blackview BL8800 Pro 5G
What to do if Blackview BL8800 Pro 5G won't turn on
What to do if Blackview BL8800 Pro 5G doesn't charge
What to do if Blackview BL8800 Pro 5G doesn't connect to PC via USB
How to take a screenshot on Blackview BL8800 Pro 5G
How to reset FRP on Blackview BL8800 Pro 5G
How to update Blackview BL8800 Pro 5G
How to call recording on Blackview BL8800 Pro 5G
How to connect Blackview BL8800 Pro 5G to TV
How to clear the cache on Blackview BL8800 Pro 5G
How to backup Blackview BL8800 Pro 5G
How to disable ads on Blackview BL8800 Pro 5G
How to clear storage on Blackview BL8800 Pro 5G
How to increase font on Blackview BL8800 Pro 5G
How to share internet on Blackview BL8800 Pro 5G
How to transfer data to Blackview BL8800 Pro 5G
How to unlock bootloader on Blackview BL8800 Pro 5G
How to recover photos on Blackview BL8800 Pro 5G
How to record the screen on Blackview BL8800 Pro 5G
How to find blacklist in Blackview BL8800 Pro 5G
How to set up fingerprint on Blackview BL8800 Pro 5G
How to block number on Blackview BL8800 Pro 5G
How to enable auto-rotate on Blackview BL8800 Pro 5G
How to set up or turn off an alarm on Blackview BL8800 Pro 5G
How to change ringtone on Blackview BL8800 Pro 5G
How to enable battery percentage on Blackview BL8800 Pro 5G
How to turn off notifications on Blackview BL8800 Pro 5G
How to turn off Google assistant on Blackview BL8800 Pro 5G
How to turn off the lock screen on Blackview BL8800 Pro 5G
How to delete app on Blackview BL8800 Pro 5G
How to recover contacts on Blackview BL8800 Pro 5G
Where is the recycle bin on Blackview BL8800 Pro 5G
How to install WhatsApp on Blackview BL8800 Pro 5G
How to set contact photo in Blackview BL8800 Pro 5G
How to scan QR code on Blackview BL8800 Pro 5G
How to connect Blackview BL8800 Pro 5G to computer
How to install SD card in Blackview BL8800 Pro 5G
How to update Play Store in Blackview BL8800 Pro 5G
How to install Google Camera in Blackview BL8800 Pro 5G
How to enable USB debugging on Blackview BL8800 Pro 5G
How to turn off Blackview BL8800 Pro 5G
How to charge Blackview BL8800 Pro 5G
How to use the camera on Blackview BL8800 Pro 5G
How to find lost Blackview BL8800 Pro 5G
How to set password on Blackview BL8800 Pro 5G
How to turn on 5g on Blackview BL8800 Pro 5G
How to turn on VPN on Blackview BL8800 Pro 5G
How to install apps on Blackview BL8800 Pro 5G
How to insert a SIM card in Blackview BL8800 Pro 5G
How to enable and configure NFC on Blackview BL8800 Pro 5G
How to set time on Blackview BL8800 Pro 5G
How to connect headphones to Blackview BL8800 Pro 5G
How to clear browser history on Blackview BL8800 Pro 5G
How to disassemble Blackview BL8800 Pro 5G
How to hide an app on Blackview BL8800 Pro 5G
How to download YouTube videos on Blackview BL8800 Pro 5G
How to unblock a contact on Blackview BL8800 Pro 5G
How to turn on the flashlight on Blackview BL8800 Pro 5G
How to split the screen on Blackview BL8800 Pro 5G
How to turn off the camera sound on Blackview BL8800 Pro 5G
How to trim video on Blackview BL8800 Pro 5G
How to check RAM in Blackview BL8800 Pro 5G
How to bypass the Google account on Blackview BL8800 Pro 5G
How to fix black screen on Blackview BL8800 Pro 5G
How to change the language on Blackview BL8800 Pro 5G
How to open engineering mode in Blackview BL8800 Pro 5G
How to open recovery mode in Blackview BL8800 Pro 5G
How to find and turn on a voice recorder on Blackview BL8800 Pro 5G
How to make video calls on Blackview BL8800 Pro 5G
Blackview BL8800 Pro 5G sim card not detected
How to transfer contacts to Blackview BL8800 Pro 5G
How to enable/disable «Do not disturb» mode on Blackview BL8800 Pro 5G
How to enable/disable answerphone on Blackview BL8800 Pro 5G
How to set up face recognition on Blackview BL8800 Pro 5G
How to set up voicemail on Blackview BL8800 Pro 5G
How to listen to voicemail on Blackview BL8800 Pro 5G
How to check the IMEI number in Blackview BL8800 Pro 5G
How to turn on fast charging on Blackview BL8800 Pro 5G
How to replace the battery on Blackview BL8800 Pro 5G
How to update the application on Blackview BL8800 Pro 5G
Why the Blackview BL8800 Pro 5G discharges quickly
How to set a password for apps in the Blackview BL8800 Pro 5G
How to format Blackview BL8800 Pro 5G
How to install TWRP on Blackview BL8800 Pro 5G
How to set up call forwarding on Blackview BL8800 Pro 5G
How to empty the recycle bin on Blackview BL8800 Pro 5G
Where to find the clipboard on Blackview BL8800 Pro 5G
Hard reset for another phones
