How to Share Internet on Vivo NEX S

Vivo NEX S smartphone has a full range of functions necessary for comfortable use of the device. In particular, it supports ways of sharing your Internet. It allows you to set up a network connection for those devices where it is not available (for example, if your friend's smartphone does not have 4G, or if Wi-Fi does not work on your computer). We simply need to figure out how to share the Internet on Vivo NEX S.
Important Points
Before turning to the methods of using the function, it is necessary to focus on some others aspects that will allow us to avoid misunderstandings. The Internet sharing option is available on all devices based on the current version of Android, including Vivo NEX S. The principle of its operation lies in the fact that the phone is used as a Wi-Fi access point, so it becomes a kind of a router for other devices.
For the option to function on Vivo NEX S, 3G or 4G mobile connection must be active, and Wi-Fi must be disabled. But even this is not enough, since mobile operators can set their own restrictions. In particular, users of unlimited Internet access plans will not be able to distribute traffic. In most cases, the option works only on plans that provide a limited gigabyte package. However, this information can be checked with your operator.
Internet Sharing Methods
The function of Vivo NEX S which provides access to the network to other devices works completely free of charge, if the corresponding restrictions are not set by your mobile operator. You can use it in a variety of ways.
Via Wi-Fi
The most popular way that Vivo NEX S owners use the most. To share the Internet via Wi-Fi you will need to:
- Open the devices settings.
- Go to the "Connections" section (the name may differ depending on the firmware version), and then to "Mobile Hotspot and Tethering".

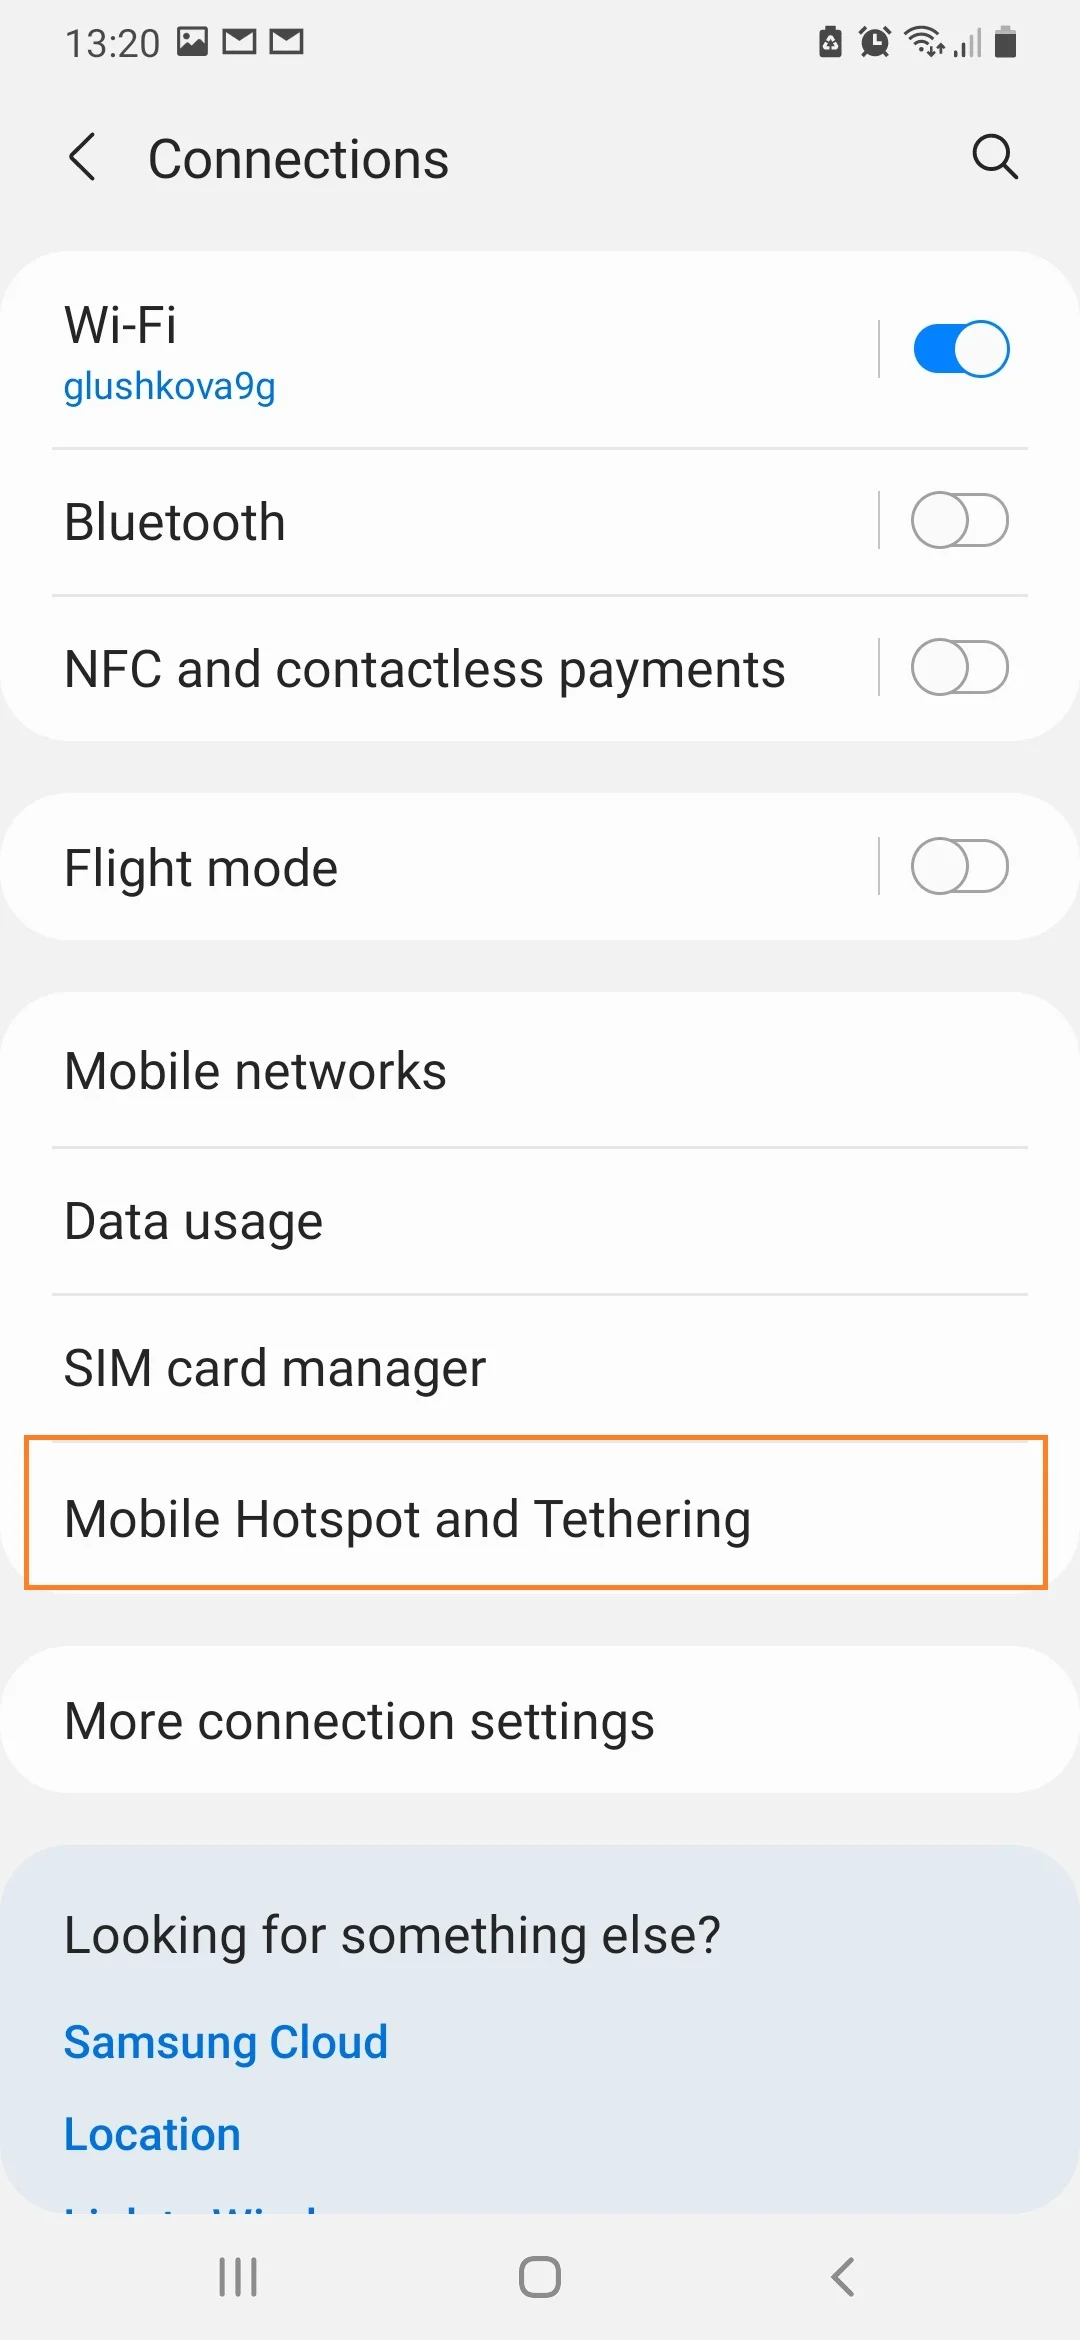
- Enable the option.
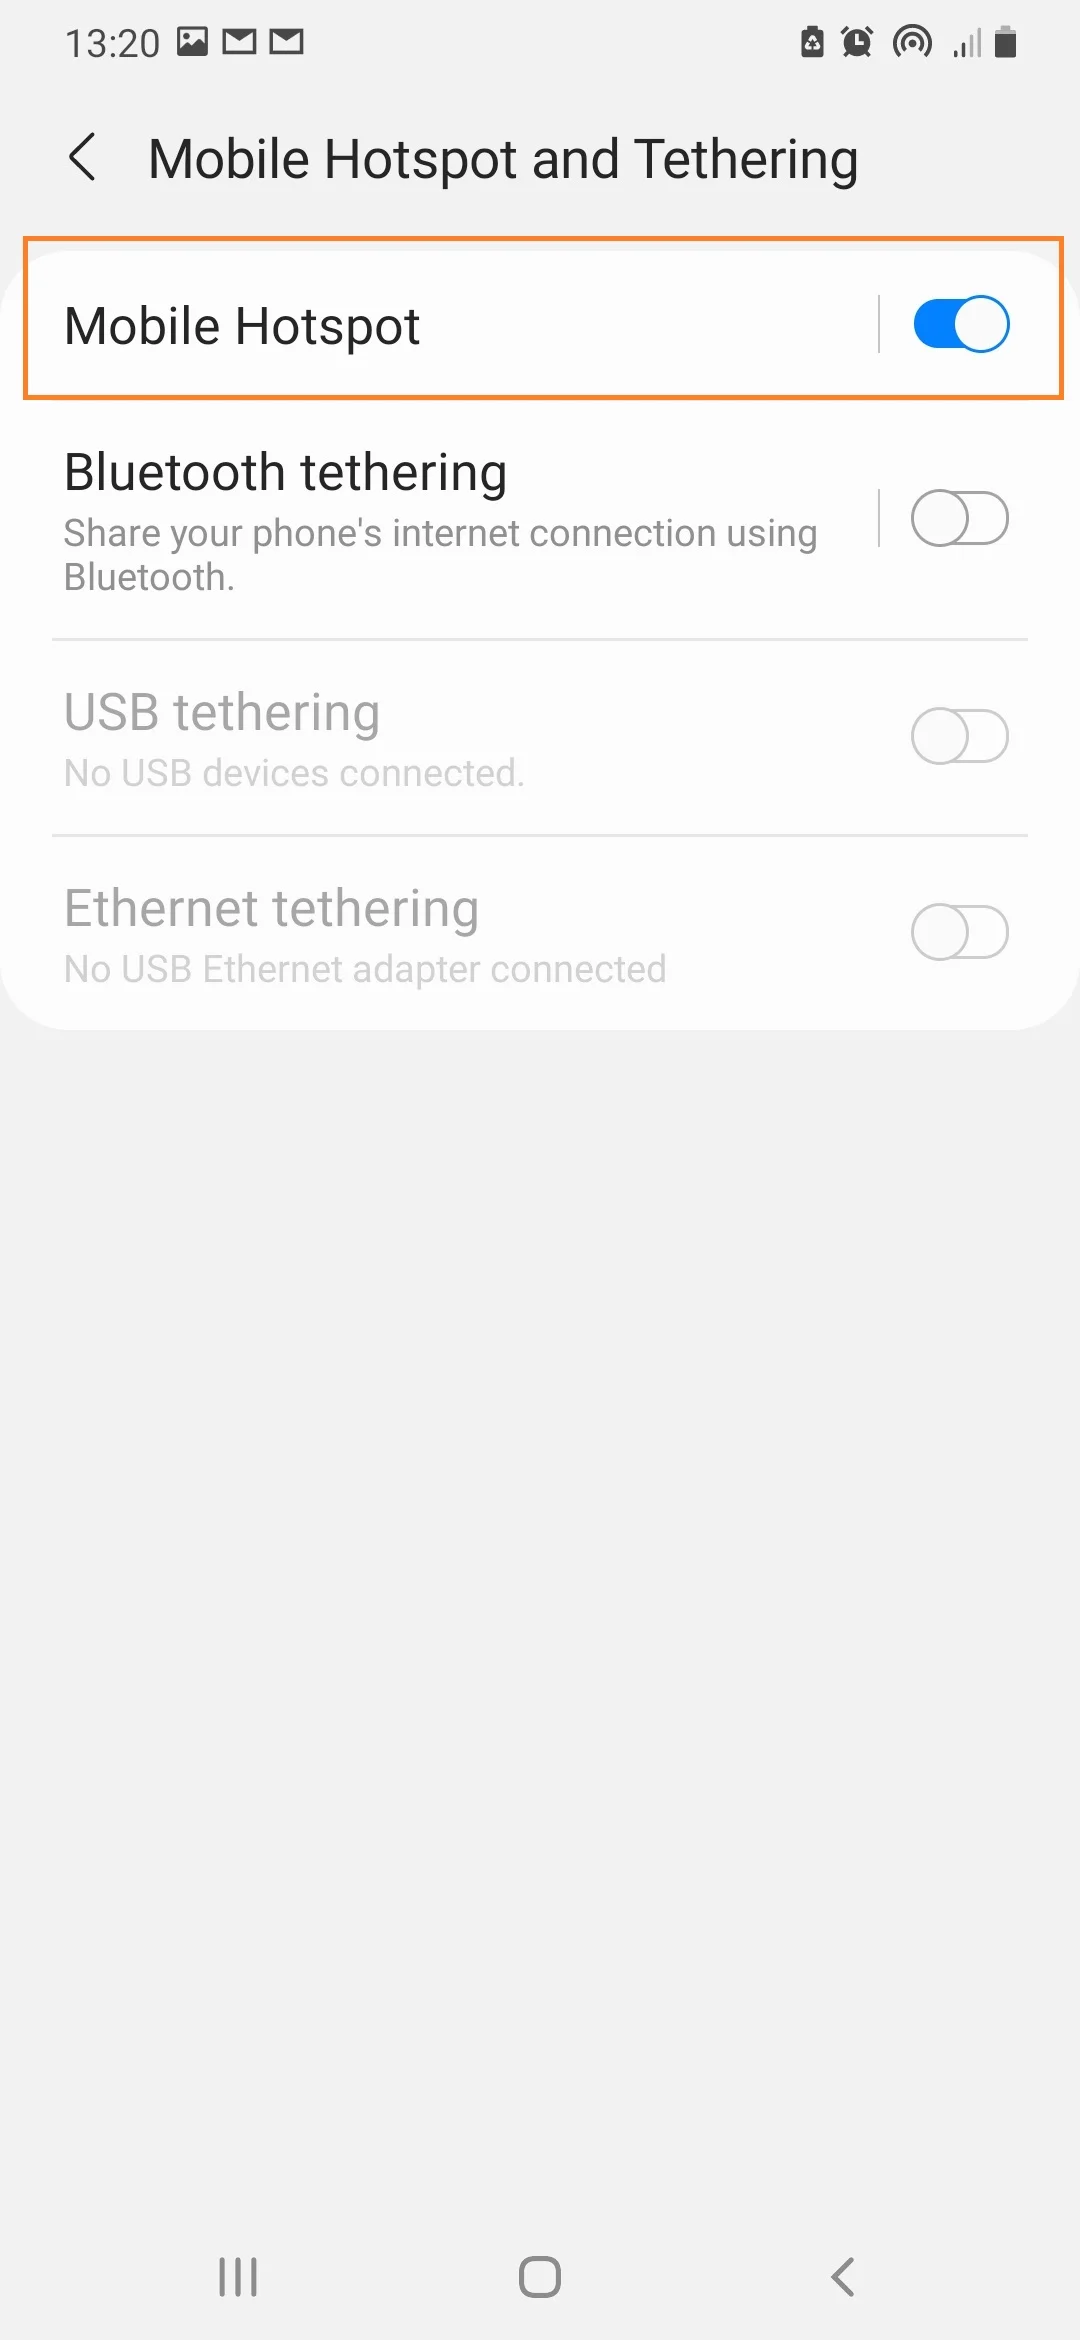
Next you need to enable Wi-Fi on the device that you want to connect to an access point, and select Vivo NEX S using the list of available networks.
Via Bluetooth
This method largely copies the previous version, but in this case the network is shared not via Wi-Fi, but via Bluetooth. However, the Internet itself works wirelessly. To set up a connection, you will need to follow steps 1-3 from the previous method and then activate the "Bluetooth tethering" slider or put a checkmark in front of it.
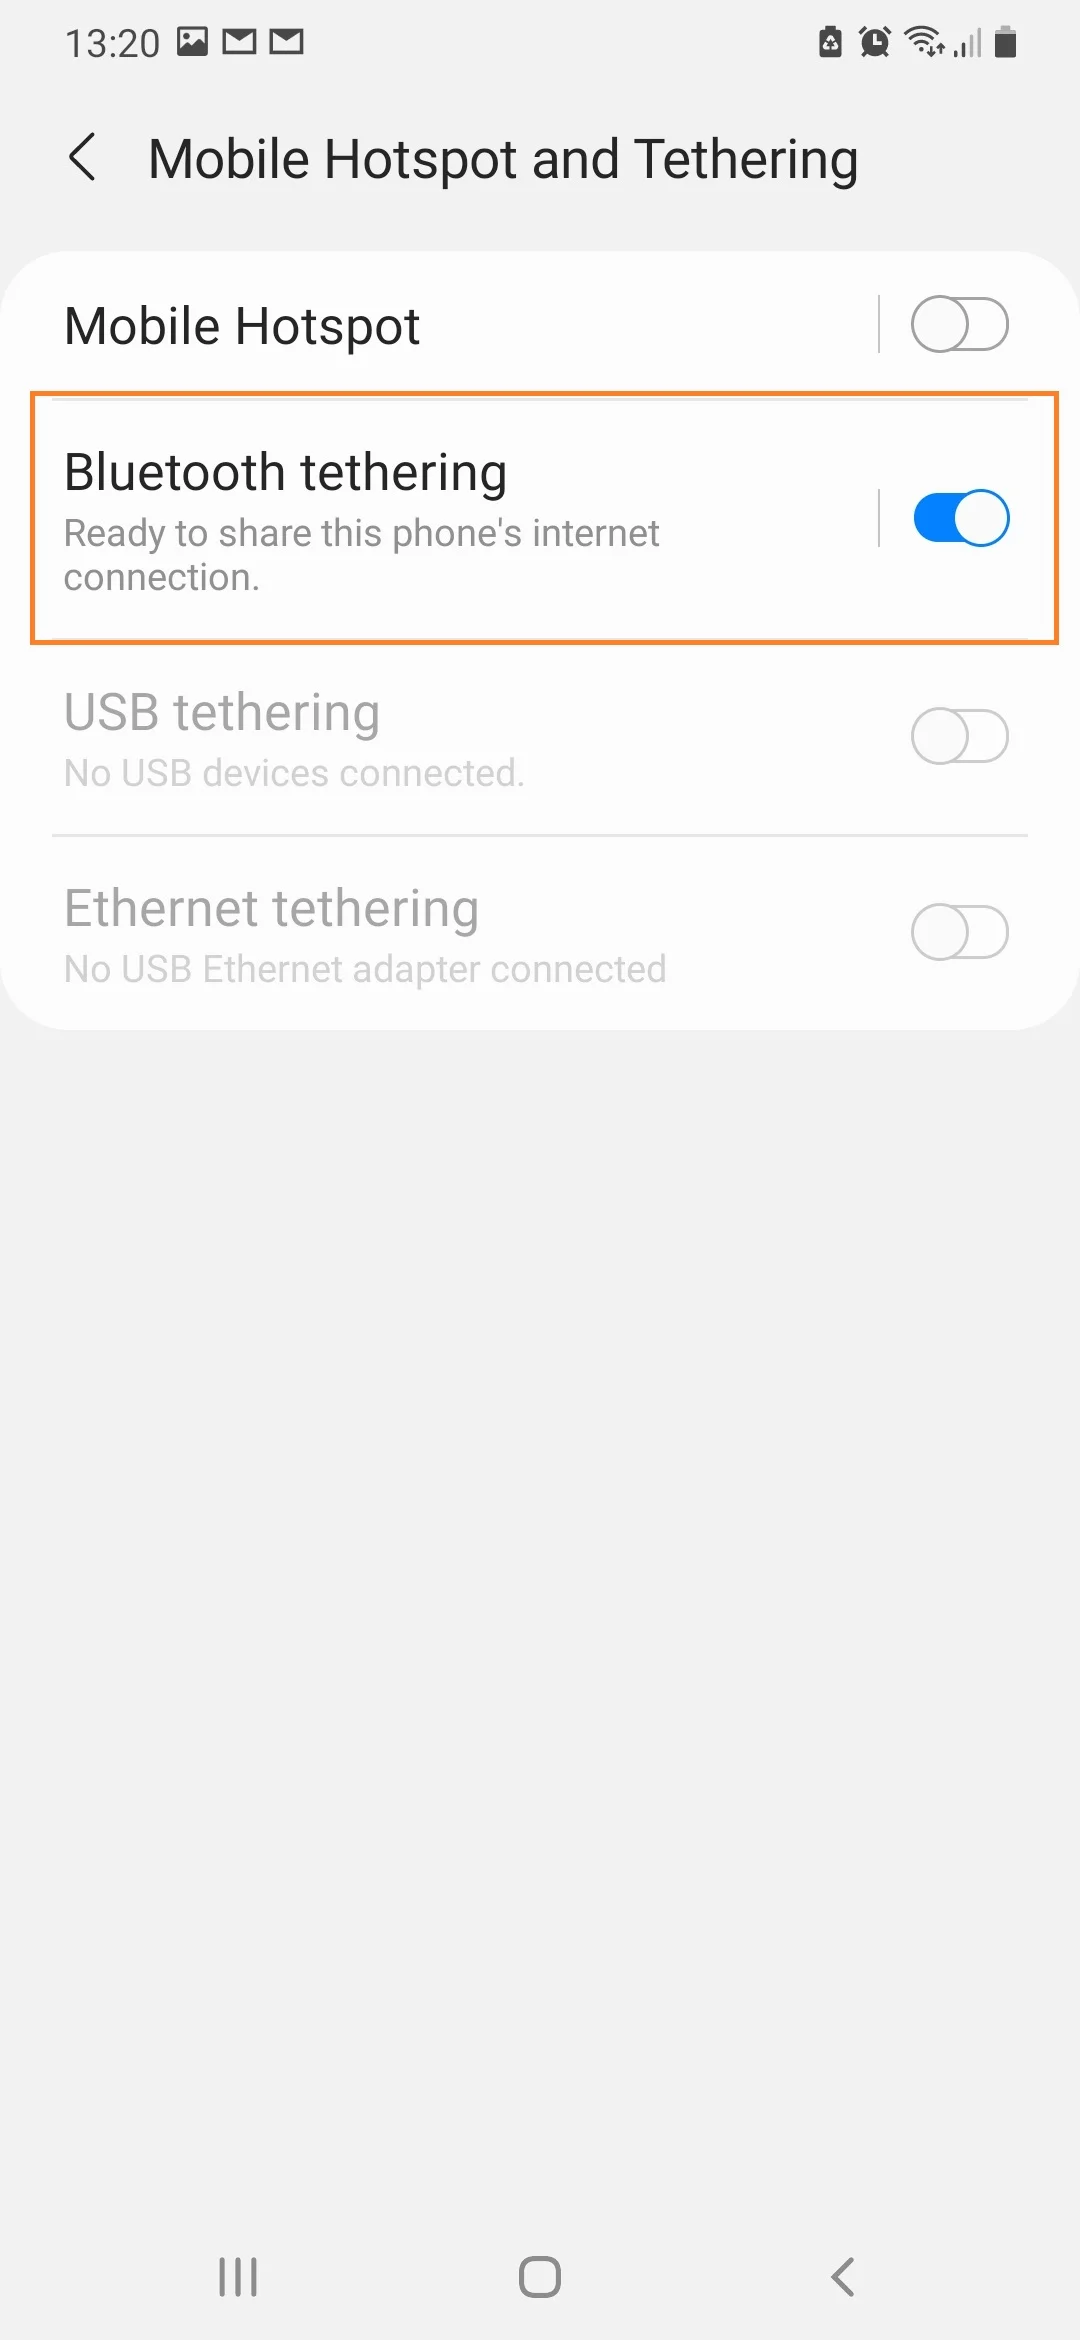
To connect on a device that should receive traffic, you must activate Bluetooth and connect to Vivo NEX S through the list of available Bluetooth networks.
Via USB
An excellent option for those who want to share their Internet to a computer that does not support a wireless Wi-Fi connection. In this case, traffic is transmitted via USB, for which a complete cable is used:
- Activate USB tethering in your phone settings.
- Connect your device to your PC.
- Confirm the “USB tethering” mode on the smartphone screen.
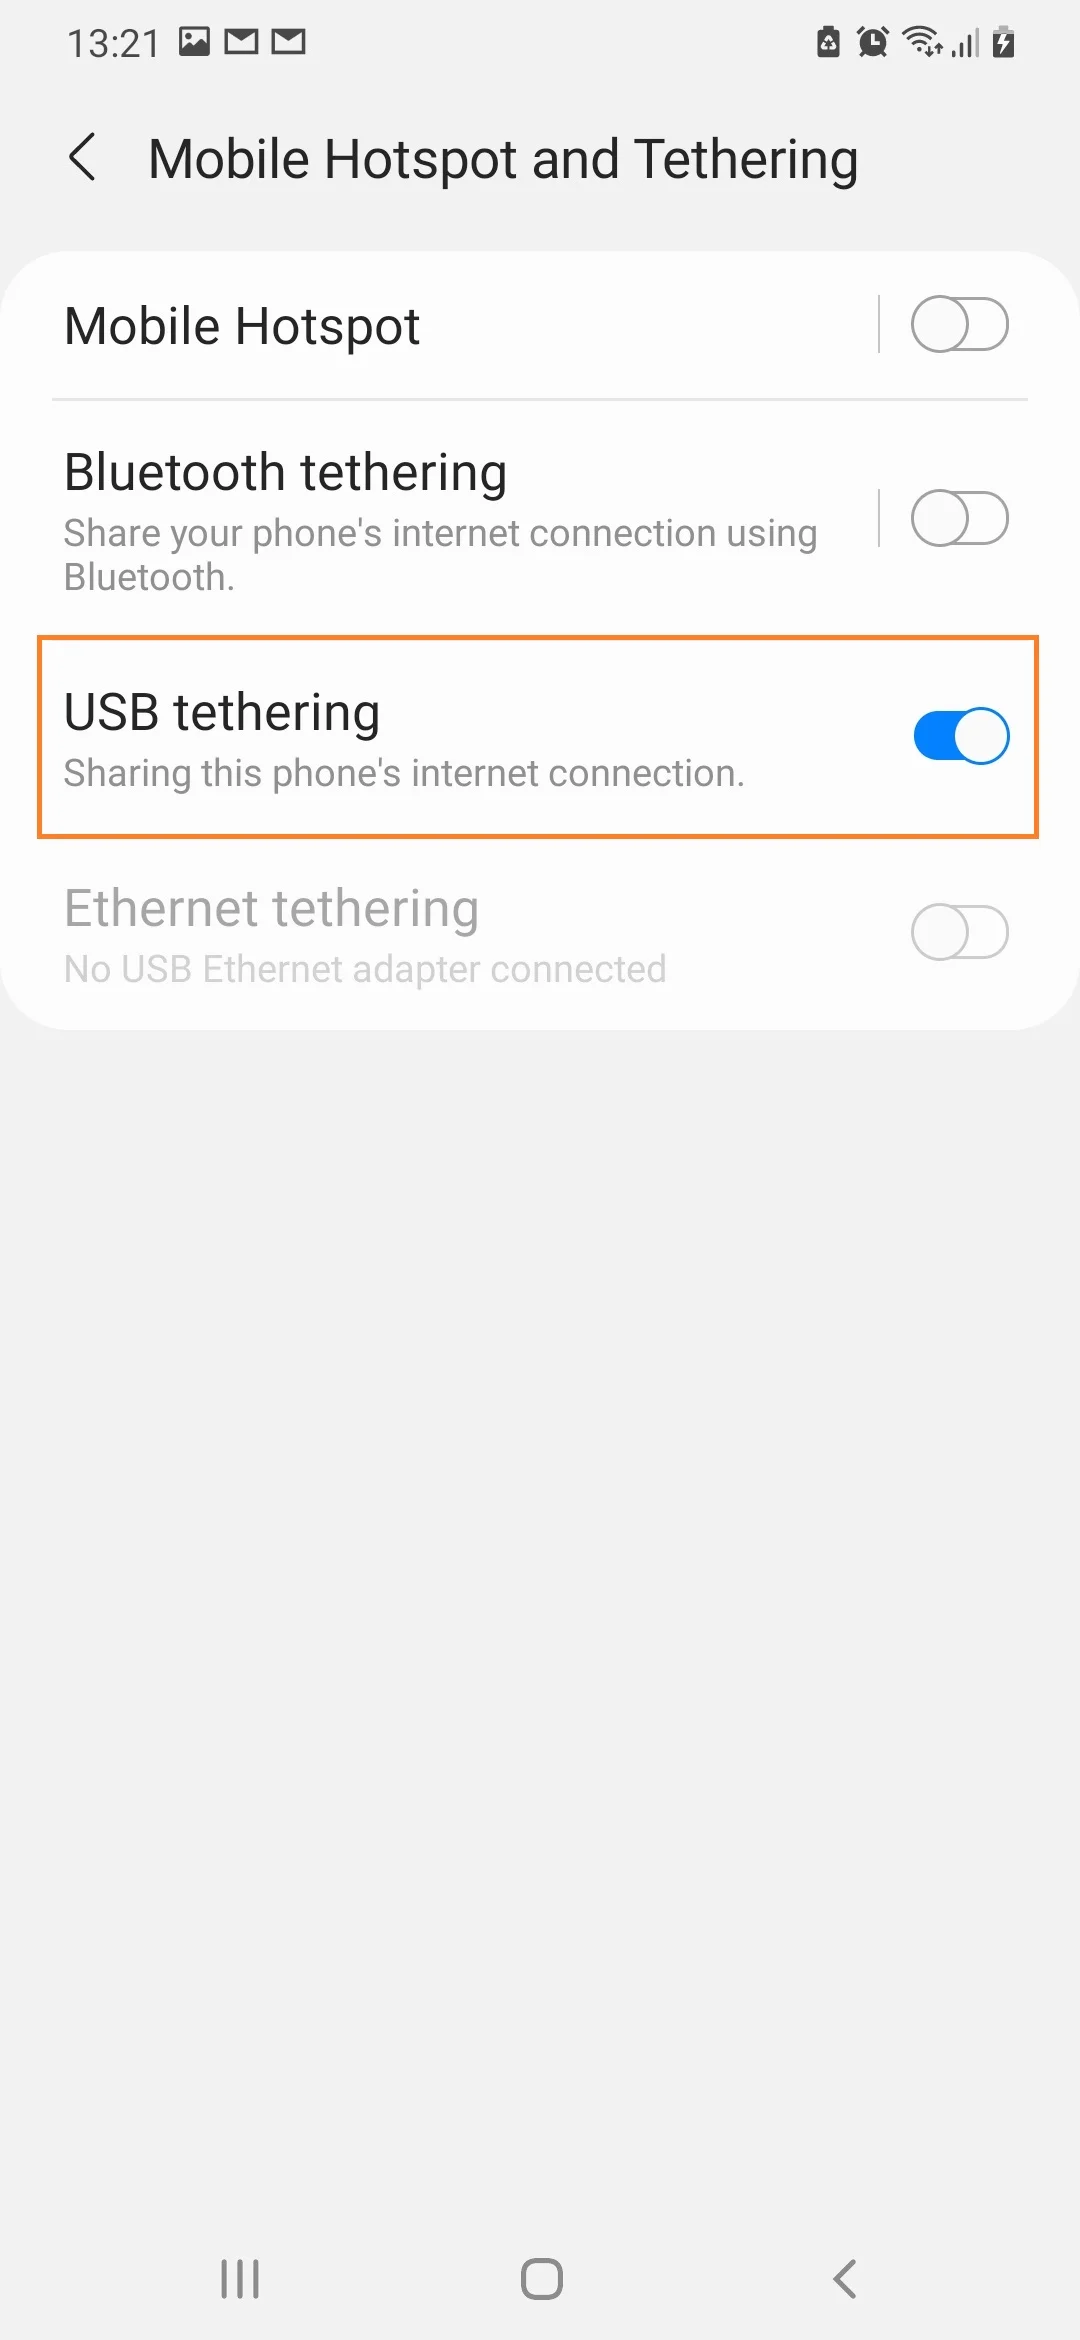
- Open the list of available networks on your computer, and then activate the new connection.
Now Vivo NEX S will distribute gigabytes of mobile traffic to your computer without using a wireless Wi-Fi network. At any time, the connection can be interrupted by accessing the device settings or by disconnecting the USB cable.
Via an Application
If you can't distribute traffic using built-in tools, you can try a special app like FoxFi. It is available on Google Play and works in a similar way. To activate the access point, you just need to open the application, set a password and check the “Activate Wi-Fi Hotspot” box.
If necessary, you can use any other similar program. In any case, the owner of Vivo NEX S will have access to the entire list of functions, including a connection via Bluetooth or USB.
Share this page with your friends:See also:
How to flash Vivo NEX S
How to root Vivo NEX S
Hard reset for Vivo NEX S
How to reboot Vivo NEX S
How to unlock Vivo NEX S
What to do if Vivo NEX S won't turn on
What to do if Vivo NEX S doesn't charge
What to do if Vivo NEX S doesn't connect to PC via USB
How to take a screenshot on Vivo NEX S
How to reset FRP on Vivo NEX S
How to call recording on Vivo NEX S
How to update Vivo NEX S
How to connect Vivo NEX S to TV
How to clear the cache on Vivo NEX S
How to backup Vivo NEX S
How to disable ads on Vivo NEX S
How to clear storage on Vivo NEX S
How to increase font on Vivo NEX S
How to transfer data to Vivo NEX S
How to unlock bootloader on Vivo NEX S
How to recover photos on Vivo NEX S
How to record the screen on Vivo NEX S
How to find blacklist in Vivo NEX S
How to set up fingerprint on Vivo NEX S
How to block number on Vivo NEX S
How to enable auto-rotate on Vivo NEX S
How to set up or turn off an alarm on Vivo NEX S
How to change ringtone on Vivo NEX S
How to enable battery percentage on Vivo NEX S
How to turn off notifications on Vivo NEX S
How to turn off Google assistant on Vivo NEX S
How to turn off the lock screen on Vivo NEX S
How to delete app on Vivo NEX S
How to recover contacts on Vivo NEX S
Where is the recycle bin on Vivo NEX S
How to install WhatsApp on Vivo NEX S
How to set contact photo in Vivo NEX S
How to scan QR code on Vivo NEX S
How to connect Vivo NEX S to computer
How to install SD card in Vivo NEX S
How to update Play Store in Vivo NEX S
How to install Google Camera in Vivo NEX S
How to enable USB debugging on Vivo NEX S
How to turn off Vivo NEX S
How to charge Vivo NEX S
How to use the camera on Vivo NEX S
How to find lost Vivo NEX S
How to set password on Vivo NEX S
How to turn on 5g on Vivo NEX S
How to turn on VPN on Vivo NEX S
How to install apps on Vivo NEX S
How to insert a SIM card in Vivo NEX S
How to enable and configure NFC on Vivo NEX S
How to set time on Vivo NEX S
How to connect headphones to Vivo NEX S
How to clear browser history on Vivo NEX S
How to disassemble Vivo NEX S
How to hide an app on Vivo NEX S
How to download YouTube videos on Vivo NEX S
How to unblock a contact on Vivo NEX S
How to turn on the flashlight on Vivo NEX S
How to split the screen on Vivo NEX S
How to turn off the camera sound on Vivo NEX S
How to trim video on Vivo NEX S
How to check RAM in Vivo NEX S
How to bypass the Google account on Vivo NEX S
How to fix black screen on Vivo NEX S
How to change the language on Vivo NEX S
How to open engineering mode in Vivo NEX S
How to open recovery mode in Vivo NEX S
How to find and turn on a voice recorder on Vivo NEX S
How to make video calls on Vivo NEX S
Vivo NEX S sim card not detected
How to transfer contacts to Vivo NEX S
How to enable/disable «Do not disturb» mode on Vivo NEX S
How to enable/disable answerphone on Vivo NEX S
How to set up face recognition on Vivo NEX S
How to set up voicemail on Vivo NEX S
How to listen to voicemail on Vivo NEX S
How to check the IMEI number in Vivo NEX S
How to turn on fast charging on Vivo NEX S
How to replace the battery on Vivo NEX S
How to update the application on Vivo NEX S
Why the Vivo NEX S discharges quickly
How to set a password for apps in the Vivo NEX S
How to format Vivo NEX S
How to install TWRP on Vivo NEX S
How to set up call forwarding on Vivo NEX S
How to empty the recycle bin on Vivo NEX S
Where to find the clipboard on Vivo NEX S
How to Share Internet on Another Phones
