ZTE Geek 2 Won't Turn On
Modern smartphones can malfunction even with the most careful of handling. They arise most often due to violations in the functioning of the operating system, but physical damage can also cause the malfunction. If the phone does not turn on, there is no need to rush to the maintenance center right away. First, you should follow a few simple and safe steps that can help restore your favorite device.
Why Won’t ZTE Geek 2 Turn On
There are many possible reasons for the disruption of the stable operation of the device; often problems arise during everyday use. According to experts and representatives of device manufacturing companies, power-on failures may be associated with the following events:
- after updating the operating system, some system files were installed with errors;
- the device stopped booting up due to viruses that came with applications not installed straight from the Play Market;
- after dropping the device on a hard surface, the display or battery cable became disconnected;
- the USB port is clogged, or moisture has caused minor but harmful rust spots on the contacts.
It should be noted right away that it is not an easy task to handle physical damage on your own. When attempting repairs yourself, you can inadvertently disrupt some of the connections, thereby making the smartphone unrepairable. If the methods proposed below do not lead to a positive result, it is recommended to contact a verified MC for diagnostics and repair.
Force Restart ZTE Geek 2
First, let's look at several methods using Recovery mode. You can boot up the Recovery if the device is charged by more than 15%. At the same time, by connecting the charger, you can make sure that the screen is intact and that the USB port is working as intended.
Then, if the phone responded to the charging connection and displayed the info concerning the process of replenishing the battery, you can proceed to the following actions:
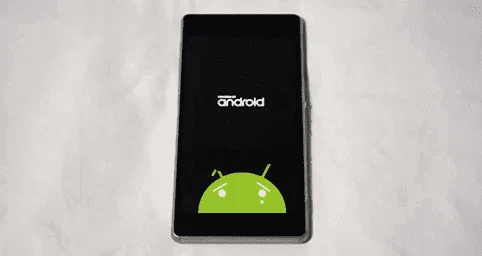
- Simultaneously hold down the power and volume up buttons. Hold them this way until the phone vibrates. The boot splash screen will appear and vibration will follow, after which the power button can be released. Important note: sometimes the combination works with the volume down button, but not the up button.

- In the newly opened menu select the "Reboot to system" button (in some versions the option is called "Reboot system now").
The device should immediately proceed to the reboot, followed by a regular Android boot-up. By the way, if the device does not charge, it is recommended to try other USB cables and chargers. It is possible that the issue lies with them, and the phone is simply discharged.
Resetting to Factory Settings
After performing the steps described above, several scenarios are possible. In addition to the usual rebooting and boot-up of the device, the phone may turn off or freeze up on the screen saver. You should not be too upset about this fact, as the steps done helped to make sure that a number of important functions and systems are working properly.
Rebooting via Recovery is an option suitable for situations in which the firmware suffered from minor glitches that were eliminated on their own. If the violation in the operating system is much more serious (for example, after flashing the firmware with errors), then you will have to reset it to the factory settings. It is important to note that this will delete all files from the device's storage, including photos, videos and music.
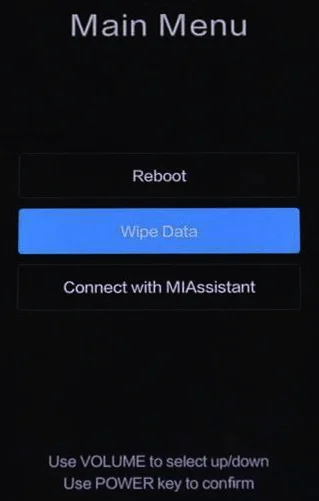
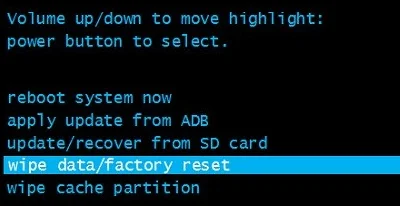
- Open up Recovery, as in the steps described above.
- Select Wipe Data/Factory Reset.
The device should reboot. The rebooting process can last much longer than usual (up to 10-15 minutes), after which you will have to perform the initial setup.
Additional Methods
What if the steps described above did not help? If the device suddenly turned off, stopped responding to pressing the power button or charging, then most likely the problem lies in physical damage. If you dropped the device or it got into the water, then you should contact the maintenance center for diagnostics. Another likely cause is battery failure. The main symptom is a rapid discharge from 100 to 0 percent until a malfunction itself is detected. When using smartphones with removable batteries, you can try to buy a similar one and simply replace it. If the case is one-piece, then it will not be possible to do so without the help of maintenance experts.
Share this page with your friends:See also:
How to flash ZTE Geek 2
How to root ZTE Geek 2
Hard reset for ZTE Geek 2
How to reboot ZTE Geek 2
How to unlock ZTE Geek 2
What to do if ZTE Geek 2 doesn't charge
What to do if ZTE Geek 2 doesn't connect to PC via USB
How to take a screenshot on ZTE Geek 2
How to reset FRP on ZTE Geek 2
How to update ZTE Geek 2
How to call recording on ZTE Geek 2
How to connect ZTE Geek 2 to TV
How to clear the cache on ZTE Geek 2
How to backup ZTE Geek 2
How to disable ads on ZTE Geek 2
How to clear storage on ZTE Geek 2
How to increase font on ZTE Geek 2
How to share internet on ZTE Geek 2
How to transfer data to ZTE Geek 2
How to unlock bootloader on ZTE Geek 2
How to recover photos on ZTE Geek 2
How to record the screen on ZTE Geek 2
How to find blacklist in ZTE Geek 2
How to set up fingerprint on ZTE Geek 2
How to block number on ZTE Geek 2
How to enable auto-rotate on ZTE Geek 2
How to set up or turn off an alarm on ZTE Geek 2
How to change ringtone on ZTE Geek 2
How to enable battery percentage on ZTE Geek 2
How to turn off notifications on ZTE Geek 2
How to turn off Google assistant on ZTE Geek 2
How to turn off the lock screen on ZTE Geek 2
How to delete app on ZTE Geek 2
How to recover contacts on ZTE Geek 2
Where is the recycle bin on ZTE Geek 2
How to install WhatsApp on ZTE Geek 2
How to set contact photo in ZTE Geek 2
How to scan QR code on ZTE Geek 2
How to connect ZTE Geek 2 to computer
How to install SD card in ZTE Geek 2
How to update Play Store in ZTE Geek 2
How to install Google Camera in ZTE Geek 2
How to enable USB debugging on ZTE Geek 2
How to turn off ZTE Geek 2
How to charge ZTE Geek 2
How to use the camera on ZTE Geek 2
How to find lost ZTE Geek 2
How to set password on ZTE Geek 2
How to turn on 5g on ZTE Geek 2
How to turn on VPN on ZTE Geek 2
How to install apps on ZTE Geek 2
How to insert a SIM card in ZTE Geek 2
How to enable and configure NFC on ZTE Geek 2
How to set time on ZTE Geek 2
How to connect headphones to ZTE Geek 2
How to clear browser history on ZTE Geek 2
How to disassemble ZTE Geek 2
How to hide an app on ZTE Geek 2
How to download YouTube videos on ZTE Geek 2
How to unblock a contact on ZTE Geek 2
How to turn on the flashlight on ZTE Geek 2
How to split the screen on ZTE Geek 2
How to turn off the camera sound on ZTE Geek 2
How to trim video on ZTE Geek 2
How to check RAM in ZTE Geek 2
How to bypass the Google account on ZTE Geek 2
How to fix black screen on ZTE Geek 2
How to change the language on ZTE Geek 2
How to open engineering mode in ZTE Geek 2
How to open recovery mode in ZTE Geek 2
How to find and turn on a voice recorder on ZTE Geek 2
How to make video calls on ZTE Geek 2
ZTE Geek 2 sim card not detected
How to transfer contacts to ZTE Geek 2
How to enable/disable «Do not disturb» mode on ZTE Geek 2
How to enable/disable answerphone on ZTE Geek 2
How to set up face recognition on ZTE Geek 2
How to set up voicemail on ZTE Geek 2
How to listen to voicemail on ZTE Geek 2
How to check the IMEI number in ZTE Geek 2
How to turn on fast charging on ZTE Geek 2
How to replace the battery on ZTE Geek 2
How to update the application on ZTE Geek 2
Why the ZTE Geek 2 discharges quickly
How to set a password for apps in the ZTE Geek 2
How to format ZTE Geek 2
How to install TWRP on ZTE Geek 2
How to set up call forwarding on ZTE Geek 2
How to empty the recycle bin on ZTE Geek 2
Where to find the clipboard on ZTE Geek 2
Why Won't Turn On Another Phones
