How to Scan QR Code on Blackview P10000 Pro
A QR code is a type of barcode in the form of a square, which is used to transmit information. Nowadays, such codes have become extremely popular and have started to be used in all spheres of life. To get the information encrypted in this simple square, you need to scan a QR code on your phone. There are several ways of doing this, each of which will be discussed below.
Direct QR code scanning on Blackview P10000 Pro
Firstly, we should distinguish between direct scanning and the reading of information from a photo, which is a QR code. In the first case, we are talking about this type of scanning, when the image of the code is located on another object (for example, on a piece of paper or a stand). The second type of scanning is the decoding of information directly from the phone where the QR is located. We start by talking about direct scanning, as it is the most commonly used type.
Via the "Camera" app
It is highly likely that your phone already has a dedicated reader, which is available through the "Camera" app. However, this will depend on the firmware version. The more up-to-date it is, the higher the chance of finding the desired function. The scan in this case proceeds as follows:
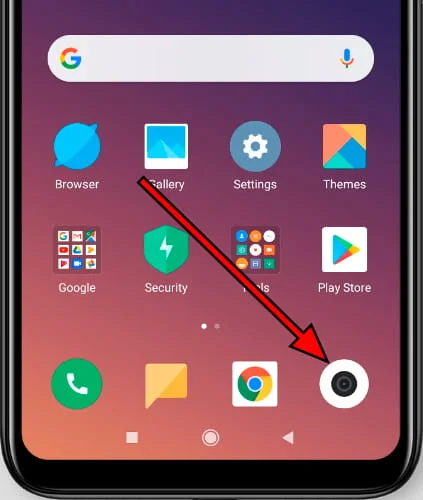
- Start the "Camera" application.
- Go to the QR code scanning section (may be located deep in the settings).
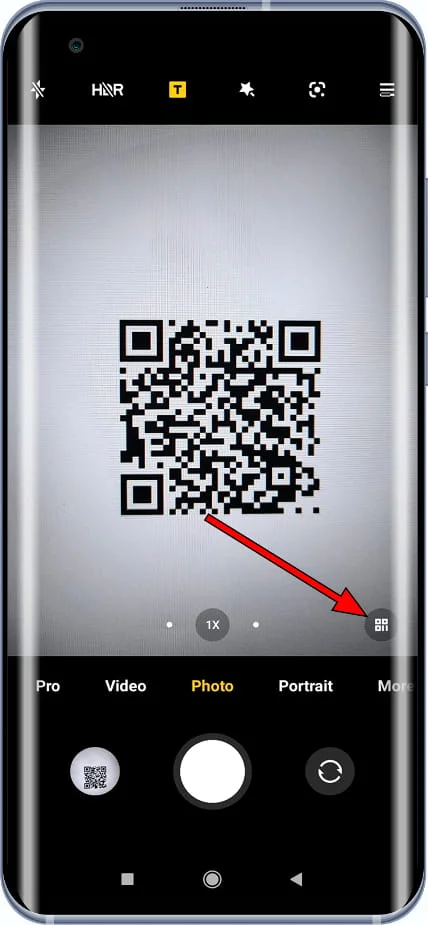
- Aim the viewfinder at the code until it fits into a virtual square.
- Press the shutter button.
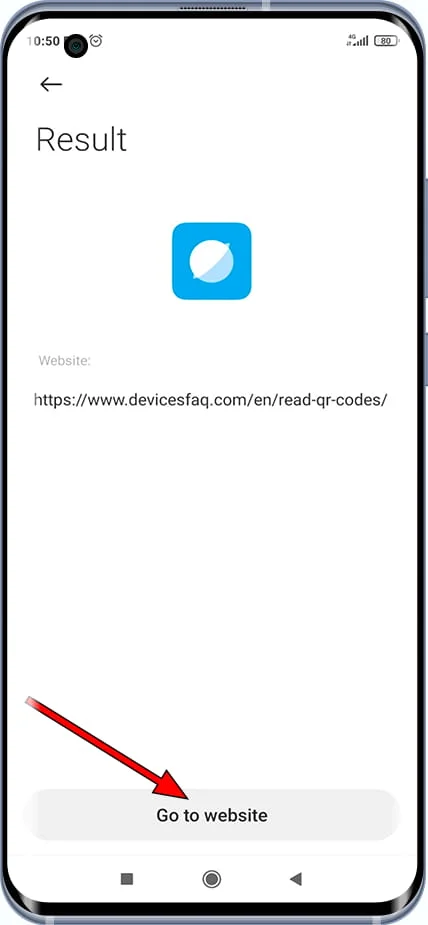
If you have followed all the instructions correctly, a QR code encrypted result will appear on the screen. This will be a link to a page on the internet or a short text.
Via Google Lens
The code reader is also integrated into the Google Lens app, available on Play Strore. It can be used in cases where Camera doesn't have the functionality we need. Google Lens is available by default on all Android smartphones, so you can run it on Blackview P10000 Pro without downloading additional software:
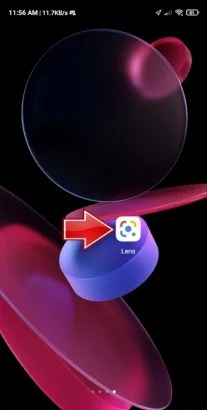
- Start the Camera app.
- Switch to the tab with Google Lens.
- Aim the camera at the square of the QR code.
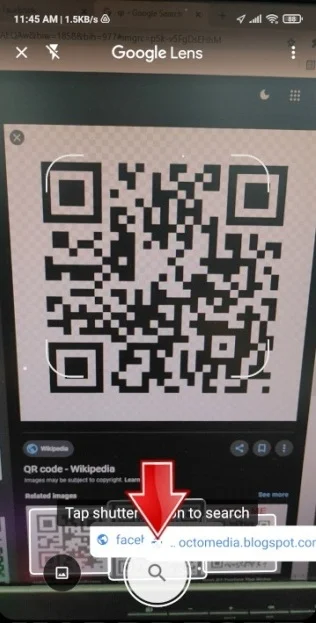
- Press the button in the form of a magnifying glass.
After completing the last step, you will be redirected to the page encrypted in the code, or you can read the author's registered text. The same awaits those who decrypt the QR through a separate Google Lens app.
Third-party software
The code reader functionality is not only available in the standard app or Google Lens. It is also found in third-party programs. For example, a code can be deciphered via the "QR & Barcode Scanner". The program is available for download from Play Store. After installing the additional software, all that remains is to follow the steps described above when considering "Camera" and Google Lens.
Scanning a QR code on Blackview P10000 Pro from a photo
If the code is not located on a separate object but saved on Blackview P10000 Pro as a photo or PDF file, you can also decrypt the information. To do this you will need:
- Highlight the snapshot (PDF file).
- Go to "Send".
- Select the read out application as the recipient.
- Confirm sending.
Choose your sending software carefully. If it is a QR-encrypted link, you can use the usual "Camera". If you need to pay for a product or service, it is better to send the file directly to the bank's app. It is also possible to upload a ready-made image for scanning in many programs.
Share this page with your friends:See also:
How to flash Blackview P10000 Pro
How to root Blackview P10000 Pro
Hard reset for Blackview P10000 Pro
How to reboot Blackview P10000 Pro
How to unlock Blackview P10000 Pro
What to do if Blackview P10000 Pro won't turn on
What to do if Blackview P10000 Pro doesn't charge
What to do if Blackview P10000 Pro doesn't connect to PC via USB
How to take a screenshot on Blackview P10000 Pro
How to reset FRP on Blackview P10000 Pro
How to call recording on Blackview P10000 Pro
How to update Blackview P10000 Pro
How to connect Blackview P10000 Pro to TV
How to clear the cache on Blackview P10000 Pro
How to backup Blackview P10000 Pro
How to disable ads on Blackview P10000 Pro
How to clear storage on Blackview P10000 Pro
How to increase font on Blackview P10000 Pro
How to share internet on Blackview P10000 Pro
How to transfer data to Blackview P10000 Pro
How to unlock bootloader on Blackview P10000 Pro
How to recover photos on Blackview P10000 Pro
How to record the screen on Blackview P10000 Pro
How to find blacklist in Blackview P10000 Pro
How to set up fingerprint on Blackview P10000 Pro
How to block number on Blackview P10000 Pro
How to enable auto-rotate on Blackview P10000 Pro
How to set up or turn off an alarm on Blackview P10000 Pro
How to change ringtone on Blackview P10000 Pro
How to enable battery percentage on Blackview P10000 Pro
How to turn off notifications on Blackview P10000 Pro
How to turn off Google assistant on Blackview P10000 Pro
How to turn off the lock screen on Blackview P10000 Pro
How to delete app on Blackview P10000 Pro
How to recover contacts on Blackview P10000 Pro
Where is the recycle bin on Blackview P10000 Pro
How to install WhatsApp on Blackview P10000 Pro
How to set contact photo in Blackview P10000 Pro
How to connect Blackview P10000 Pro to computer
How to install SD card in Blackview P10000 Pro
How to update Play Store in Blackview P10000 Pro
How to install Google Camera in Blackview P10000 Pro
How to enable USB debugging on Blackview P10000 Pro
How to turn off Blackview P10000 Pro
How to charge Blackview P10000 Pro
How to use the camera on Blackview P10000 Pro
How to find lost Blackview P10000 Pro
How to set password on Blackview P10000 Pro
How to turn on 5g on Blackview P10000 Pro
How to turn on VPN on Blackview P10000 Pro
How to install apps on Blackview P10000 Pro
How to insert a SIM card in Blackview P10000 Pro
How to enable and configure NFC on Blackview P10000 Pro
How to set time on Blackview P10000 Pro
How to connect headphones to Blackview P10000 Pro
How to clear browser history on Blackview P10000 Pro
How to disassemble Blackview P10000 Pro
How to hide an app on Blackview P10000 Pro
How to download YouTube videos on Blackview P10000 Pro
How to unblock a contact on Blackview P10000 Pro
How to turn on the flashlight on Blackview P10000 Pro
How to split the screen on Blackview P10000 Pro
How to turn off the camera sound on Blackview P10000 Pro
How to trim video on Blackview P10000 Pro
How to check RAM in Blackview P10000 Pro
How to bypass the Google account on Blackview P10000 Pro
How to fix black screen on Blackview P10000 Pro
How to change the language on Blackview P10000 Pro
How to open engineering mode in Blackview P10000 Pro
How to open recovery mode in Blackview P10000 Pro
How to find and turn on a voice recorder on Blackview P10000 Pro
How to make video calls on Blackview P10000 Pro
Blackview P10000 Pro sim card not detected
How to transfer contacts to Blackview P10000 Pro
How to enable/disable «Do not disturb» mode on Blackview P10000 Pro
How to enable/disable answerphone on Blackview P10000 Pro
How to set up face recognition on Blackview P10000 Pro
How to set up voicemail on Blackview P10000 Pro
How to listen to voicemail on Blackview P10000 Pro
How to check the IMEI number in Blackview P10000 Pro
How to turn on fast charging on Blackview P10000 Pro
How to replace the battery on Blackview P10000 Pro
How to update the application on Blackview P10000 Pro
Why the Blackview P10000 Pro discharges quickly
How to set a password for apps in the Blackview P10000 Pro
How to format Blackview P10000 Pro
How to install TWRP on Blackview P10000 Pro
How to set up call forwarding on Blackview P10000 Pro
How to empty the recycle bin on Blackview P10000 Pro
Where to find the clipboard on Blackview P10000 Pro
How to Scan QR Code on Another Phones
