How to enable call recording on DNS S5701
Despite the large number of additional features, modern smartphones continue to be used for making calls. And often users need to record a call on DNS S5701. This will allow the device owner to present the MP3 file of the call as a weighty argument in the dispute, as well as simply to clarify individual details of the call.
There are several ways to record calls on DNS S5701. The choice of a particular option depends on the firmware version and other factors that affect the functionality of the device. It is recommended to study all the ways of recording a call at once to choose the most convenient one.
How to record a call on DNS S5701 using built-in tools
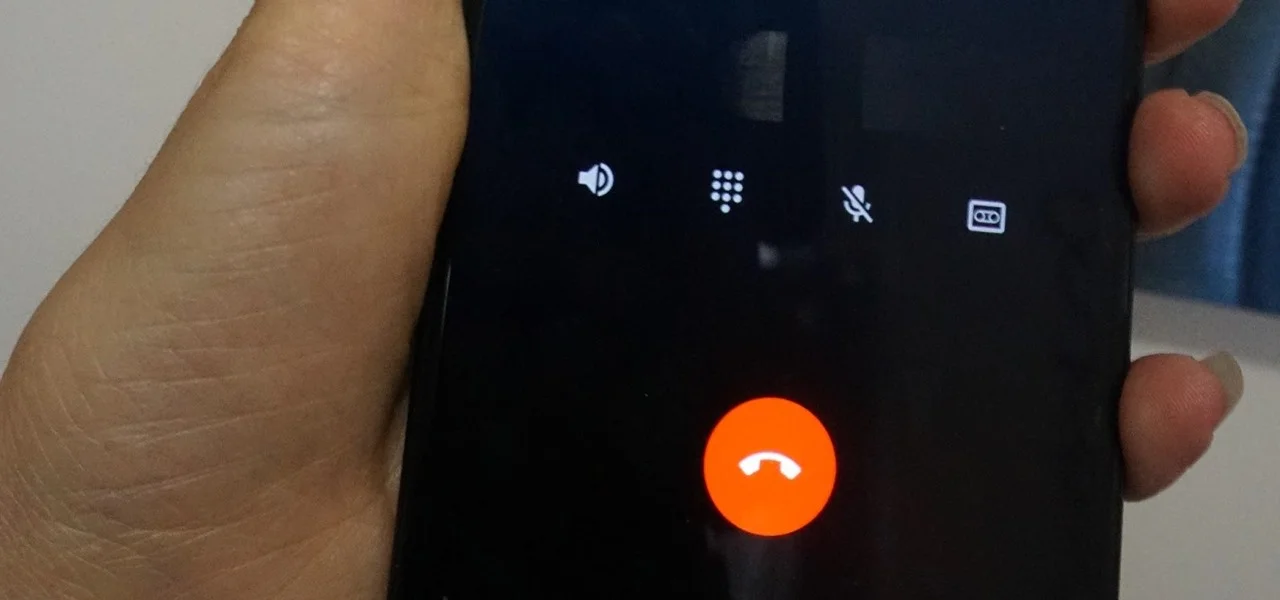
DNS S5701, like any other smartphone on Android, has everything you need to record a call without the use of auxiliary tools. To perform the operation, you will need to call a subscriber or answer an incoming call. After that, the call menu will appear on the device’s screen.
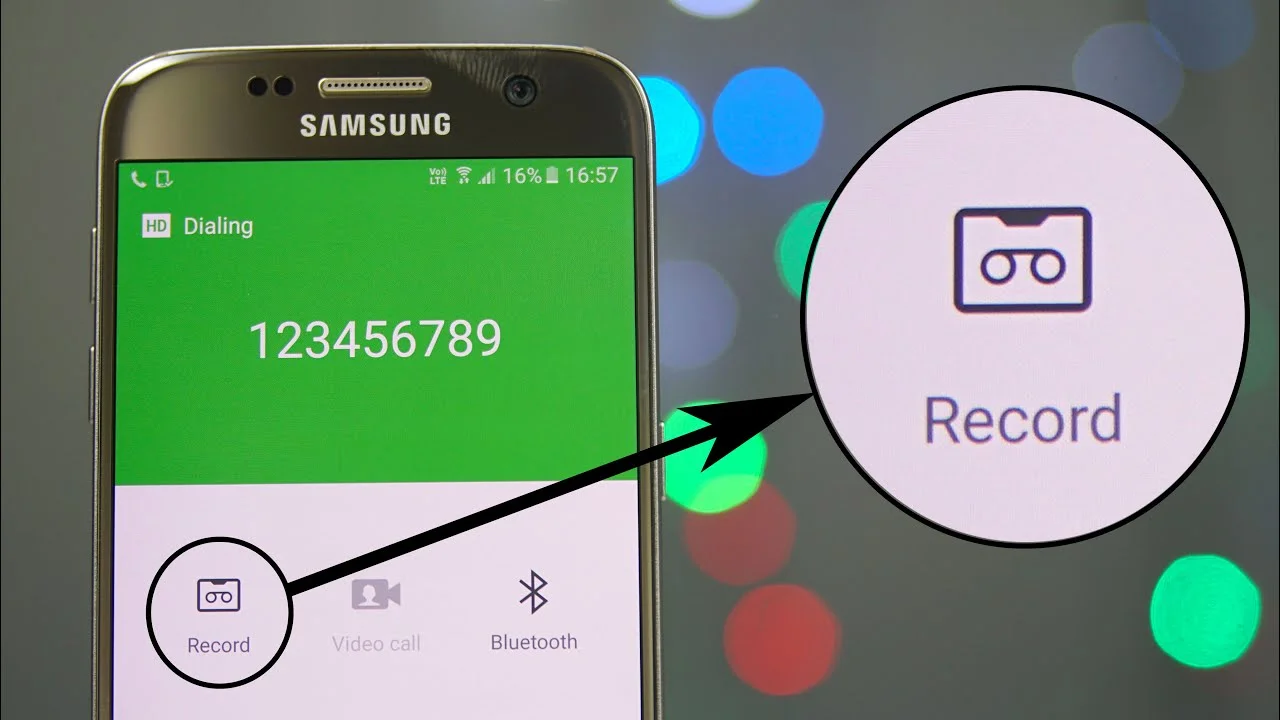
Here you need to click the "Record" button so that it is highlighted. This will be a direct indication that the call is being recorded. And it does not matter whether the person is talking through a conversational or multimedia speaker. In any case, recording is done at the system level.
Please note that the "Recording" button is not always displayed on the main screen of the call menu. Often it has to be activated through the additional menu which calls "More". Therefore, it is recommended to check all the settings of the standard dialer.
Call recording via third-party apps
Despite the fact that each subsequent version of the firmware carries a lot of new features, after the update, some smartphones work unstable. This happens when the user ignores the preparatory stage.
It happens that the phone DNS S5701 pre-installed application for making calls does not have the function of audio recording. This happens from time to time and depends on the specific firmware version. In this situation, you can bypass the restriction by installing third-party software. For example, CallRec:
- Open the Google Play App Store.
- Use the search bar to find CallRec and click Install.
- After installation, run the program and agree to the terms of use.
- Go to the "Recording rules" section and configure the settings for recording.
- After performing the specified actions, all calls will be automatically recorded. At the end of the conversation, you only need to agree or refuse to save the call.
How to find and play a recorded conversation
After the user manages to make a recording on DNS S5701, the question arises about further listening to the call. To do this, you will need to find a fixed call.
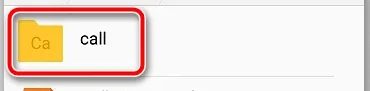
If the recording of phone conversations was made by the built-in tools of DNS S5701, you need to open the file explorer and move to the "Recorder" folder.
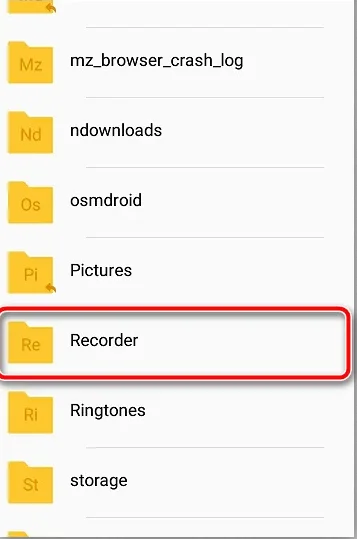
The next step is to open the "Call" directory, where any recording of conversations made through a standard dialer automatically goes.
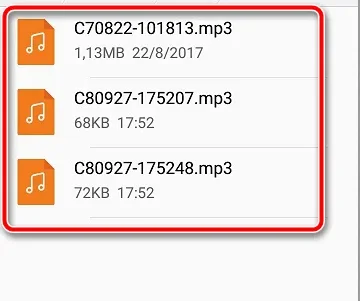
In this folder, you can see a list of MP3 files, named in any order. Sometimes the date of the record is used as the name. To play a recorded call, open the corresponding file.
In addition, you can also find the recording file through the standard Music app. Along with the songs saved in the memory of DNS S5701, the recorded calls will be displayed here.
If there are no recordings of conversations in the audio player, it means that the Music app settings have restrictions on the length or size of automatically added tracks. The settings can be changed, after which the MP3 files of the recording will be displayed. In addition, you can use any third-party audio player from Google Play to listen to the call.
Finally, in a situation where the CallRec application was used to record a call on DNS S5701, you need to search for the call file in the program itself. To do this, open it and move in through following menus: "All", "Incoming", "Outgoing" or "Favorites". It depends on the call type.
If you use other software to fix the call, you should check the location of the files with the developer. But most often, the records automatically get into the interface of a third-party program or they are located in its folder located in the internal storage of the smartphone.
Share this page with your friends:See also:
How to flash DNS S5701
How to root DNS S5701
Hard reset for DNS S5701
How to reboot DNS S5701
How to unlock DNS S5701
What to do if DNS S5701 won't turn on
What to do if DNS S5701 doesn't charge
What to do if DNS S5701 doesn't connect to PC via USB
How to take a screenshot on DNS S5701
How to reset FRP on DNS S5701
How to update DNS S5701
How to connect DNS S5701 to TV
How to clear the cache on DNS S5701
How to backup DNS S5701
How to disable ads on DNS S5701
How to clear storage on DNS S5701
How to increase font on DNS S5701
How to share internet on DNS S5701
How to transfer data to DNS S5701
How to unlock bootloader on DNS S5701
How to recover photos on DNS S5701
How to record the screen on DNS S5701
How to find blacklist in DNS S5701
How to set up fingerprint on DNS S5701
How to block number on DNS S5701
How to enable auto-rotate on DNS S5701
How to set up or turn off an alarm on DNS S5701
How to change ringtone on DNS S5701
How to enable battery percentage on DNS S5701
How to turn off notifications on DNS S5701
How to turn off Google assistant on DNS S5701
How to turn off the lock screen on DNS S5701
How to delete app on DNS S5701
How to recover contacts on DNS S5701
Where is the recycle bin on DNS S5701
How to install WhatsApp on DNS S5701
How to set contact photo in DNS S5701
How to scan QR code on DNS S5701
How to connect DNS S5701 to computer
How to install SD card in DNS S5701
How to update Play Store in DNS S5701
How to install Google Camera in DNS S5701
How to enable USB debugging on DNS S5701
How to turn off DNS S5701
How to charge DNS S5701
How to use the camera on DNS S5701
How to find lost DNS S5701
How to set password on DNS S5701
How to turn on 5g on DNS S5701
How to turn on VPN on DNS S5701
How to install apps on DNS S5701
How to insert a SIM card in DNS S5701
How to enable and configure NFC on DNS S5701
How to set time on DNS S5701
How to connect headphones to DNS S5701
How to clear browser history on DNS S5701
How to disassemble DNS S5701
How to hide an app on DNS S5701
How to download YouTube videos on DNS S5701
How to unblock a contact on DNS S5701
How to turn on the flashlight on DNS S5701
How to split the screen on DNS S5701
How to turn off the camera sound on DNS S5701
How to trim video on DNS S5701
How to check RAM in DNS S5701
How to bypass the Google account on DNS S5701
How to fix black screen on DNS S5701
How to change the language on DNS S5701
How to open engineering mode in DNS S5701
How to open recovery mode in DNS S5701
How to find and turn on a voice recorder on DNS S5701
How to make video calls on DNS S5701
DNS S5701 sim card not detected
How to transfer contacts to DNS S5701
How to enable/disable «Do not disturb» mode on DNS S5701
How to enable/disable answerphone on DNS S5701
How to set up face recognition on DNS S5701
How to set up voicemail on DNS S5701
How to listen to voicemail on DNS S5701
How to check the IMEI number in DNS S5701
How to turn on fast charging on DNS S5701
How to replace the battery on DNS S5701
How to update the application on DNS S5701
Why the DNS S5701 discharges quickly
How to set a password for apps in the DNS S5701
How to format DNS S5701
How to install TWRP on DNS S5701
How to set up call forwarding on DNS S5701
How to empty the recycle bin on DNS S5701
Where to find the clipboard on DNS S5701
How to Call Recording Another Phones
