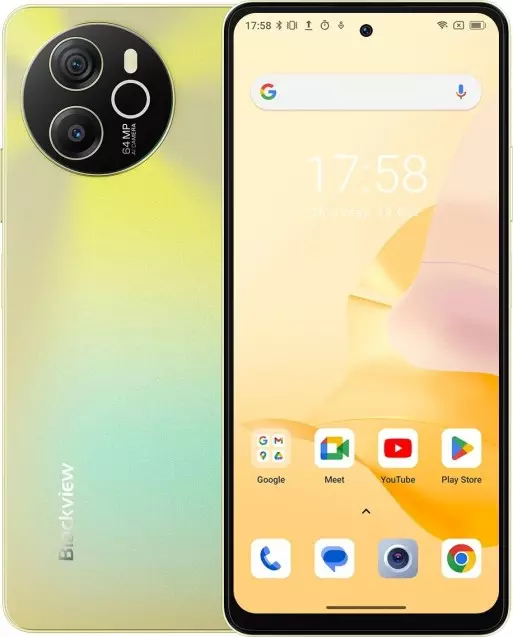
How to Set Up Voicemail on Blackview Shark 8
Voicemail — an answering machine in smartphones. It is free and enabled by default for modern devices. But the basic functions are not suitable for many people — it is important to set up voice mail correctly on Blackview Shark 8.
A vivid example — a person has two SIM cards of different operators installed in a smartphone. With basic settings, mail will work only on the first SIM card, ignoring the second one. And there are many similar cases of incorrect or incomplete work: a different number is specified, the wrong answer is selected, notifications do not come.
Setup in a standard application
Each smartphone manufacturer creates its own applications for making calls. But the instruction is suitable for 99% of devices — the software is standardized: the same buttons, names and paths are used.
To change the basic functions:
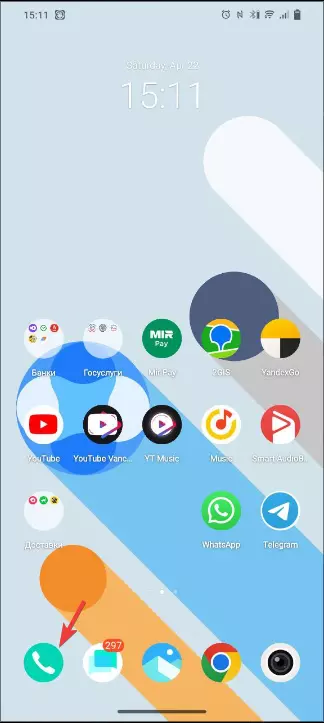
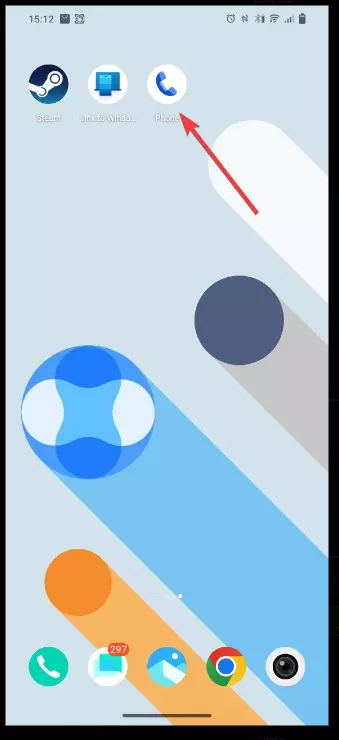
- Go to in "Calls" (the icon in the form of a handset).
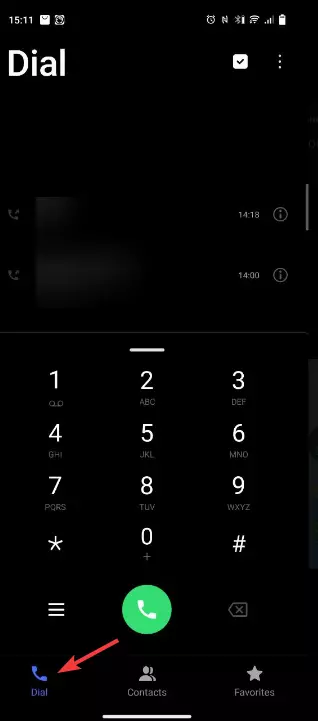
- Check that the section is "Dialing" (Not "Contacts" and not "Favorites").
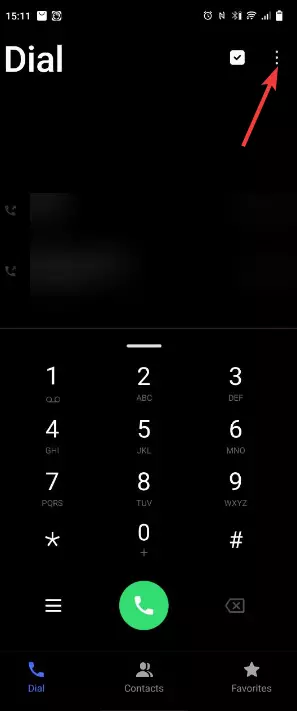
- Click on the three dots in the upper right corner.
- Click "Call Settings".
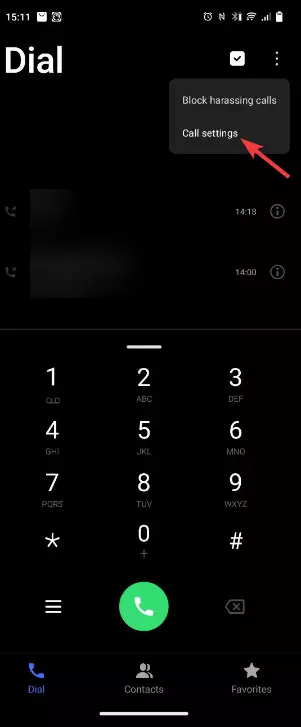
- Swipe to the bottom and click "Voice mail".

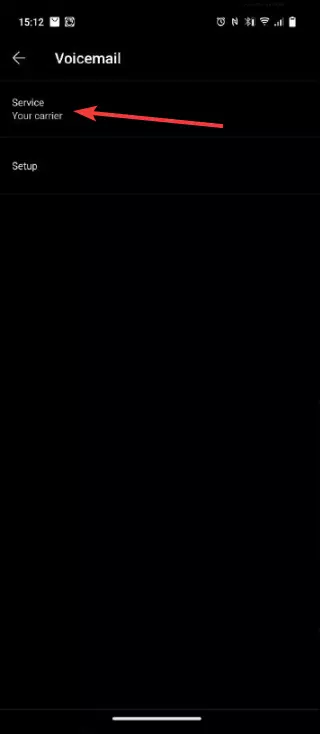
There are two menus available here:
- Service. By default, it will be "Your telecom operator". But you can contact third-party companies and set up mail through them.
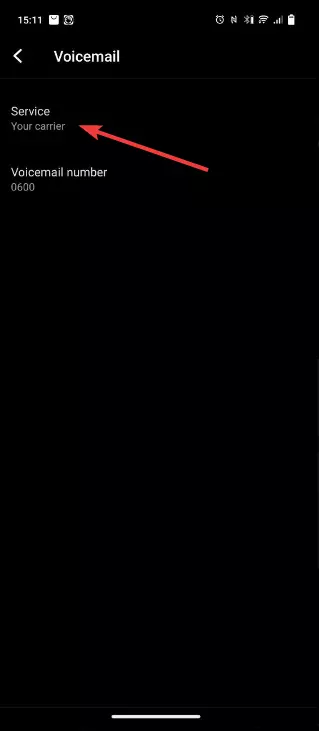
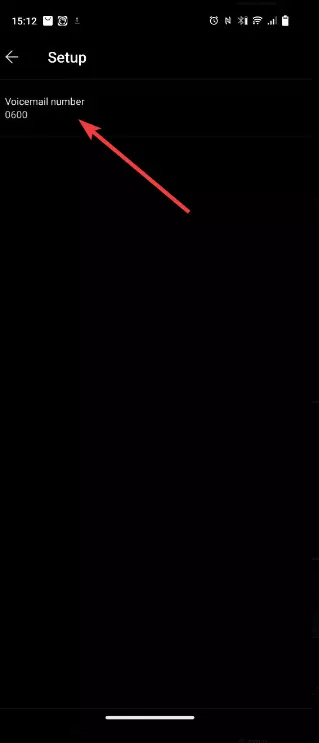
- Number. It changes at any moment, but it is better not to do this. The reason — past calls will be saved to the old address and will not be transferred to the new one.
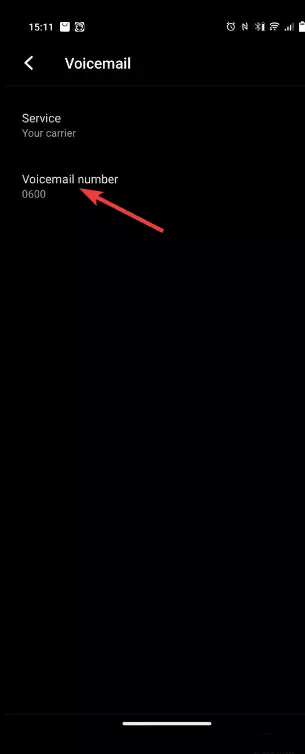 To change it:
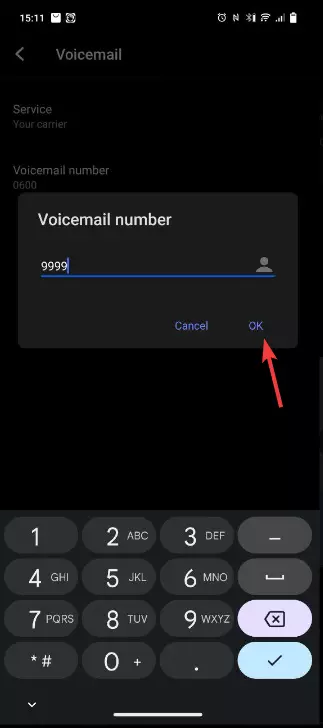
- Click on the "Voicemail number".
- Enter any numbers you like.
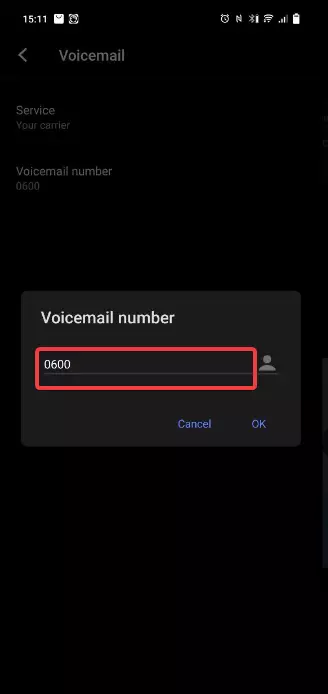
- Click "OK".
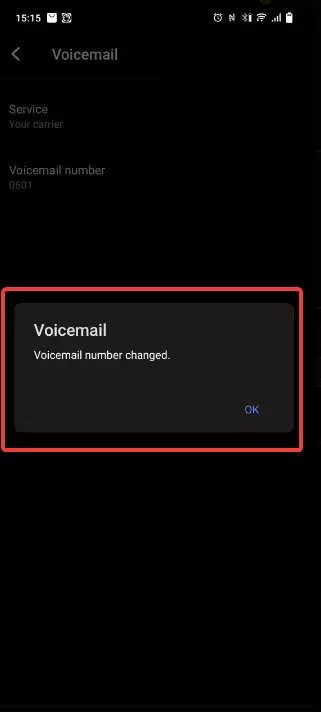
- The change is successful — the message "The number has been changed" will appear.
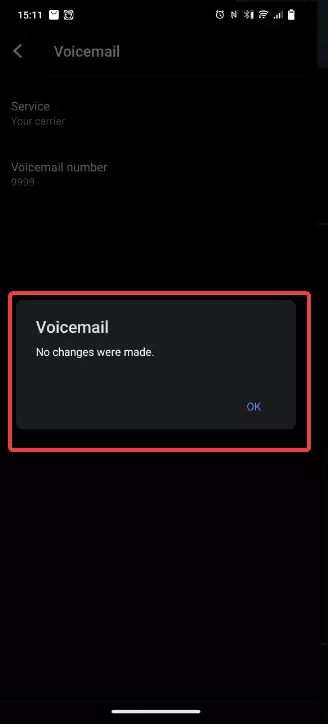
- The change has not been made — "The number has not been changed".
Setting up voicemail via "Phone" from Google
Many users abandon the standard application created by the smartphone manufacturer in favor of a "Phone" from Google — the developer of the Android OS. There are several reasons:
- works faster;
- works without extra "interlayers";
- optimized for Android as much as possible.
In the software, can change the voice mail, and there will be more opportunities:
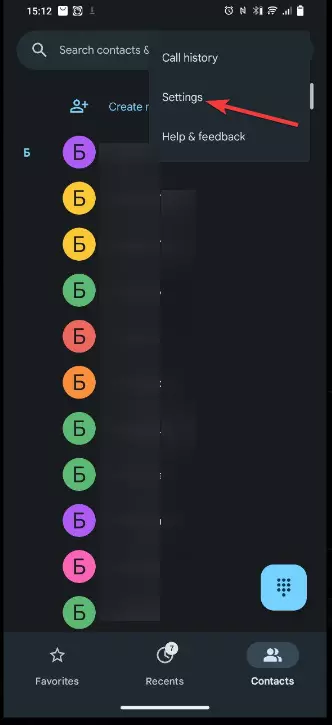
- Open the "Phone".
- Click on the three dots in the upper right corner.

- Go to in "Settings".
- "Voice mail".
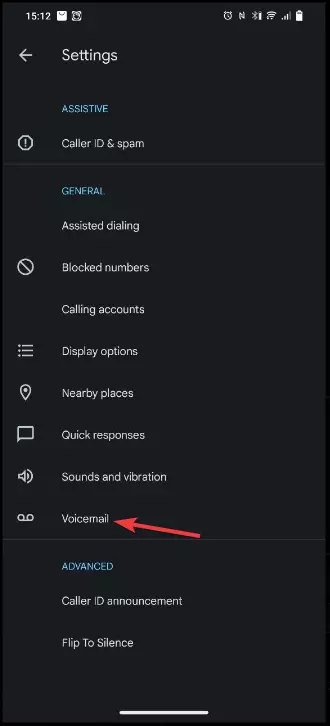
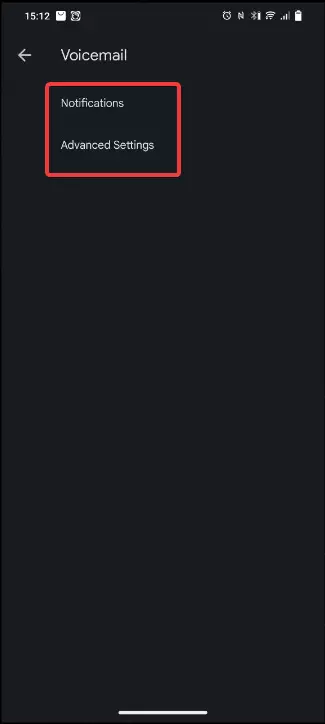
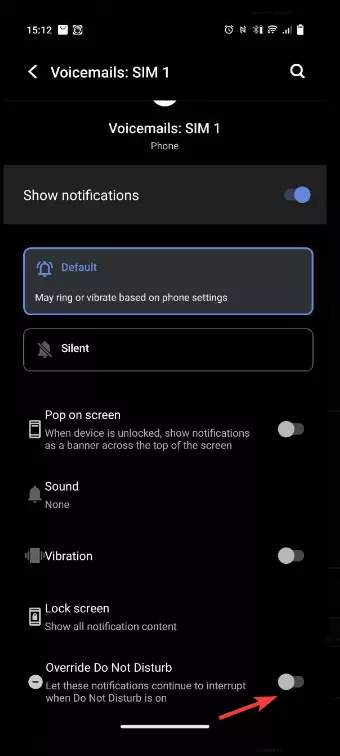
- Two menus are used for management — "Extended Settings" and "Notifications".
In the first menu:
- Enable notifications about incoming calls — turn on the toggle switch next to "Enable notifications".
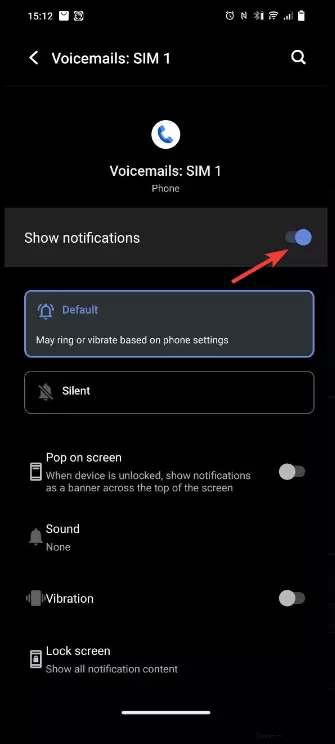
- Select the operating mode — "Default" and "Without sound".
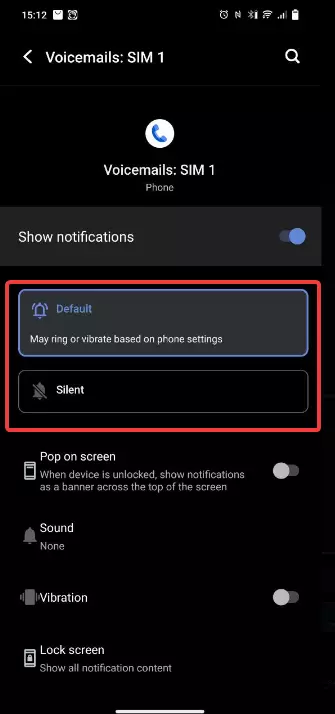
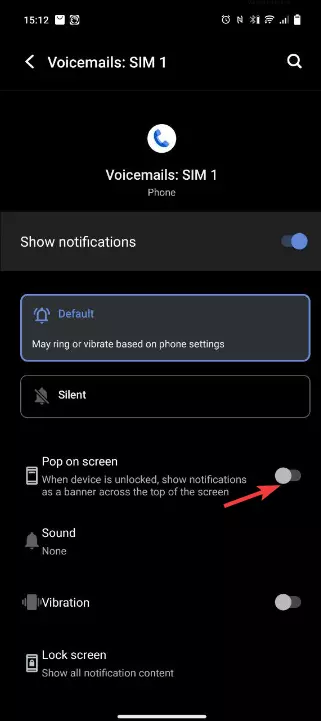
- The "Pop-up window" function will display an alert at the top of the screen.
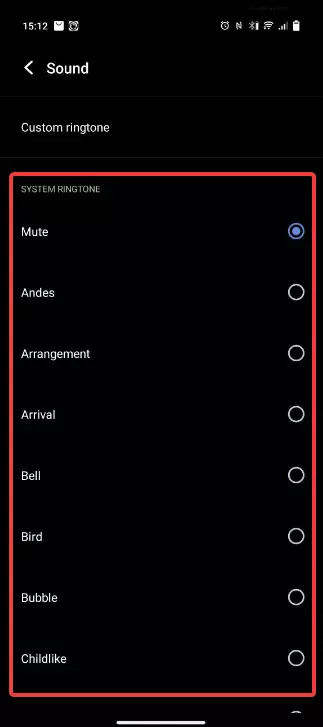
- In the "Sound" section, specify the sound played when the message appears.
- The toggle switch opposite the "Vibration" enables or disables vibration.

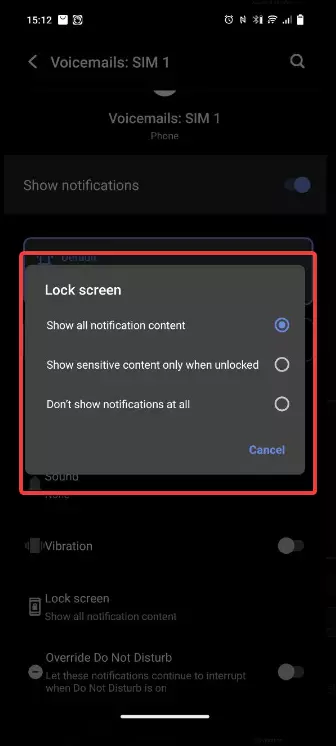
- The "Lock screen" allows you to select the mode of displaying alerts that are displayed without logging in.
- "Notifications in the "Do not disturb" mode allows notifications to come even in the "Do not disturb" mode.
There are two items available in "Extended Settings":
- Service. It is no different from the standard application.
- The algorithm for changing the number is identical to the standard application.
See also:
How to flash Blackview Shark 8
How to root Blackview Shark 8
Hard reset for Blackview Shark 8
How to reboot Blackview Shark 8
How to unlock Blackview Shark 8
What to do if Blackview Shark 8 won't turn on
What to do if Blackview Shark 8 doesn't charge
What to do if Blackview Shark 8 doesn't connect to PC via USB
How to take a screenshot on Blackview Shark 8
How to reset FRP on Blackview Shark 8
How to call recording on Blackview Shark 8
How to update Blackview Shark 8
How to connect Blackview Shark 8 to TV
How to clear the cache on Blackview Shark 8
How to backup Blackview Shark 8
How to disable ads on Blackview Shark 8
How to clear storage on Blackview Shark 8
How to increase font on Blackview Shark 8
How to share internet on Blackview Shark 8
How to transfer data to Blackview Shark 8
How to unlock bootloader on Blackview Shark 8
How to recover photos on Blackview Shark 8
How to record the screen on Blackview Shark 8
How to find blacklist in Blackview Shark 8
How to set up fingerprint on Blackview Shark 8
How to block number on Blackview Shark 8
How to enable auto-rotate on Blackview Shark 8
How to set up or turn off an alarm on Blackview Shark 8
How to change ringtone on Blackview Shark 8
How to enable battery percentage on Blackview Shark 8
How to turn off notifications on Blackview Shark 8
How to turn off Google assistant on Blackview Shark 8
How to turn off the lock screen on Blackview Shark 8
How to delete app on Blackview Shark 8
How to recover contacts on Blackview Shark 8
Where is the recycle bin on Blackview Shark 8
How to install WhatsApp on Blackview Shark 8
How to set contact photo in Blackview Shark 8
How to scan QR code on Blackview Shark 8
How to connect Blackview Shark 8 to computer
How to install SD card in Blackview Shark 8
How to update Play Store in Blackview Shark 8
How to install Google Camera in Blackview Shark 8
How to enable USB debugging on Blackview Shark 8
How to turn off Blackview Shark 8
How to charge Blackview Shark 8
How to use the camera on Blackview Shark 8
How to find lost Blackview Shark 8
How to set password on Blackview Shark 8
How to turn on 5g on Blackview Shark 8
How to turn on VPN on Blackview Shark 8
How to install apps on Blackview Shark 8
How to insert a SIM card in Blackview Shark 8
How to enable and configure NFC on Blackview Shark 8
How to set time on Blackview Shark 8
How to connect headphones to Blackview Shark 8
How to clear browser history on Blackview Shark 8
How to disassemble Blackview Shark 8
How to hide an app on Blackview Shark 8
How to download YouTube videos on Blackview Shark 8
How to unblock a contact on Blackview Shark 8
How to turn on the flashlight on Blackview Shark 8
How to split the screen on Blackview Shark 8
How to turn off the camera sound on Blackview Shark 8
How to trim video on Blackview Shark 8
How to bypass the Google account on Blackview Shark 8
How to fix black screen on Blackview Shark 8
How to change the language on Blackview Shark 8
How to open engineering mode in Blackview Shark 8
How to open recovery mode in Blackview Shark 8
How to find and turn on a voice recorder on Blackview Shark 8
How to make video calls on Blackview Shark 8
Blackview Shark 8 sim card not detected
How to transfer contacts to Blackview Shark 8
How to enable/disable «Do not disturb» mode on Blackview Shark 8
How to enable/disable answerphone on Blackview Shark 8
How to set up face recognition on Blackview Shark 8
How to listen to voicemail on Blackview Shark 8
How to check the IMEI number in Blackview Shark 8
How to turn on fast charging on Blackview Shark 8
How to replace the battery on Blackview Shark 8
How to update the application on Blackview Shark 8
Why the Blackview Shark 8 discharges quickly
How to set a password for apps in the Blackview Shark 8
How to format Blackview Shark 8
How to install TWRP on Blackview Shark 8
How to set up call forwarding on Blackview Shark 8
How to empty the recycle bin on Blackview Shark 8
Where to find the clipboard on Blackview Shark 8
How to Set Up Voicemail on Another Phones
