How to Set Time on Vivo NEX 2
Any smartphone is a multifunctional device, which is also used to display time. The owner of the device can spot the watch on the desktop, lock screen and status bar. However, the time may not be set correctly, and then you will have to manually configure it on Vivo NEX 2.
How to set up date and time on Android
You can set time on Vivo NEX 2 using the settings menu. You can easily find this menu item by following the instructions:
- Open your phone settings.
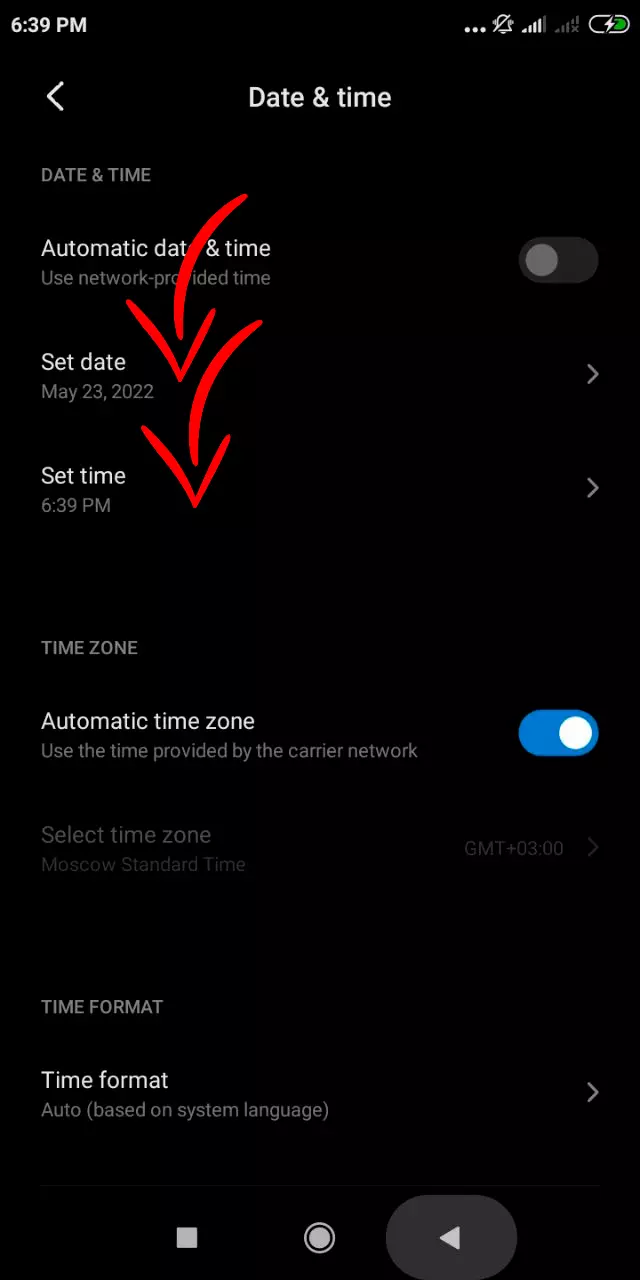
- Go to Additional settings and then to Date and Time.
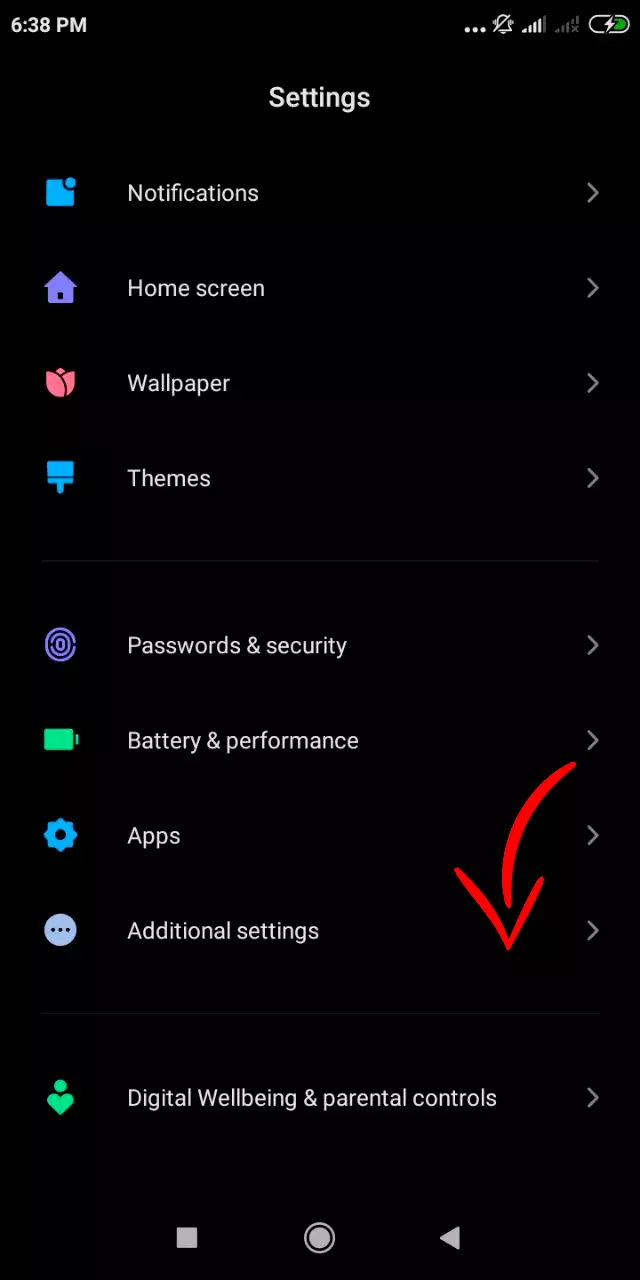
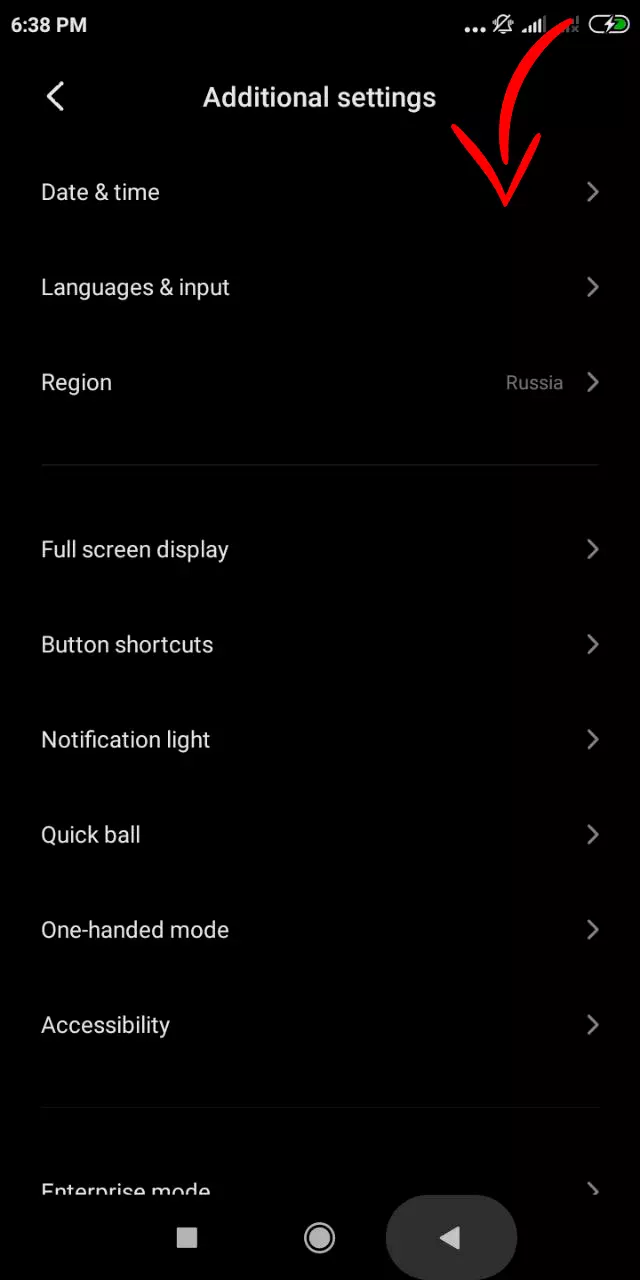
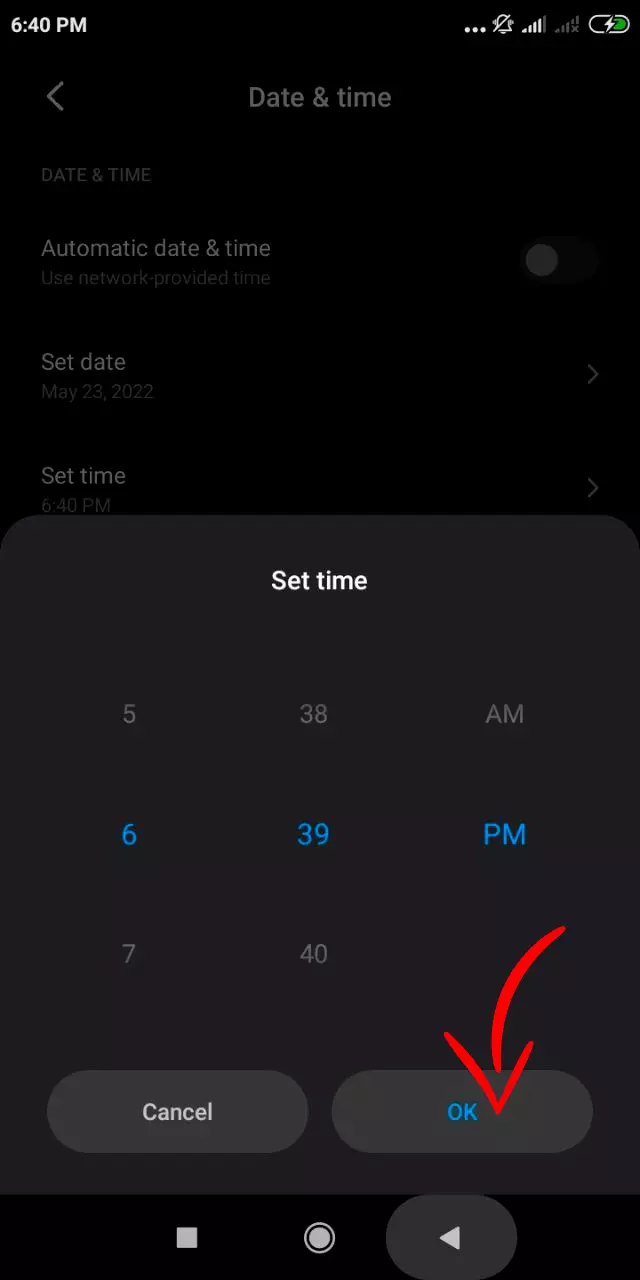
- Click the Set Time tab and set the correct values. You can also change the date values in the Set Date tab.
In addition, depending on the Android version, the Clock application may be preinstalled on Vivo NEX 2. Like the device settings, it is suitable for changing date and time settings:
- Launch the Clock application.
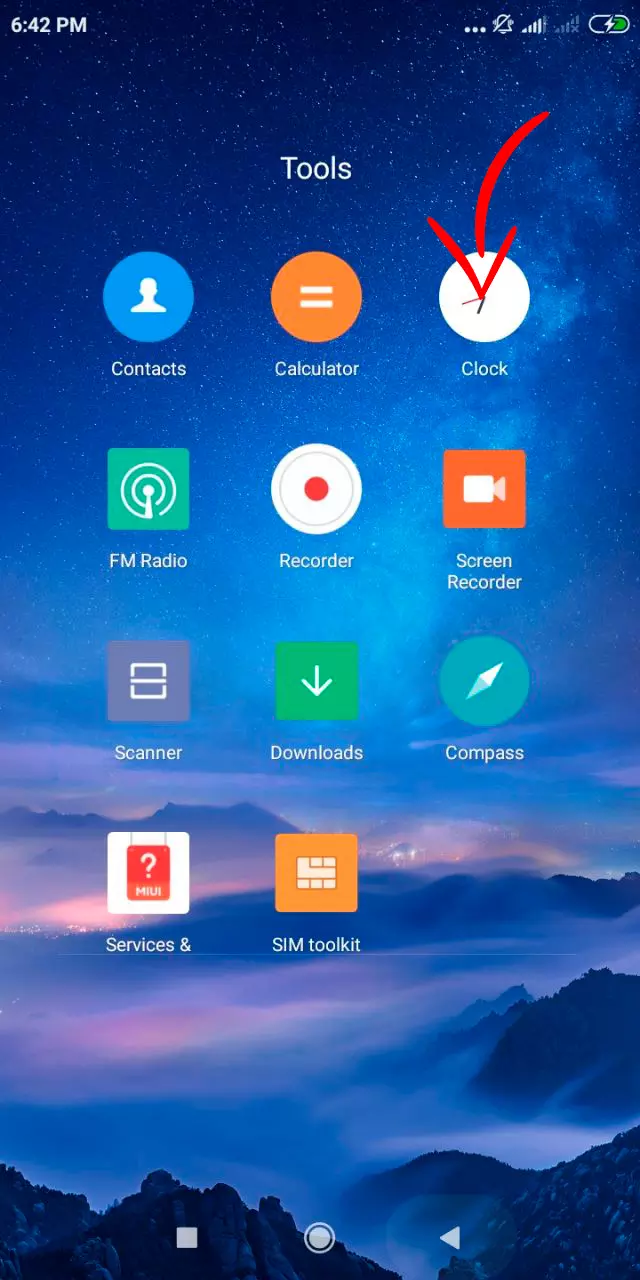
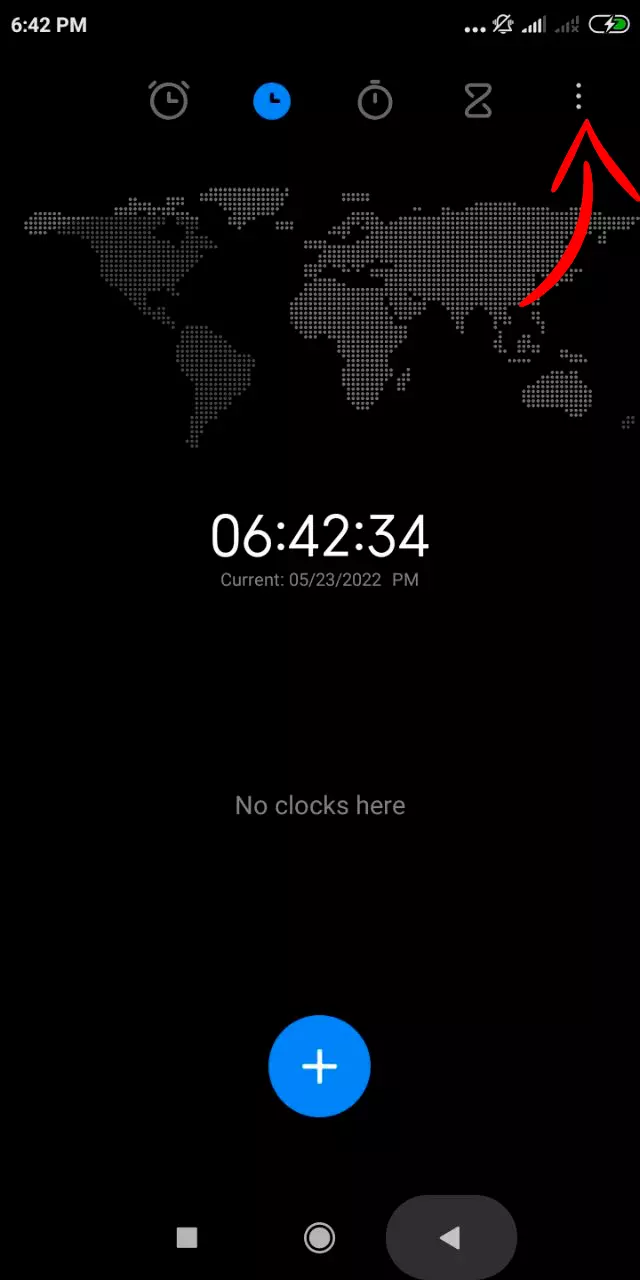
- Click the three-point button.
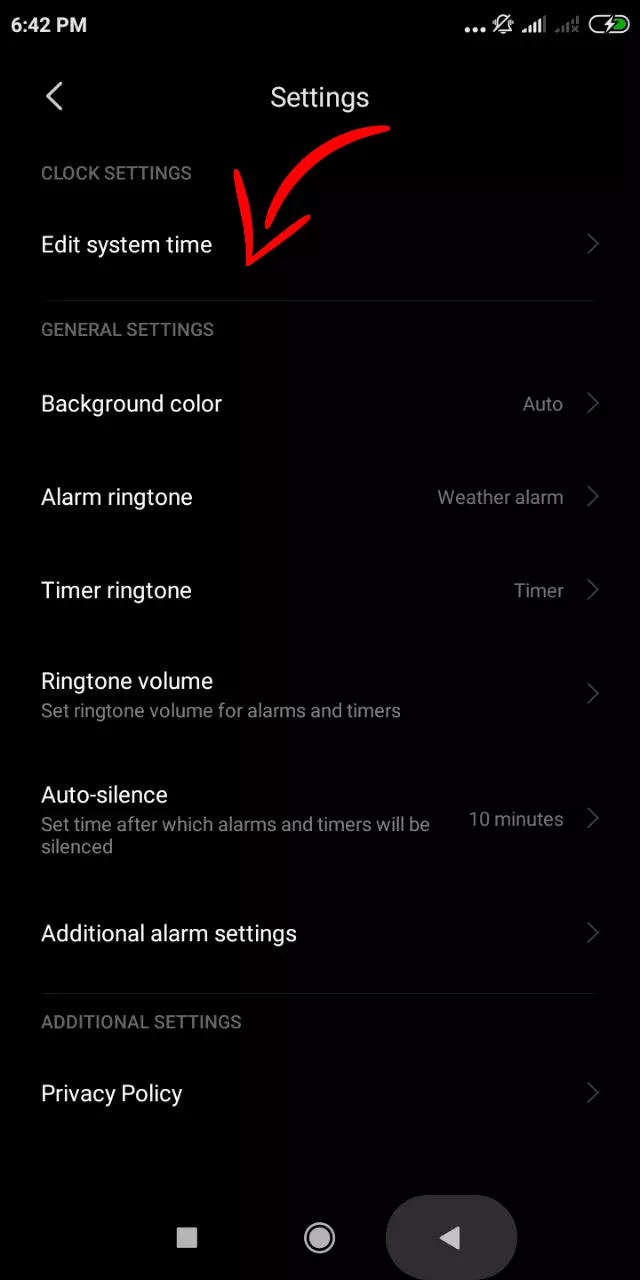
- Click Edit system time.
- Set new time parameters.
The values you specify are saved automatically. The set time will be displayed in the status bar and in all places where the clock is set.
Advanced Date and Time Settings
In addition to date and time values, you can change other settings that indirectly affect these parameters. In particular, this applies to the format of the date and hours, as well as the choice of the time zone. However, the main parameter to look out for will be automatic date and time. By activating this option, you will avoid problems with incorrect date and time values.
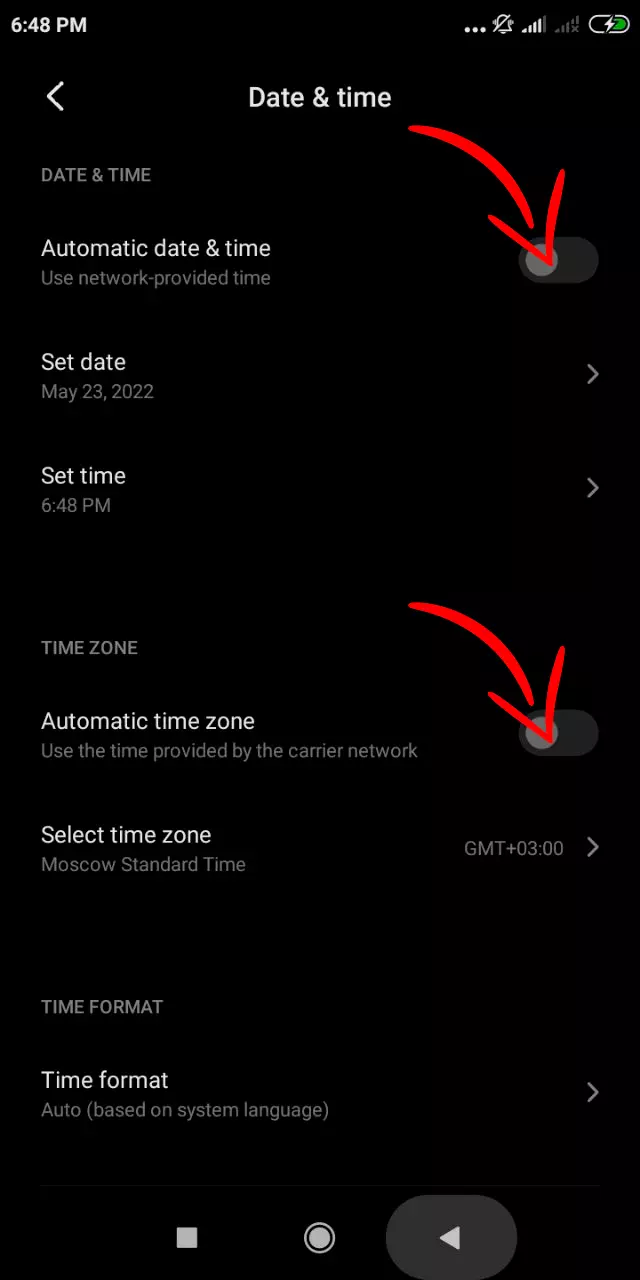
At the same time, the opposite cases are known when, after automatic time setting, the clock begins to lag by several hours. This is caused by an incorrect time zone definition or an operating system failure. This problem is solved by manually setting the time according to the instructions from the previous paragraph.
Installing the clock widget on the home screen
Speaking of date and time, it is worth mentioning the ability to install the clock widget on the main screen so that you can always see the current time. You can install the time widget on the phone desktop using the following instructions
- Hold your finger on the free area of the main screen.
- Click the Widgets tab.
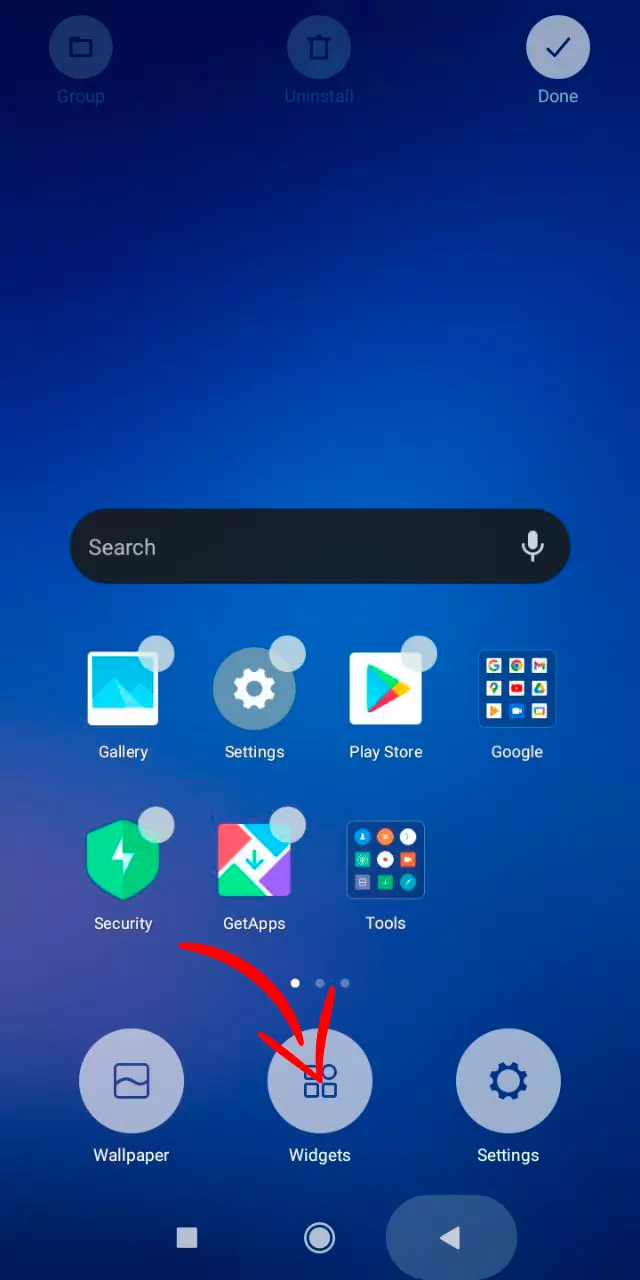
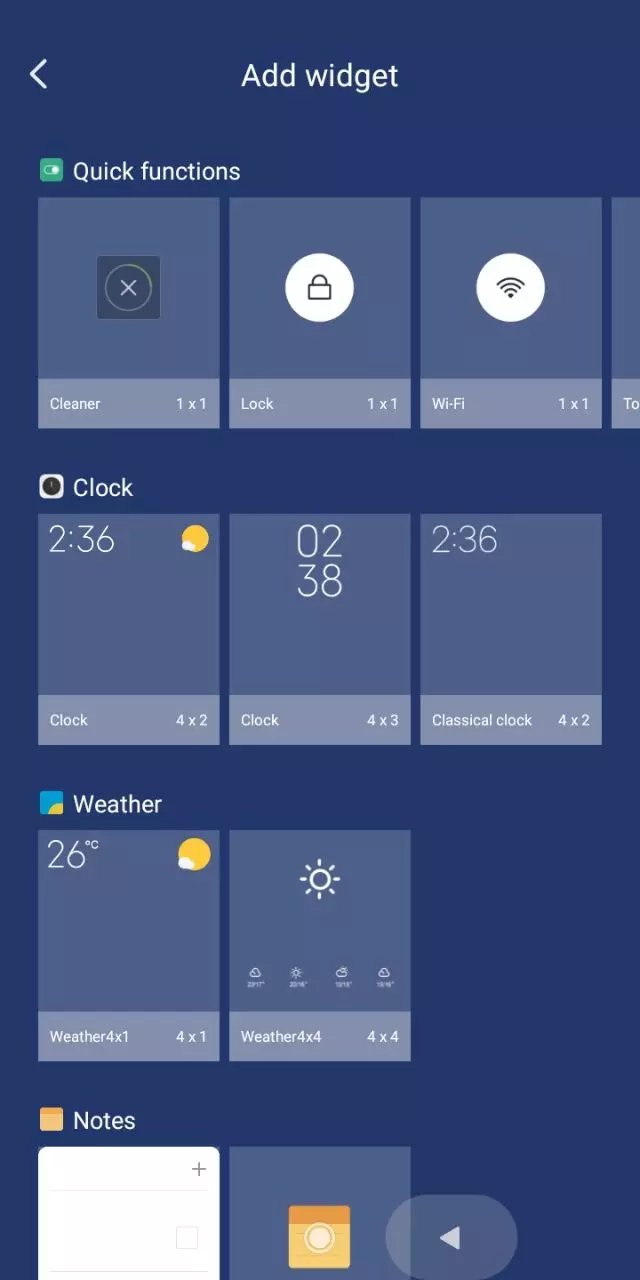
- Place the widget.
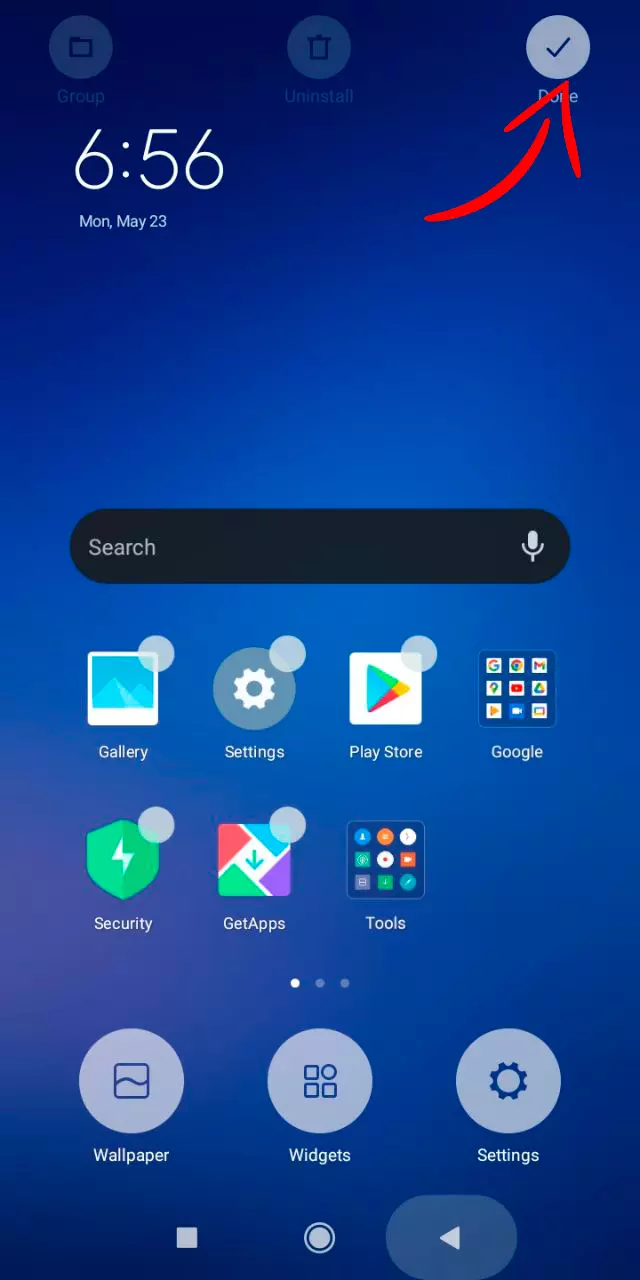
The clock will be displayed not only on the status bar, but also on the main screen. If you need to change the time settings in the future, you can go to them by tapping on the widget.
Share this page with your friends:See also:
How to flash Vivo NEX 2
How to root Vivo NEX 2
Hard reset for Vivo NEX 2
How to reboot Vivo NEX 2
How to unlock Vivo NEX 2
What to do if Vivo NEX 2 won't turn on
What to do if Vivo NEX 2 doesn't charge
What to do if Vivo NEX 2 doesn't connect to PC via USB
How to take a screenshot on Vivo NEX 2
How to reset FRP on Vivo NEX 2
How to call recording on Vivo NEX 2
How to update Vivo NEX 2
How to connect Vivo NEX 2 to TV
How to clear the cache on Vivo NEX 2
How to backup Vivo NEX 2
How to disable ads on Vivo NEX 2
How to clear storage on Vivo NEX 2
How to increase font on Vivo NEX 2
How to share internet on Vivo NEX 2
How to transfer data to Vivo NEX 2
How to unlock bootloader on Vivo NEX 2
How to recover photos on Vivo NEX 2
How to record the screen on Vivo NEX 2
How to find blacklist in Vivo NEX 2
How to set up fingerprint on Vivo NEX 2
How to block number on Vivo NEX 2
How to enable auto-rotate on Vivo NEX 2
How to set up or turn off an alarm on Vivo NEX 2
How to change ringtone on Vivo NEX 2
How to enable battery percentage on Vivo NEX 2
How to turn off notifications on Vivo NEX 2
How to turn off Google assistant on Vivo NEX 2
How to turn off the lock screen on Vivo NEX 2
How to delete app on Vivo NEX 2
How to recover contacts on Vivo NEX 2
Where is the recycle bin on Vivo NEX 2
How to install WhatsApp on Vivo NEX 2
How to set contact photo in Vivo NEX 2
How to scan QR code on Vivo NEX 2
How to connect Vivo NEX 2 to computer
How to install SD card in Vivo NEX 2
How to update Play Store in Vivo NEX 2
How to install Google Camera in Vivo NEX 2
How to enable USB debugging on Vivo NEX 2
How to turn off Vivo NEX 2
How to charge Vivo NEX 2
How to use the camera on Vivo NEX 2
How to find lost Vivo NEX 2
How to set password on Vivo NEX 2
How to turn on 5g on Vivo NEX 2
How to turn on VPN on Vivo NEX 2
How to install apps on Vivo NEX 2
How to insert a SIM card in Vivo NEX 2
How to enable and configure NFC on Vivo NEX 2
How to connect headphones to Vivo NEX 2
How to clear browser history on Vivo NEX 2
How to disassemble Vivo NEX 2
How to hide an app on Vivo NEX 2
How to download YouTube videos on Vivo NEX 2
How to unblock a contact on Vivo NEX 2
How to turn on the flashlight on Vivo NEX 2
How to split the screen on Vivo NEX 2
How to turn off the camera sound on Vivo NEX 2
How to trim video on Vivo NEX 2
How to check RAM in Vivo NEX 2
How to bypass the Google account on Vivo NEX 2
How to fix black screen on Vivo NEX 2
How to change the language on Vivo NEX 2
How to open engineering mode in Vivo NEX 2
How to open recovery mode in Vivo NEX 2
How to find and turn on a voice recorder on Vivo NEX 2
How to make video calls on Vivo NEX 2
Vivo NEX 2 sim card not detected
How to transfer contacts to Vivo NEX 2
How to enable/disable «Do not disturb» mode on Vivo NEX 2
How to enable/disable answerphone on Vivo NEX 2
How to set up face recognition on Vivo NEX 2
How to set up voicemail on Vivo NEX 2
How to listen to voicemail on Vivo NEX 2
How to check the IMEI number in Vivo NEX 2
How to turn on fast charging on Vivo NEX 2
How to replace the battery on Vivo NEX 2
How to update the application on Vivo NEX 2
Why the Vivo NEX 2 discharges quickly
How to set a password for apps in the Vivo NEX 2
How to format Vivo NEX 2
How to install TWRP on Vivo NEX 2
How to set up call forwarding on Vivo NEX 2
How to empty the recycle bin on Vivo NEX 2
Where to find the clipboard on Vivo NEX 2
How to Set Time on Another Phones
