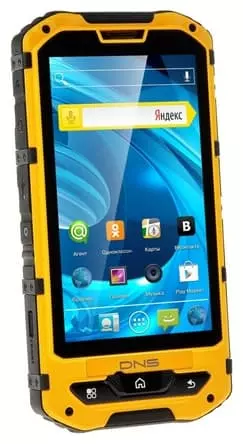
How to Transfer Data to DNS SD01
Every new DNS SD01 owner takes care to transfer files from their previous system. No-one wants to lose any saved files from an old smartphone after all. There are various ways the developers of the current model provide to transfer data to DNS SD01. Each one is appropriate for various usage scenarios.
Transferring All Data
DNS SD01 owners usually store not just photos, music, files, contacts, and other data on their old devices. As such, all data can be transferred in two ways simultaneously.
When You Turn the Phone On for the First Time
Like most devices on the market, DNS SD01 is based on the Android operating system. The OS offers Google services integration, which enables you to move data when you first turn on your new device:
- Switch DNS SD01 on and put your old smartphone close by.
- Pick a Wi-Fi network when you first set up your phone (it must match the other device).
- Enter the Google account information that were used on the previous device.
- Make sure your old device has been properly found by the DNS SD01; pick the data you need to transfer and then press Next.
- Wait until the operation is complete and accept the Google Terms of Service.
During the original set-up, multimedia files can be transferred to the new phone, and apps start to download after the home screen has been entered. Once the device is switched on, DNS SD01 should not be overloaded, and the user should allow 10 to 15 minutes for the entire data transfer.
Google Sync
If you have been using DNS SD01 for a while, the transfer can be done in another way, but with Google services synchronization. First, you have to log on to the old device with a valid account and backup through the "Restore and Reset" menu.
The next step is to set up synchronization on DNS SD01:
- Open your phone settings.
- Go to the "Accounts" section and press "Add account".
- Enter your Google account information from your previous device.
- Go to your account settings and bring up the dialog.
- Confirm the sync.
All data saved on the previous smartphone will be uploaded into DNS SD01 automatically. If you have previously synced such data to Google Services you will have access to all files and your contact list.
Memory Card
The transfer operation of data takes only a moment if your old phone supports MicroSD cards, as does DNS SD01. Of course, this method will work for you if you have all the information saved on an external drive previously. Simply install the card into DNS SD01 and all the files will be displayed in File Explorer.
PC
Not the best, but still suitable way to transfer files. First of all, you must establish a connection between the old device and your computer. The preferred option is USB.
The phone must appear in the "This PC" application and the user must copy the contents of the inner storage of the device into any folder of the PC. Then it becomes possible for the DNS SD01 to receive these files from PC to smartphone.
Partial Transfer
Data from another phone can also be partly transmitted to DNS SD01. This is appropriate if the new device has the data already and only contacts, notes or files need to be added.
Contacts
If the user transferred multimedia files to DNS SD01 using a memory card, then they will only have to add the list of contacts. To do this, open the application of the same name on your old device, go to Settings and select import.
Contacts can be transferred in various ways. They are, for example, fully transmitted to the SIM card and loaded on a new phone automatically. You can also transfer to your existing Google account by synchronization. If this method is used, DNS SD01 must only configure the sync, as shown previously with the complete data transfer.
Multimedia
For those who wish to transfer photos, music and videos from phone to phone, there are many ways to perform the operation:
- via microSD card;
- Bluetooth;
- Wi-Fi (via third party apps like SHAREit);
- messengers.
Special software is the preferred option. You can send all the data at once or only a few individual files.
Games and Applications
As the Play Market app store is available on DNS SD01, Google Sync is the best way to transfer software. You only have to log into the account on your new smartphone that was used on the old device. Games and apps are then automatically downloaded. You can refer to the help of the ES Explorer application if this method is not suitable for you. You can use Bluetooth and Wi-Fi to transfer software.
Share this page with your friends:See also:
How to flash DNS SD01
How to root DNS SD01
Hard reset for DNS SD01
How to reboot DNS SD01
How to unlock DNS SD01
What to do if DNS SD01 won't turn on
What to do if DNS SD01 doesn't charge
What to do if DNS SD01 doesn't connect to PC via USB
How to take a screenshot on DNS SD01
How to reset FRP on DNS SD01
How to call recording on DNS SD01
How to update DNS SD01
How to connect DNS SD01 to TV
How to clear the cache on DNS SD01
How to backup DNS SD01
How to disable ads on DNS SD01
How to clear storage on DNS SD01
How to increase font on DNS SD01
How to share internet on DNS SD01
How to unlock bootloader on DNS SD01
How to recover photos on DNS SD01
How to record the screen on DNS SD01
How to find blacklist in DNS SD01
How to set up fingerprint on DNS SD01
How to block number on DNS SD01
How to enable auto-rotate on DNS SD01
How to set up or turn off an alarm on DNS SD01
How to change ringtone on DNS SD01
How to enable battery percentage on DNS SD01
How to turn off notifications on DNS SD01
How to turn off Google assistant on DNS SD01
How to turn off the lock screen on DNS SD01
How to delete app on DNS SD01
How to recover contacts on DNS SD01
Where is the recycle bin on DNS SD01
How to install WhatsApp on DNS SD01
How to set contact photo in DNS SD01
How to scan QR code on DNS SD01
How to connect DNS SD01 to computer
How to install SD card in DNS SD01
How to update Play Store in DNS SD01
How to install Google Camera in DNS SD01
How to enable USB debugging on DNS SD01
How to turn off DNS SD01
How to charge DNS SD01
How to use the camera on DNS SD01
How to find lost DNS SD01
How to set password on DNS SD01
How to turn on 5g on DNS SD01
How to turn on VPN on DNS SD01
How to install apps on DNS SD01
How to insert a SIM card in DNS SD01
How to enable and configure NFC on DNS SD01
How to set time on DNS SD01
How to connect headphones to DNS SD01
How to clear browser history on DNS SD01
How to disassemble DNS SD01
How to hide an app on DNS SD01
How to download YouTube videos on DNS SD01
How to unblock a contact on DNS SD01
How to turn on the flashlight on DNS SD01
How to split the screen on DNS SD01
How to turn off the camera sound on DNS SD01
How to trim video on DNS SD01
How to check RAM in DNS SD01
How to bypass the Google account on DNS SD01
How to fix black screen on DNS SD01
How to change the language on DNS SD01
How to open engineering mode in DNS SD01
How to open recovery mode in DNS SD01
How to find and turn on a voice recorder on DNS SD01
How to make video calls on DNS SD01
DNS SD01 sim card not detected
How to transfer contacts to DNS SD01
How to enable/disable «Do not disturb» mode on DNS SD01
How to enable/disable answerphone on DNS SD01
How to set up face recognition on DNS SD01
How to set up voicemail on DNS SD01
How to listen to voicemail on DNS SD01
How to check the IMEI number in DNS SD01
How to turn on fast charging on DNS SD01
How to replace the battery on DNS SD01
How to update the application on DNS SD01
Why the DNS SD01 discharges quickly
How to set a password for apps in the DNS SD01
How to format DNS SD01
How to install TWRP on DNS SD01
How to set up call forwarding on DNS SD01
How to empty the recycle bin on DNS SD01
Where to find the clipboard on DNS SD01
How to Transfer Data to Another Phones
