How to Transfer Contacts to Doogee Shoot 2
One of the most convenient differences between a smartphone and a landline — is the contact book right on the device. Thanks to this innovation, millions of people were able to throw away their notebooks. However, a new problem has arisen — and how to transfer contacts to Doogee Shoot 2.
Why do need to transfer contacts on Doogee Shoot 2
The issue of transfer lies in the plane of storing numbers. The fact is that an ordinary user of Android works only with a graphic layer. Roughly speaking, all program elements, codes, and other complex details are hidden deep in the device. Thanks to this, the smartphone is as convenient to use as possible — a couple of clicks are enough to make calls and send messages.
But with the transfer, everything is much more complicated. Data can be stored on:
- SIM card;
- the physical memory of the device;
- Google, Yandex, MI, Vivo cloud storage, and so on.
And the transfer is just necessary so that the user can safely use them. For example, by buying a new phone and inserting a SIM card with saved numbers, he will immediately receive a list of them. And by synchronizing the account on two different devices, he will be able to access the phone book from both smartphones at once.
What other ways to transfer contacts exist
- via Google account;
- via SIM card;
- via external media;
- with the help of third-party applications;
- with the help of Bluetooth;
- through cloud storage.
Transferring contacts with the help of a Google account
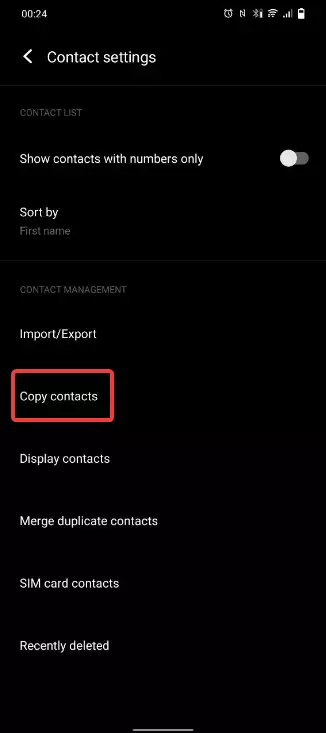
- Click on the three dots in the upper right corner, "Settings".

- Click on "Copy".
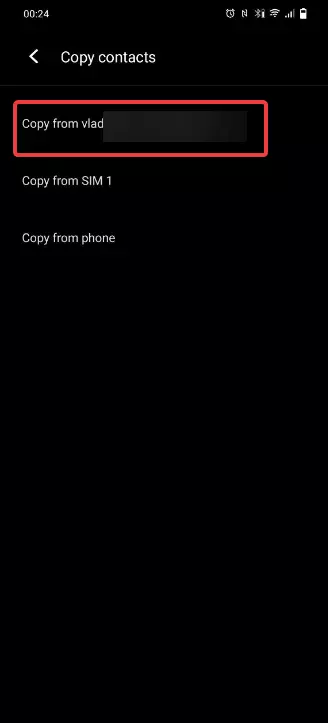
- Click copy from "Your email address".
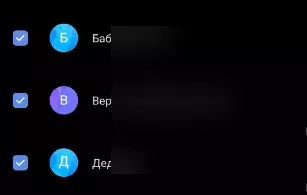
- Mark the necessary numbers that want to transfer to the device — just click on the desired number once and a checkmark will appear next to it.
- Click on the "Copy" button at the very bottom in the center.

Creating a backup copy of contacts on the Google Account
- Go to settings.
- Find the item "System".
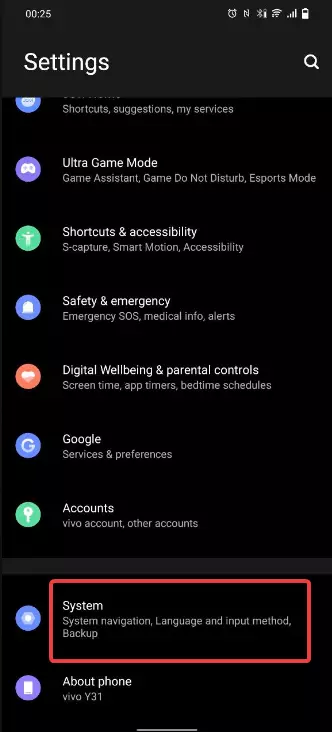
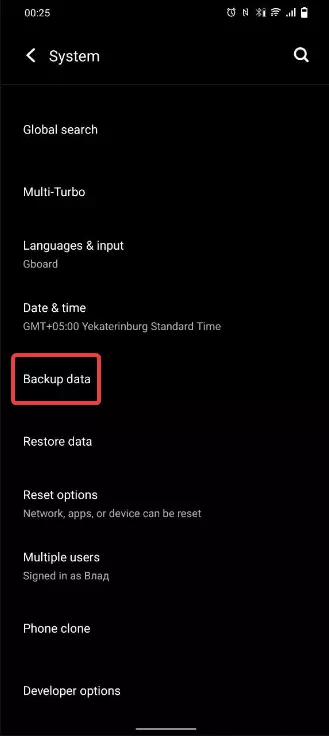
- "Data backups".
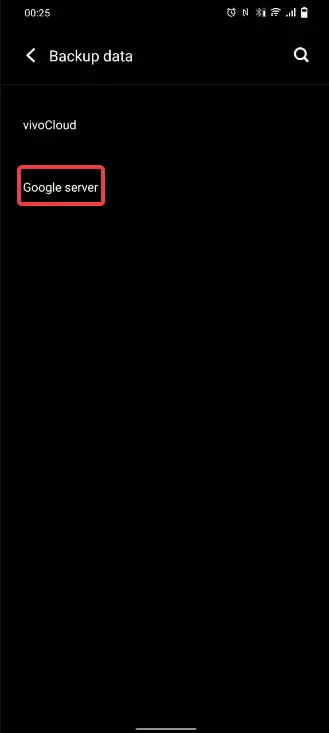
- "Google Server".
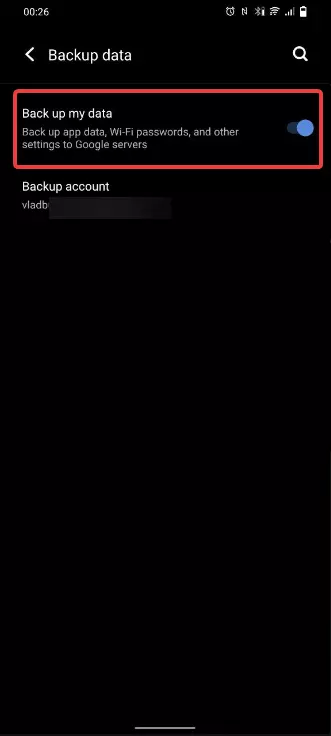
- Turn the toggle switch to the on position.
Restoring contacts on a new phone
All data will be restored by default after authorization via a Google account. If you have already logged in, but they have not appeared, then:
- Go to settings.
- Finding Google.

- "Installation and resetting settings".
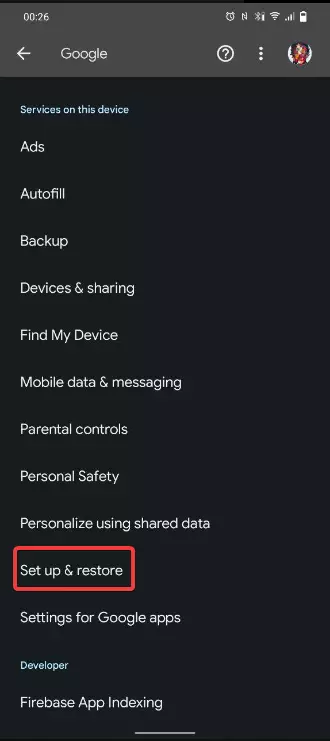
- "Recovery".
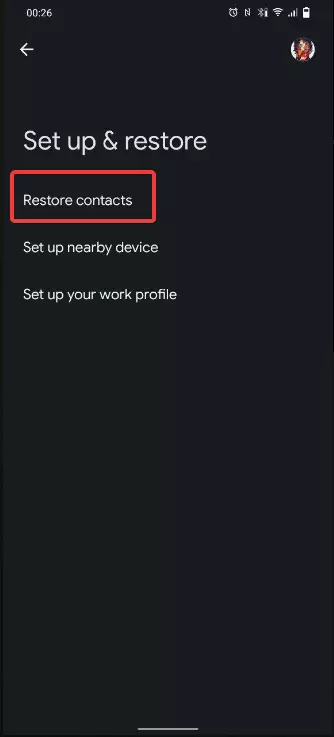
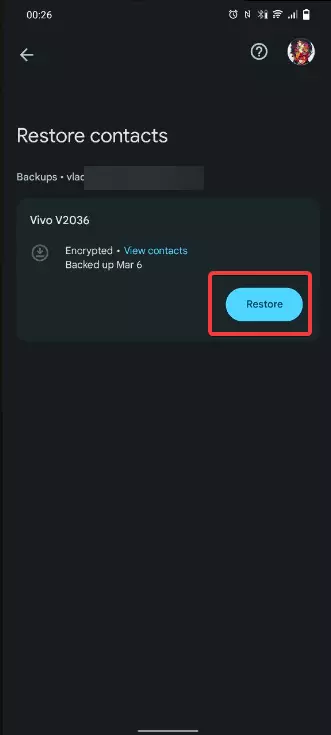
- Click "Restore".
Transferring contacts with the help of a data transfer app
We strongly do not recommend using this method. We cannot claim that all such applications steal your data. But we can't be sure that this is not happening. The standard toolkit is enough to transfer all the numbers where you need them.
Application selection
If you still decide to use third-party applications, then choose only software with good reviews and from trusted creators. For example, the "Contacts" app from Google.
Transferring contacts with the help of the app
It is not possible to create a common instruction — all applications have different interfaces and functionality. Therefore, we recommend that you find tips in the comments, or see instructions from the developers. With a high probability, they know why people download their application, so they download a small instruction directly into the "Interface screenshots".
Transferring contacts to Doogee Shoot 2 with the help of a SIM card
The most convenient way is since the SIM card can be inserted into most smartphones. The only limitation — is to check the size of the SIM card slot in advance.
Importing contacts from a SIM card
- Click on the three dots in the upper right corner, and select "Settings".
- Click on "Copy".
- Click on "Copy from SIM".
- Select the necessary data.
- Click "Copy".
Exporting contacts to a SIM card
- Click on the three dots in the upper right corner, and select "Settings".
- Click on "SIM card contacts".
- Click on the three dots in the upper right corner, and select "Import from phone".
- Select the necessary data.
- Click "Import to SIM".
Transferring contacts with the help of Bluetooth
Connecting phones via Bluetooth
- Go to settings.
- Find the item "Bluetooth and devices".
- Click on "Bluetooth", and the toggle switch should be turned on.
- Click "Add device". Smartphones are highlighted by the handset icon.
Transfer contacts via Bluetooth
- Select the necessary numbers.
- Click on the three dots in the upper right corner. Click "Share".
- Click "In the form of text". You can choose "As an attachment", just the first method is more convenient.
- Select "Bluetooth".
- Select the available devices.
Transferring contacts with the help of cloud storage
The method is also not recommended for use, since it has no advantages and global differences from transferring using a Google account. The only difference — is the name of the cloud service on each device. For example, on Vivo smartphones it is VivoCloud, on Xiaomi smartphones it is MiCloud, and so on.
Using cloud storage to back up contacts
- Go to settings.
- Find the item "System".
- Select "Data Backups".
- Choose not the "Google Server", but the top option (it varies depending on the phone).
- Click "Contacts".
- Click "Copy".
Restoring contacts on Doogee Shoot 2 from cloud storage
- Go to settings.
- Find the item "System".
- Select "Data Backups".
- Decide not the "Google Server", but the top option (it varies depending on the phone).
- Click "Contacts".
- Click "Restore".
Recommendations for data security
We advise you to accept the fact that they are not entirely secure. The only thing that remains — is to read the license agreement and, if you are not satisfied with it, do not store your data on various services. Remember that you can always copy data using a SIM card — it's much safer than storing data on the cloud.
Share this page with your friends:See also:
How to flash Doogee Shoot 2
How to root Doogee Shoot 2
Hard reset for Doogee Shoot 2
How to reboot Doogee Shoot 2
How to unlock Doogee Shoot 2
What to do if Doogee Shoot 2 won't turn on
What to do if Doogee Shoot 2 doesn't charge
What to do if Doogee Shoot 2 doesn't connect to PC via USB
How to take a screenshot on Doogee Shoot 2
How to reset FRP on Doogee Shoot 2
How to call recording on Doogee Shoot 2
How to update Doogee Shoot 2
How to connect Doogee Shoot 2 to TV
How to clear the cache on Doogee Shoot 2
How to backup Doogee Shoot 2
How to disable ads on Doogee Shoot 2
How to clear storage on Doogee Shoot 2
How to increase font on Doogee Shoot 2
How to share internet on Doogee Shoot 2
How to transfer data to Doogee Shoot 2
How to unlock bootloader on Doogee Shoot 2
How to recover photos on Doogee Shoot 2
How to record the screen on Doogee Shoot 2
How to find blacklist in Doogee Shoot 2
How to set up fingerprint on Doogee Shoot 2
How to block number on Doogee Shoot 2
How to enable auto-rotate on Doogee Shoot 2
How to set up or turn off an alarm on Doogee Shoot 2
How to change ringtone on Doogee Shoot 2
How to enable battery percentage on Doogee Shoot 2
How to turn off notifications on Doogee Shoot 2
How to turn off Google assistant on Doogee Shoot 2
How to turn off the lock screen on Doogee Shoot 2
How to delete app on Doogee Shoot 2
How to recover contacts on Doogee Shoot 2
Where is the recycle bin on Doogee Shoot 2
How to install WhatsApp on Doogee Shoot 2
How to set contact photo in Doogee Shoot 2
How to scan QR code on Doogee Shoot 2
How to connect Doogee Shoot 2 to computer
How to install SD card in Doogee Shoot 2
How to update Play Store in Doogee Shoot 2
How to install Google Camera in Doogee Shoot 2
How to enable USB debugging on Doogee Shoot 2
How to turn off Doogee Shoot 2
How to charge Doogee Shoot 2
How to use the camera on Doogee Shoot 2
How to find lost Doogee Shoot 2
How to set password on Doogee Shoot 2
How to turn on 5g on Doogee Shoot 2
How to turn on VPN on Doogee Shoot 2
How to install apps on Doogee Shoot 2
How to insert a SIM card in Doogee Shoot 2
How to enable and configure NFC on Doogee Shoot 2
How to set time on Doogee Shoot 2
How to connect headphones to Doogee Shoot 2
How to clear browser history on Doogee Shoot 2
How to disassemble Doogee Shoot 2
How to hide an app on Doogee Shoot 2
How to download YouTube videos on Doogee Shoot 2
How to unblock a contact on Doogee Shoot 2
How to turn on the flashlight on Doogee Shoot 2
How to split the screen on Doogee Shoot 2
How to turn off the camera sound on Doogee Shoot 2
How to trim video on Doogee Shoot 2
How to bypass the Google account on Doogee Shoot 2
How to fix black screen on Doogee Shoot 2
How to change the language on Doogee Shoot 2
How to open engineering mode in Doogee Shoot 2
How to open recovery mode in Doogee Shoot 2
How to find and turn on a voice recorder on Doogee Shoot 2
How to make video calls on Doogee Shoot 2
Doogee Shoot 2 sim card not detected
How to enable/disable «Do not disturb» mode on Doogee Shoot 2
How to enable/disable answerphone on Doogee Shoot 2
How to set up face recognition on Doogee Shoot 2
How to set up voicemail on Doogee Shoot 2
How to listen to voicemail on Doogee Shoot 2
How to check the IMEI number in Doogee Shoot 2
How to turn on fast charging on Doogee Shoot 2
How to replace the battery on Doogee Shoot 2
How to update the application on Doogee Shoot 2
Why the Doogee Shoot 2 discharges quickly
How to set a password for apps in the Doogee Shoot 2
How to format Doogee Shoot 2
How to install TWRP on Doogee Shoot 2
How to set up call forwarding on Doogee Shoot 2
How to empty the recycle bin on Doogee Shoot 2
Where to find the clipboard on Doogee Shoot 2
How to Transfer Contacts to Another Phones
