How to Unlock Blackview BL9000 if You Forgot Your Password
There are many reasons as to why you would need to unlock Blackview BL9000. A pattern key is an additional tool for locking Android smartphones. The operating system asks to set it up so it could be used alongside a fingerprint sensor or with face unlocking options. Budget versions of smartphones prove to be an exception, in which the pattern key is provided as an alternative to the usual digital password. Setting up an extremely complicated graphic combination can lead to problems, such as repeated erroneous input that could automatically lead to device locking. Knowing some tricks and approaches to modern Android versions can help you unlock Blackview BL9000 if you forgot your password or pattern lock (depending on what option you chose for your lock screen).
Usually, after the key has been entered incorrectly, information concerning the lock appears on the phone’s display. Here the OS offers the user several solutions. Among the primary ones is the SOS function, which can be used to call rescue services, as well as a means to restore access to the device. Let’s take a look at the last option now.
Blackview BL9000 Bypass Lock Screen via Google Account
It should be noted right away that this method is not applicable to any and all devices. The list of verified models includes “clean” Android devices, such as Samsung, Huawei, Honor, as well as some Xiaomi models.
If you enter the wrong pattern 5 times in a row, a lock notification with a timer will open up on the display. You can find the “Forgot your pattern key?” button below, which you should tap on. The system will automatically offer to authorize into the Google account to which the phone is linked. It will be possible to input your own email and password only if you have a Wi-Fi or cellular Internet connection. If there is a working network and authorization was successful, the smartphone will be unlocked and all data will remain as is.
Resetting to factory settings
The problem can overtake the user at the wrong time, e.g. in the absence of any Internet connection. In this case, authorization via Google is not possible. There are two ways to deal with this circumstance:
- find a place with a Wi-Fi network that is saved to the device (it’s important that the automatic connection option is activated in the settings) and do the steps described above;
- reset the device to factory settings through the special menu of the smartphone.
The latter option merits a more detailed consideration. In almost every model based on Android, the standard Recovery utility is preinstalled for service settings. This utility will help you to unlock your device. Before performing the described actions, keep in mind that after a reset through Recovery all files will be deleted from the device memory. The fate of the elements stored on the microSD card depends on the manufacturer. Therefore, before performing any actions, we strongly recommend creating a backup copy of your data.
You need to do the following:
- Turn off the phone completely.
- Press the analogue “volume up” and “enable/unlock” buttons.
- After the phone emits vibration, release the power button while holding the “volume up” button until the engineering menu appears.
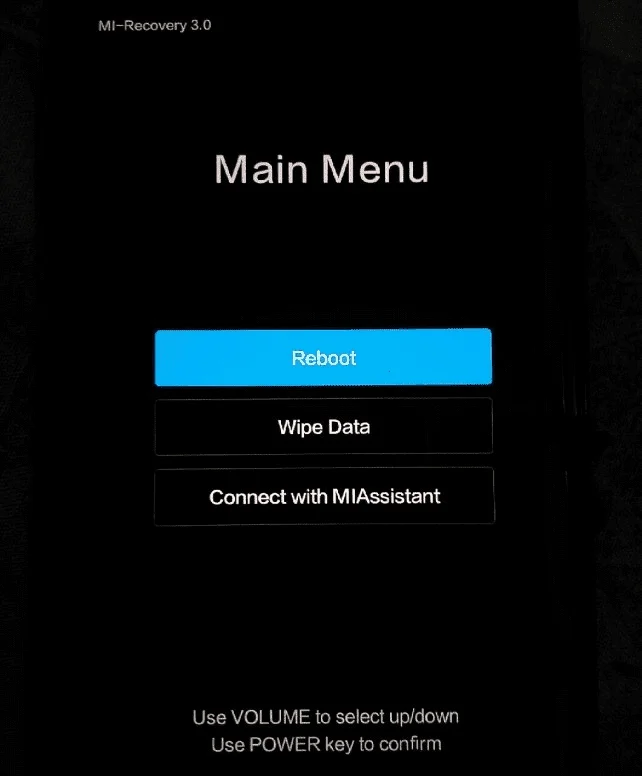
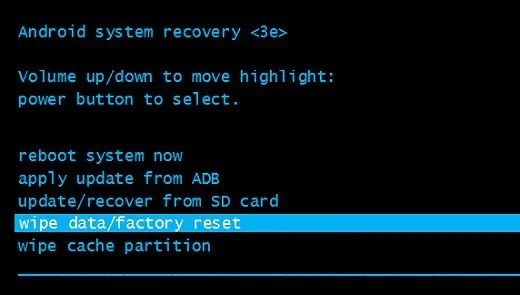
- After opening Recovery, release the button and select Wipe Data/Factory Reset.

Most often the menu in the Recovery mode is touch-sensitive; accordingly, clicking on the Wipe Data button should be performed as per usual when working with a smartphone device. However, in older models the menu may not have normal sensor functioning. Controlling the menu in this case is carried out as follows:
- selecting menu items – volume keys;
- confirm action – the power button.

After the reset, the phone will reboot and prompt you to perform the initial setup of the system. Once again, keep in mind that a factory reset deletes all user files stored in the smartphone's memory.
Share this page with your friends:See also:
How to flash Blackview BL9000
How to root Blackview BL9000
Hard reset for Blackview BL9000
How to reboot Blackview BL9000
What to do if Blackview BL9000 won't turn on
What to do if Blackview BL9000 doesn't charge
What to do if Blackview BL9000 doesn't connect to PC via USB
How to take a screenshot on Blackview BL9000
How to reset FRP on Blackview BL9000
How to update Blackview BL9000
How to call recording on Blackview BL9000
How to connect Blackview BL9000 to TV
How to clear the cache on Blackview BL9000
How to backup Blackview BL9000
How to disable ads on Blackview BL9000
How to clear storage on Blackview BL9000
How to increase font on Blackview BL9000
How to share internet on Blackview BL9000
How to transfer data to Blackview BL9000
How to unlock bootloader on Blackview BL9000
How to recover photos on Blackview BL9000
How to record the screen on Blackview BL9000
How to find blacklist in Blackview BL9000
How to set up fingerprint on Blackview BL9000
How to block number on Blackview BL9000
How to enable auto-rotate on Blackview BL9000
How to set up or turn off an alarm on Blackview BL9000
How to change ringtone on Blackview BL9000
How to enable battery percentage on Blackview BL9000
How to turn off notifications on Blackview BL9000
How to turn off Google assistant on Blackview BL9000
How to turn off the lock screen on Blackview BL9000
How to delete app on Blackview BL9000
How to recover contacts on Blackview BL9000
Where is the recycle bin on Blackview BL9000
How to install WhatsApp on Blackview BL9000
How to set contact photo in Blackview BL9000
How to scan QR code on Blackview BL9000
How to connect Blackview BL9000 to computer
How to install SD card in Blackview BL9000
How to update Play Store in Blackview BL9000
How to install Google Camera in Blackview BL9000
How to enable USB debugging on Blackview BL9000
How to turn off Blackview BL9000
How to charge Blackview BL9000
How to use the camera on Blackview BL9000
How to find lost Blackview BL9000
How to set password on Blackview BL9000
How to turn on 5g on Blackview BL9000
How to turn on VPN on Blackview BL9000
How to install apps on Blackview BL9000
How to insert a SIM card in Blackview BL9000
How to enable and configure NFC on Blackview BL9000
How to set time on Blackview BL9000
How to connect headphones to Blackview BL9000
How to clear browser history on Blackview BL9000
How to disassemble Blackview BL9000
How to hide an app on Blackview BL9000
How to download YouTube videos on Blackview BL9000
How to unblock a contact on Blackview BL9000
How to turn on the flashlight on Blackview BL9000
How to split the screen on Blackview BL9000
How to turn off the camera sound on Blackview BL9000
How to trim video on Blackview BL9000
How to check RAM in Blackview BL9000
How to bypass the Google account on Blackview BL9000
How to fix black screen on Blackview BL9000
How to change the language on Blackview BL9000
How to open engineering mode in Blackview BL9000
How to open recovery mode in Blackview BL9000
How to find and turn on a voice recorder on Blackview BL9000
How to make video calls on Blackview BL9000
Blackview BL9000 sim card not detected
How to transfer contacts to Blackview BL9000
How to enable/disable «Do not disturb» mode on Blackview BL9000
How to enable/disable answerphone on Blackview BL9000
How to set up face recognition on Blackview BL9000
How to set up voicemail on Blackview BL9000
How to listen to voicemail on Blackview BL9000
How to check the IMEI number in Blackview BL9000
How to turn on fast charging on Blackview BL9000
How to replace the battery on Blackview BL9000
How to update the application on Blackview BL9000
Why the Blackview BL9000 discharges quickly
How to set a password for apps in the Blackview BL9000
How to format Blackview BL9000
How to install TWRP on Blackview BL9000
How to set up call forwarding on Blackview BL9000
How to empty the recycle bin on Blackview BL9000
Where to find the clipboard on Blackview BL9000
How to unlock for another phones
