How to Update DNS S4501M
Usually, smartphone manufacturers support their devices in terms of software for a few years from their date of release. During this time, users regularly receive updates that add new features to an operating system. To update Android on your DNS S4501M, you need to follow a few simple steps, but before that, prepare for the process.
How to check the current Android version on DNS S4501M
Please check your current software version before installing updates. If your Android is already up to date, you don’t need to reinstall it.
See which Android version you have:
- Open your phone’s settings.
- Press “About phone”.
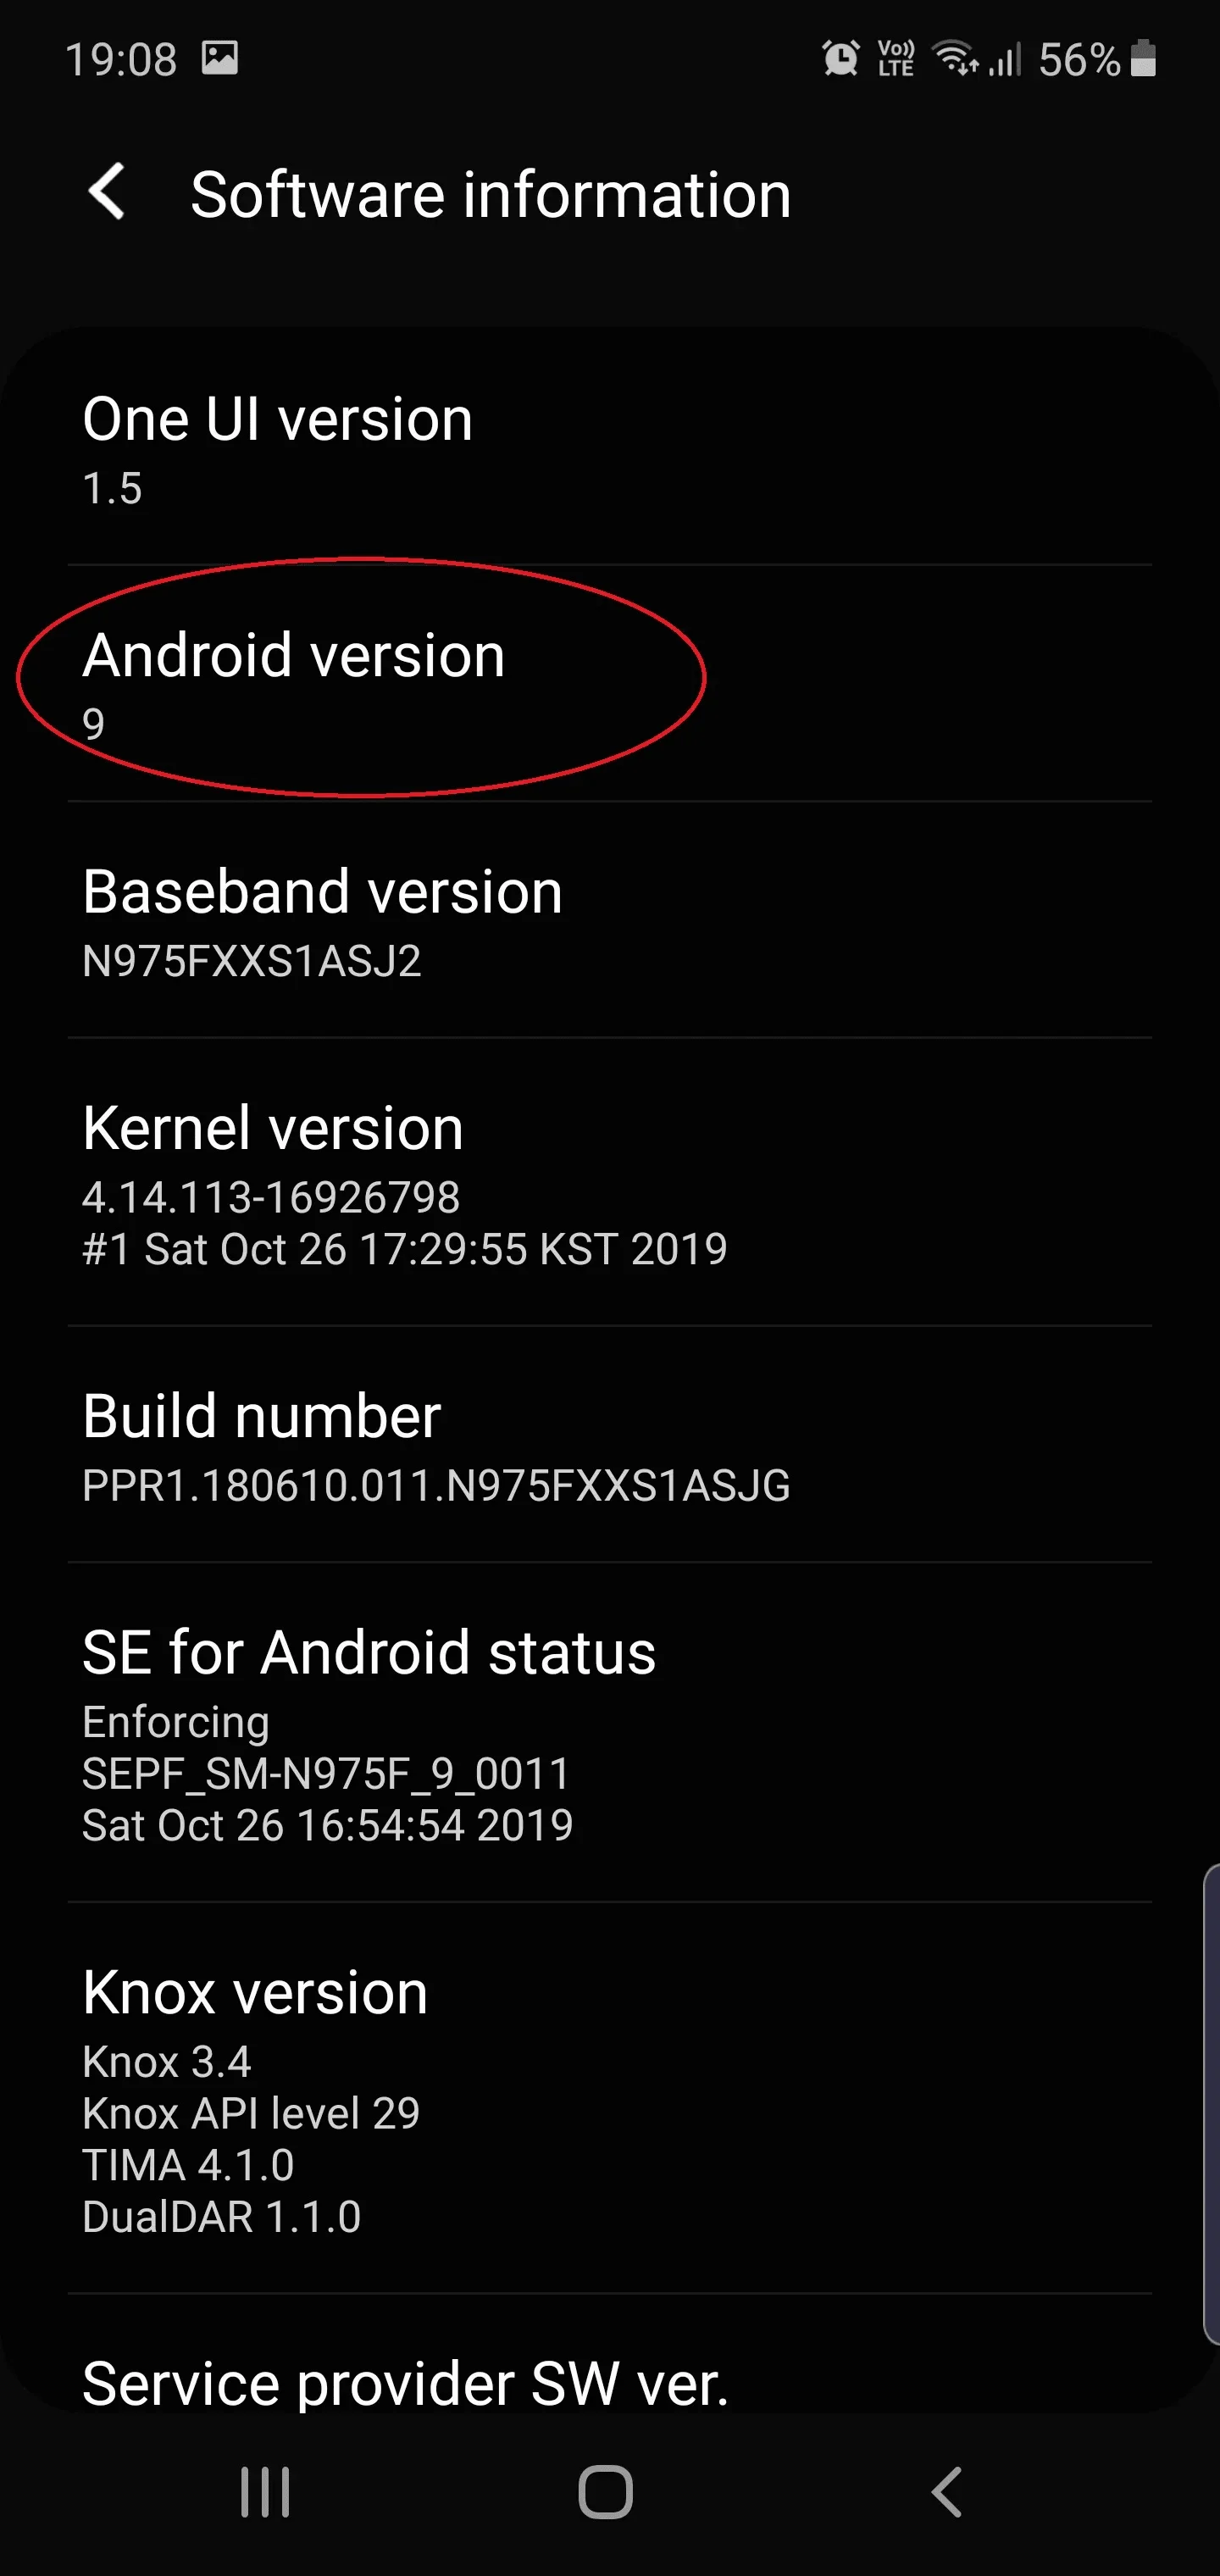
- Find the item “Android version”.
This is where the current software version will be indicated. At the beginning of 2021, it is Android 11, but Google is going to release another update to Android 12 soon.
Preparatory phase
Each new version of software contains many new functions, but after installing them, there may be problems in the operation of some smartphones. This happens when users ignore the preparatory phase.
Before updating your DNS S4501M, you need to follow 2 basic requirements:
- make sure the device has at least a 30% charge;
- reset your device to factory default settings.
The first point is clear, but the second requires explanation. Resetting to factory settings means deleting all files from your device's memory. It helps you to avoid errors when installing updates.
Of course, no one wants to lose their personal data, that is why you need to create a backup before resetting:
- Open the settings.
- Go to the “Accounts and backup” section.
- Select Google Drive.
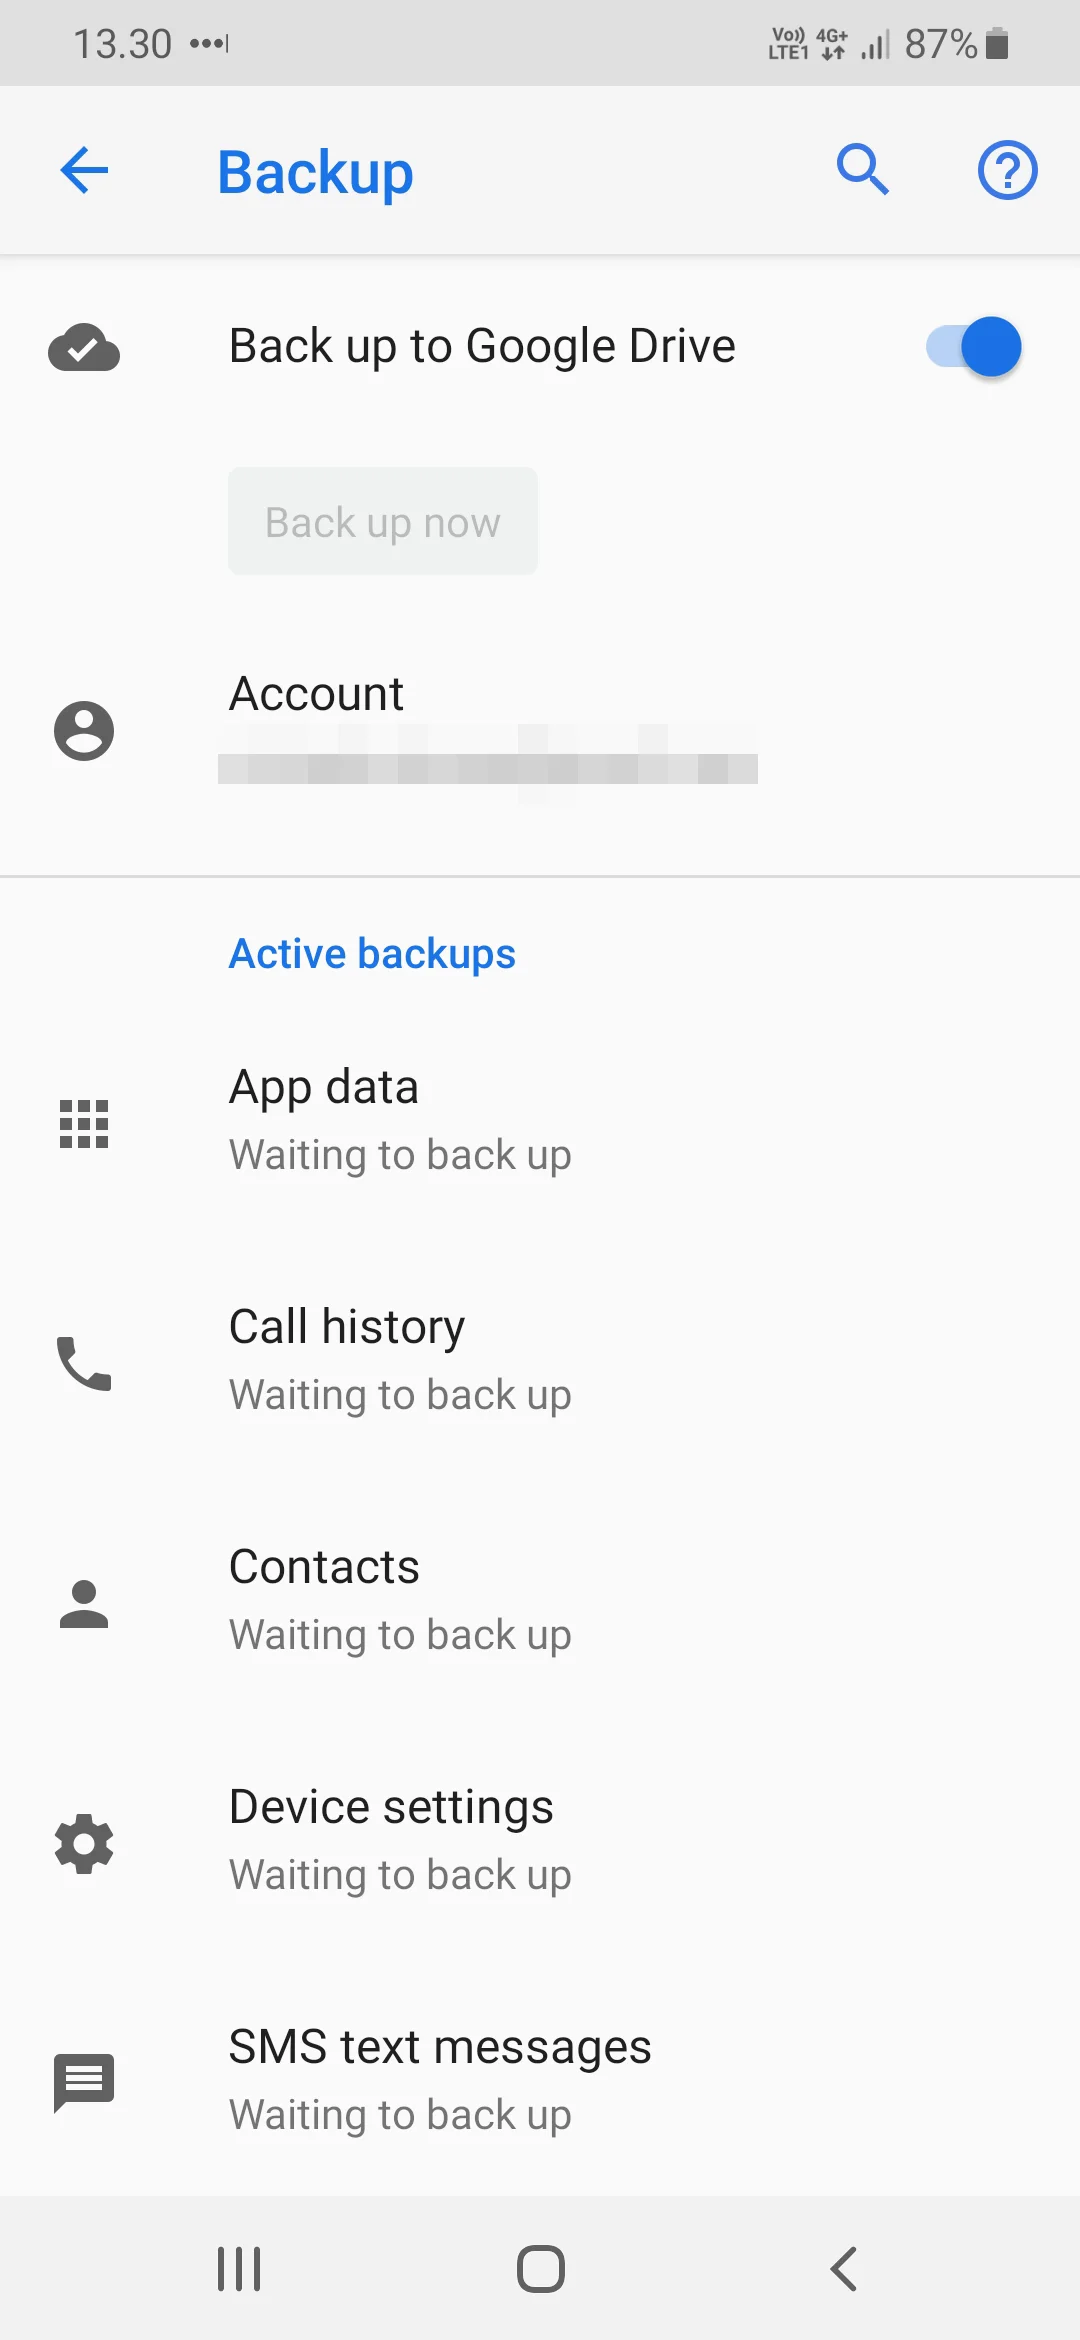
- Back up your data.
These steps will help you move your data to cloud storage. You can restore it after upgrading your operating system.
If there is not enough space on Google Drive to save all the information, you can create a backup copy using the "Backup & Restore" option. Move the resulting file to another device (for example, a computer), and after the updates are installed, return it to your smartphone's memory.
After creating a backup, you can start resetting your phone to factory settings:
- Open the settings.
- Go to the “Backup and reset” section.
- Choose “Factory data reset”.
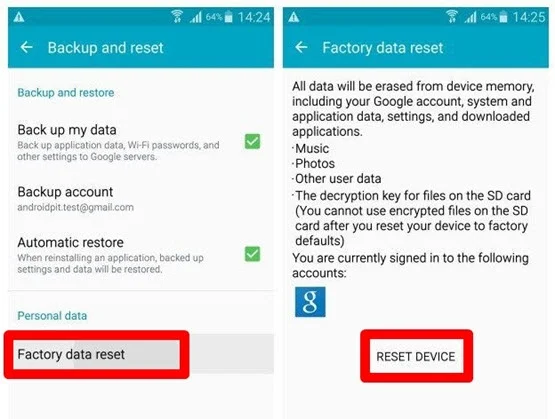
- Click “Reset device”.
- Confirm the operation.
Now reboot your smartphone and then go directly to the process of installing the new software.
Ways of updating Android on DNS S4501M
There are different ways of updating the Android OS, including both classic and alternative options. We recommend that you consider the upgrade methods in the order that is presented in this article.
Over-the-air update
This is the easiest and most common way to update your smartphone. The main condition here is to complete the preparatory steps and have an Internet connection.
To update Android on your phone you need to:
- Open the settings.
- Press "System" or "About phone".
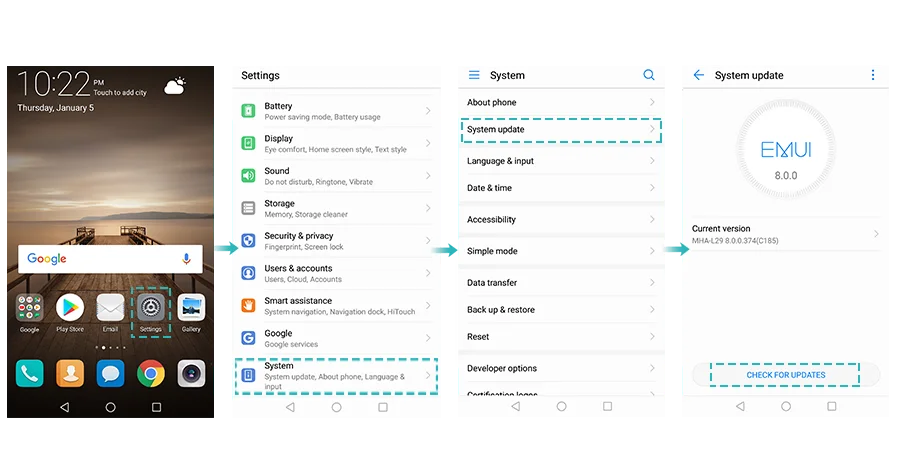
- Go to "System update".
- Click “Update”.
If there are updates available, you will be prompted to download the firmware file and click "Install". After that, your device will restart and be ready for further use.
Manual update via settings
This option is for those cases when your device cannot find an update over the air. To install the latest firmware version, download the installation file from the manufacturer’s official website. After placing the zip file in the device's memory, follow these steps:
- Open your device settings.
- Go to the System update section.
- Press the three-dots button, and then click the “Select firmware file” button.
- Select the folder where the zip filе was saved.
- Confirm the installation of updates.
The further process is the same that was presented earlier in the over-the-air updates. That is, your phone will restart, and after installing the firmware, you will be able to use it.
Manual update via Recovery Mode
This method is similar to the previous one because here you also need to download the firmware file to your phone first, but the rest of the process is very different. To install updates, you need to go to the engineering menu (Recovery Mode).
First of all, turn off your smartphone and hold down both the Power button and the Volume Up button for a few seconds. If nothing happens, change the combination to the Power button and the Volume Down button.
If everything is done correctly, the recovery menu will appear on the screen. Use the Volume keys to navigate, and the Power button to confirm actions.
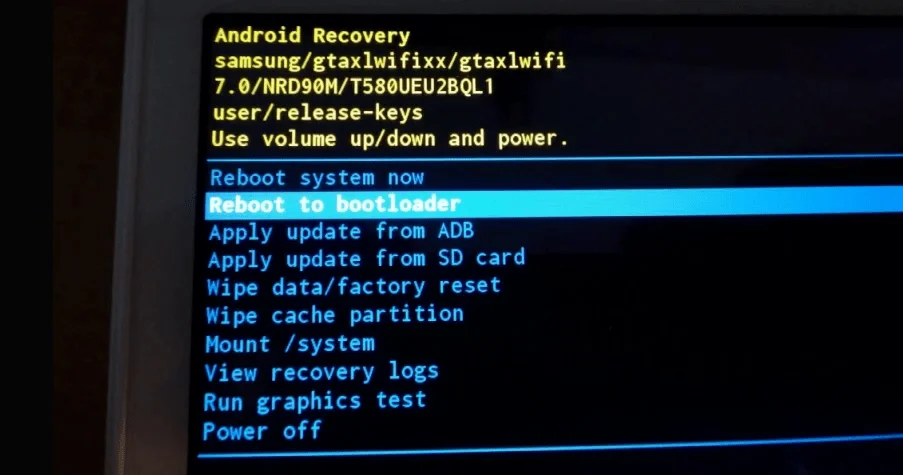
If you want to perform an over-the-air update, select “Reboot system now”. The "Apply update from ADB" option is needed to install the firmware from the internal storage, and "Apply update from SD card" is for installing from the memory card. After selecting the desired option, confirm the operation and wait for the end of the process.
What to do after installing updates
When the updating is completed, turn on your smartphone and check how stable it works. If everything is fine, you can restore your backed-up information.
If the backup was uploaded to Google Drive, all you need is to log into your Google account, and the data will be restored automatically. If the backup file was placed on another device, you need to upload it back to your smartphone.
If the backup was not restored automatically, try to operate manually. To do this, open the settings, go to the "System" section and restore the data.
Share this page with your friends:See also:
How to flash DNS S4501M
How to root DNS S4501M
Hard reset for DNS S4501M
How to reboot DNS S4501M
How to unlock DNS S4501M
What to do if DNS S4501M won't turn on
What to do if DNS S4501M doesn't charge
What to do if DNS S4501M doesn't connect to PC via USB
How to take a screenshot on DNS S4501M
How to reset FRP on DNS S4501M
How to call recording on DNS S4501M
How to connect DNS S4501M to TV
How to clear the cache on DNS S4501M
How to backup DNS S4501M
How to disable ads on DNS S4501M
How to clear storage on DNS S4501M
How to increase font on DNS S4501M
How to share internet on DNS S4501M
How to transfer data to DNS S4501M
How to unlock bootloader on DNS S4501M
How to recover photos on DNS S4501M
How to record the screen on DNS S4501M
How to find blacklist in DNS S4501M
How to set up fingerprint on DNS S4501M
How to block number on DNS S4501M
How to enable auto-rotate on DNS S4501M
How to set up or turn off an alarm on DNS S4501M
How to change ringtone on DNS S4501M
How to enable battery percentage on DNS S4501M
How to turn off notifications on DNS S4501M
How to turn off Google assistant on DNS S4501M
How to turn off the lock screen on DNS S4501M
How to delete app on DNS S4501M
How to recover contacts on DNS S4501M
Where is the recycle bin on DNS S4501M
How to install WhatsApp on DNS S4501M
How to set contact photo in DNS S4501M
How to scan QR code on DNS S4501M
How to connect DNS S4501M to computer
How to install SD card in DNS S4501M
How to update Play Store in DNS S4501M
How to install Google Camera in DNS S4501M
How to enable USB debugging on DNS S4501M
How to turn off DNS S4501M
How to charge DNS S4501M
How to use the camera on DNS S4501M
How to find lost DNS S4501M
How to set password on DNS S4501M
How to turn on 5g on DNS S4501M
How to turn on VPN on DNS S4501M
How to install apps on DNS S4501M
How to insert a SIM card in DNS S4501M
How to enable and configure NFC on DNS S4501M
How to set time on DNS S4501M
How to connect headphones to DNS S4501M
How to clear browser history on DNS S4501M
How to disassemble DNS S4501M
How to hide an app on DNS S4501M
How to download YouTube videos on DNS S4501M
How to unblock a contact on DNS S4501M
How to turn on the flashlight on DNS S4501M
How to split the screen on DNS S4501M
How to turn off the camera sound on DNS S4501M
How to trim video on DNS S4501M
How to check RAM in DNS S4501M
How to bypass the Google account on DNS S4501M
How to fix black screen on DNS S4501M
How to change the language on DNS S4501M
How to open engineering mode in DNS S4501M
How to open recovery mode in DNS S4501M
How to find and turn on a voice recorder on DNS S4501M
How to make video calls on DNS S4501M
DNS S4501M sim card not detected
How to transfer contacts to DNS S4501M
How to enable/disable «Do not disturb» mode on DNS S4501M
How to enable/disable answerphone on DNS S4501M
How to set up face recognition on DNS S4501M
How to set up voicemail on DNS S4501M
How to listen to voicemail on DNS S4501M
How to check the IMEI number in DNS S4501M
How to turn on fast charging on DNS S4501M
How to replace the battery on DNS S4501M
How to update the application on DNS S4501M
Why the DNS S4501M discharges quickly
How to set a password for apps in the DNS S4501M
How to format DNS S4501M
How to install TWRP on DNS S4501M
How to set up call forwarding on DNS S4501M
How to empty the recycle bin on DNS S4501M
Where to find the clipboard on DNS S4501M
How to Update Another Phones
