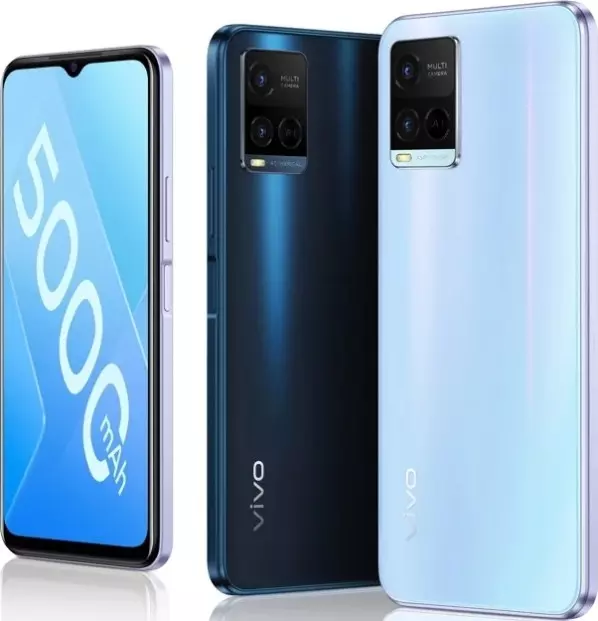
How to Update the Application on Vivo Y32
Most applications are available for installation in «raw» form. That is, the creator releases his product unfinished, assuming that later he can introduce new features and fix bugs through updates. Consequently, many people have a logical question about how to update the application on Vivo Y32.
Updating applications on Vivo Y32 in the standard way
By default, all Android phones have Google Play installed — a store through which you can download, edit and uninstall applications. Since it is considered proprietary (basic), updating apps through Google Play can be called the standard way. To perform it:
- Launch the Google Play store on your smartphone. You must be logged in to your account. Otherwise, the store will not even launch.

- Click on your profile portrait in the upper right corner next to the «Search» field and the «Notifications» icon.
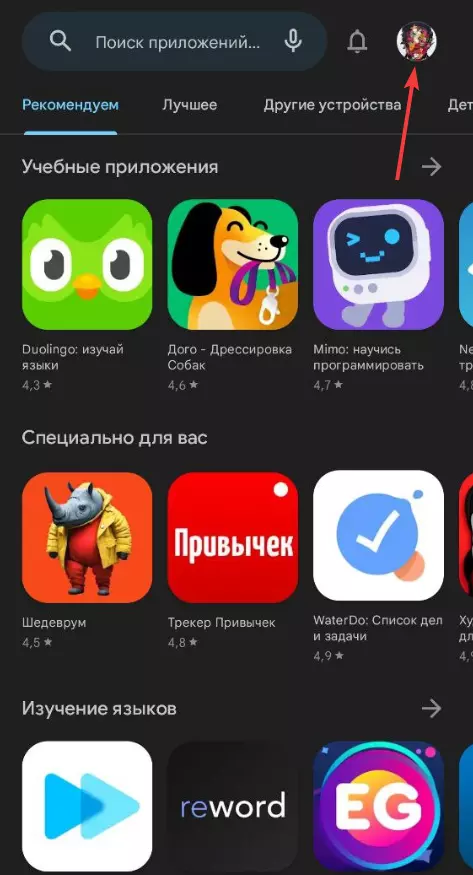
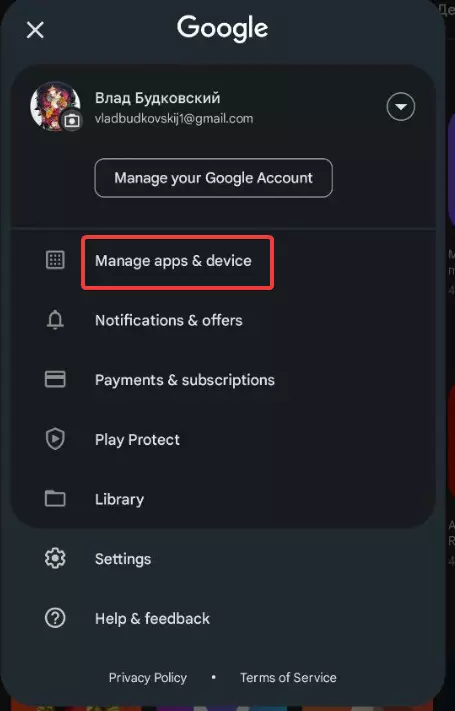
- Go to «Manage applications…».
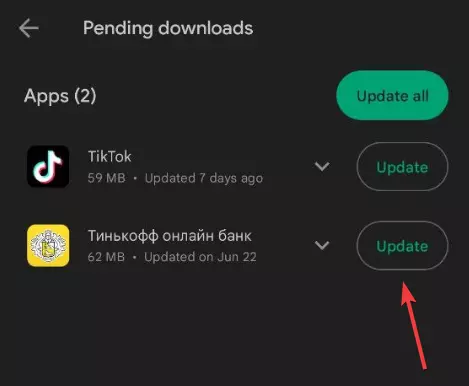
- Click on «Update All» if you want all updates downloaded and installed at one time.
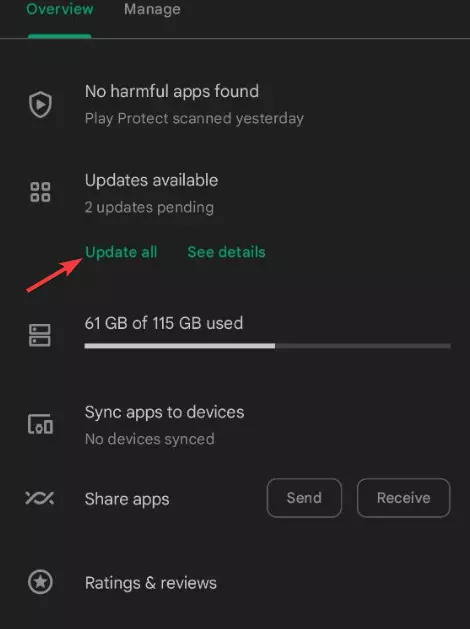
- If you want to install updates for one or more apps, click «More detailed».

- Click on the «Update» button next to the app for which you want to install the update.
Update Google Play
Google Play — it's also an app. Since it is considered proprietary (built-in), it is often updated automatically without notifying the user. If you have disabled automatic updates, sooner or later you will get an error that prevents you from using Google Play. To fix this error:
- Launch Google Play again.
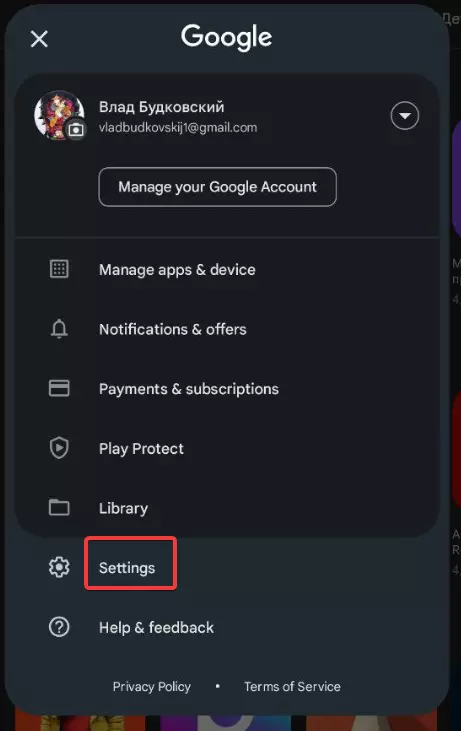
- Click on the profile icon.
- Go to the «Settings» menu.
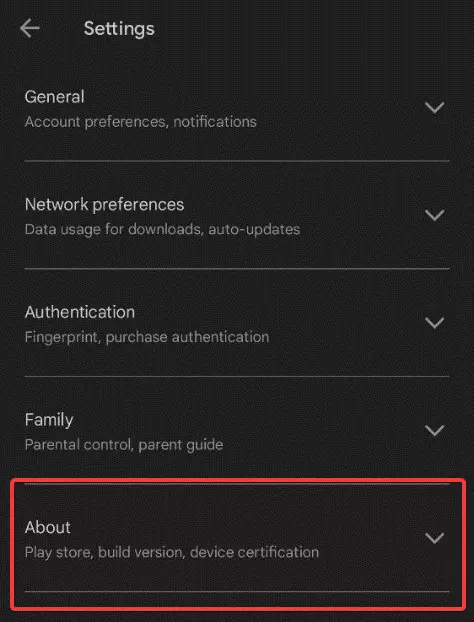
- Next, in the submenu «About application».
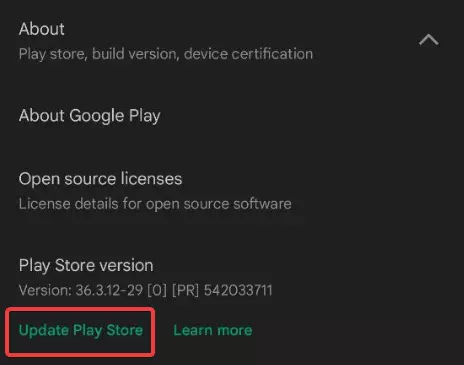
- Click on «Update Google Play».
Regular auto-updating of applications
If you don't want to worry about constantly manually updating your apps, we recommend allowing Google Play to auto-update. To do this:
- Open up Google Play.
- Go to the profile settings.
- Click on «Settings».
- Go to the «Connection Settings» submenu.
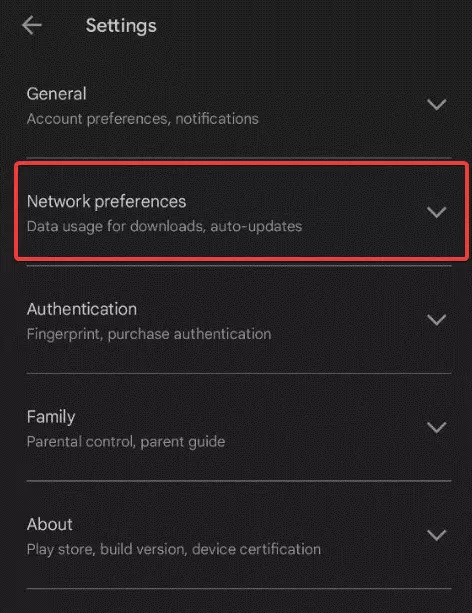
- Expand the «Auto-update applications» menu. Note — you must be logged in to your account for auto-update to work.
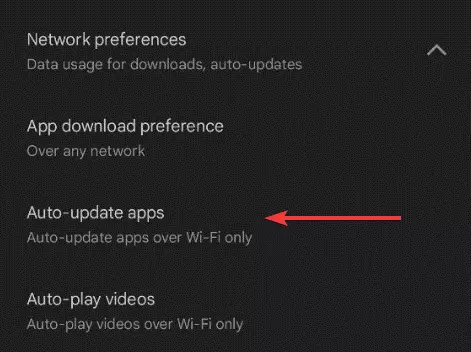
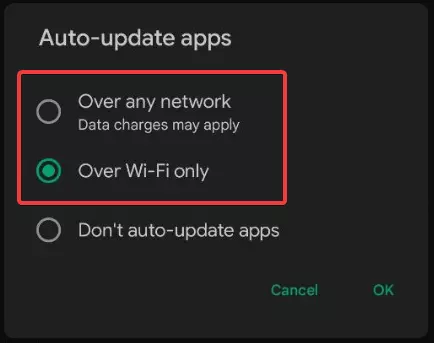
- Select options:
- «Only via Wi-Fi».
- «Download over any network». If you have limited traffic on your mobile network, we do not recommend choosing this option.
Auto-update individual applications
In Google Play, you have the option to manually select the apps for which auto-update will be available. To do this:
- Open up Google Play.
- Go to your profile.
- Go to the «Manage applications» menu ….
- The «Management» tab.
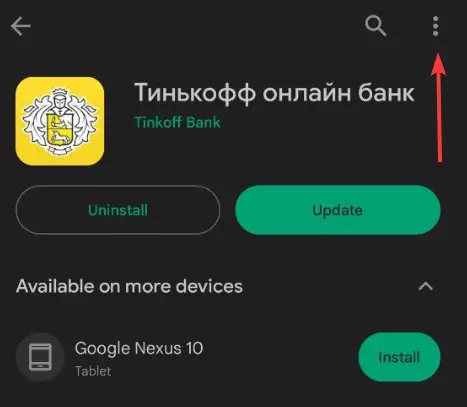
- Click on any application.
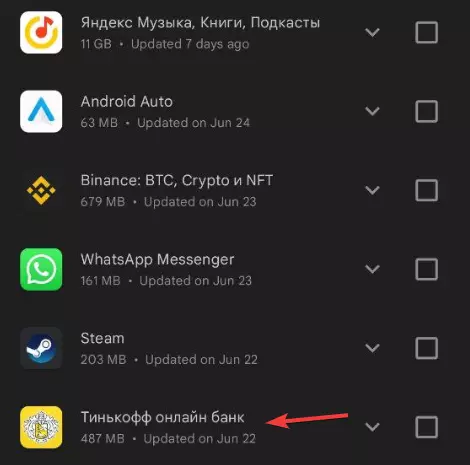
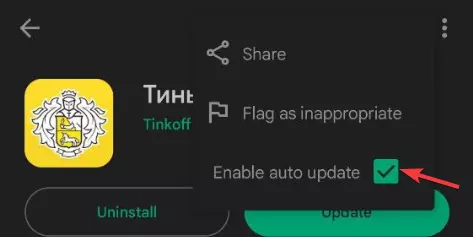
- Click on the icon in the form of three dots.
- Check the box next to «Auto-update».
See also:
How to flash Vivo Y32
How to root Vivo Y32
Hard reset for Vivo Y32
How to reboot Vivo Y32
How to unlock Vivo Y32
What to do if Vivo Y32 won't turn on
What to do if Vivo Y32 doesn't charge
What to do if Vivo Y32 doesn't connect to PC via USB
How to take a screenshot on Vivo Y32
How to reset FRP on Vivo Y32
How to call recording on Vivo Y32
How to update Vivo Y32
How to connect Vivo Y32 to TV
How to clear the cache on Vivo Y32
How to backup Vivo Y32
How to disable ads on Vivo Y32
How to clear storage on Vivo Y32
How to increase font on Vivo Y32
How to share internet on Vivo Y32
How to transfer data to Vivo Y32
How to unlock bootloader on Vivo Y32
How to recover photos on Vivo Y32
How to record the screen on Vivo Y32
How to find blacklist in Vivo Y32
How to set up fingerprint on Vivo Y32
How to block number on Vivo Y32
How to enable auto-rotate on Vivo Y32
How to set up or turn off an alarm on Vivo Y32
How to change ringtone on Vivo Y32
How to enable battery percentage on Vivo Y32
How to turn off notifications on Vivo Y32
How to turn off Google assistant on Vivo Y32
How to turn off the lock screen on Vivo Y32
How to delete app on Vivo Y32
How to recover contacts on Vivo Y32
Where is the recycle bin on Vivo Y32
How to install WhatsApp on Vivo Y32
How to set contact photo in Vivo Y32
How to scan QR code on Vivo Y32
How to connect Vivo Y32 to computer
How to install SD card in Vivo Y32
How to update Play Store in Vivo Y32
How to install Google Camera in Vivo Y32
How to enable USB debugging on Vivo Y32
How to turn off Vivo Y32
How to charge Vivo Y32
How to use the camera on Vivo Y32
How to find lost Vivo Y32
How to set password on Vivo Y32
How to turn on 5g on Vivo Y32
How to turn on VPN on Vivo Y32
How to install apps on Vivo Y32
How to insert a SIM card in Vivo Y32
How to enable and configure NFC on Vivo Y32
How to set time on Vivo Y32
How to connect headphones to Vivo Y32
How to clear browser history on Vivo Y32
How to disassemble Vivo Y32
How to hide an app on Vivo Y32
How to download YouTube videos on Vivo Y32
How to unblock a contact on Vivo Y32
How to turn on the flashlight on Vivo Y32
How to split the screen on Vivo Y32
How to turn off the camera sound on Vivo Y32
How to trim video on Vivo Y32
How to bypass the Google account on Vivo Y32
How to fix black screen on Vivo Y32
How to change the language on Vivo Y32
How to open engineering mode in Vivo Y32
How to open recovery mode in Vivo Y32
How to find and turn on a voice recorder on Vivo Y32
How to make video calls on Vivo Y32
Vivo Y32 sim card not detected
How to transfer contacts to Vivo Y32
How to enable/disable «Do not disturb» mode on Vivo Y32
How to enable/disable answerphone on Vivo Y32
How to set up face recognition on Vivo Y32
How to set up voicemail on Vivo Y32
How to listen to voicemail on Vivo Y32
How to check the IMEI number in Vivo Y32
How to turn on fast charging on Vivo Y32
How to replace the battery on Vivo Y32
Why the Vivo Y32 discharges quickly
How to set a password for apps in the Vivo Y32
How to format Vivo Y32
How to install TWRP on Vivo Y32
How to set up call forwarding on Vivo Y32
How to empty the recycle bin on Vivo Y32
Where to find the clipboard on Vivo Y32
How to Update the Application on Another Phones
